ギャラリー機能

SenseCraft HMI のギャラリー機能を使用すると、画面ベースのデバイスを美しいデジタルフォトフレームに変換できます。ローカル画像をアップロードしたり、URL からインポートしたりして、カスタマイズ可能なトランジション間隔とビジュアルエフェクトで表示できます。この機能は、アンビエントディスプレイ、情報画面、または Seeed Studio ディスプレイデバイスを使用した装飾的なフォトアルバムの作成に最適です。
このチュートリアルでは、SenseCraft HMI でのギャラリー機能の使用、画像アップロード方法、ディスプレイ設定、最適なパフォーマンスのための重要な考慮事項について説明します。
この記事では、reTerminal E1002 を例として、SenseCraft HMI プラットフォームでこの機能を使用する方法を説明します。
ギャラリーの使い始め
Section titled “ギャラリーの使い始め”ギャラリー機能へのアクセス
Section titled “ギャラリー機能へのアクセス”ステップ1: 以下の SenseCraft HMI プラットフォームに移動
ステップ2: デバイスを接続するか、すでにペアリングされているデバイスを選択して使用
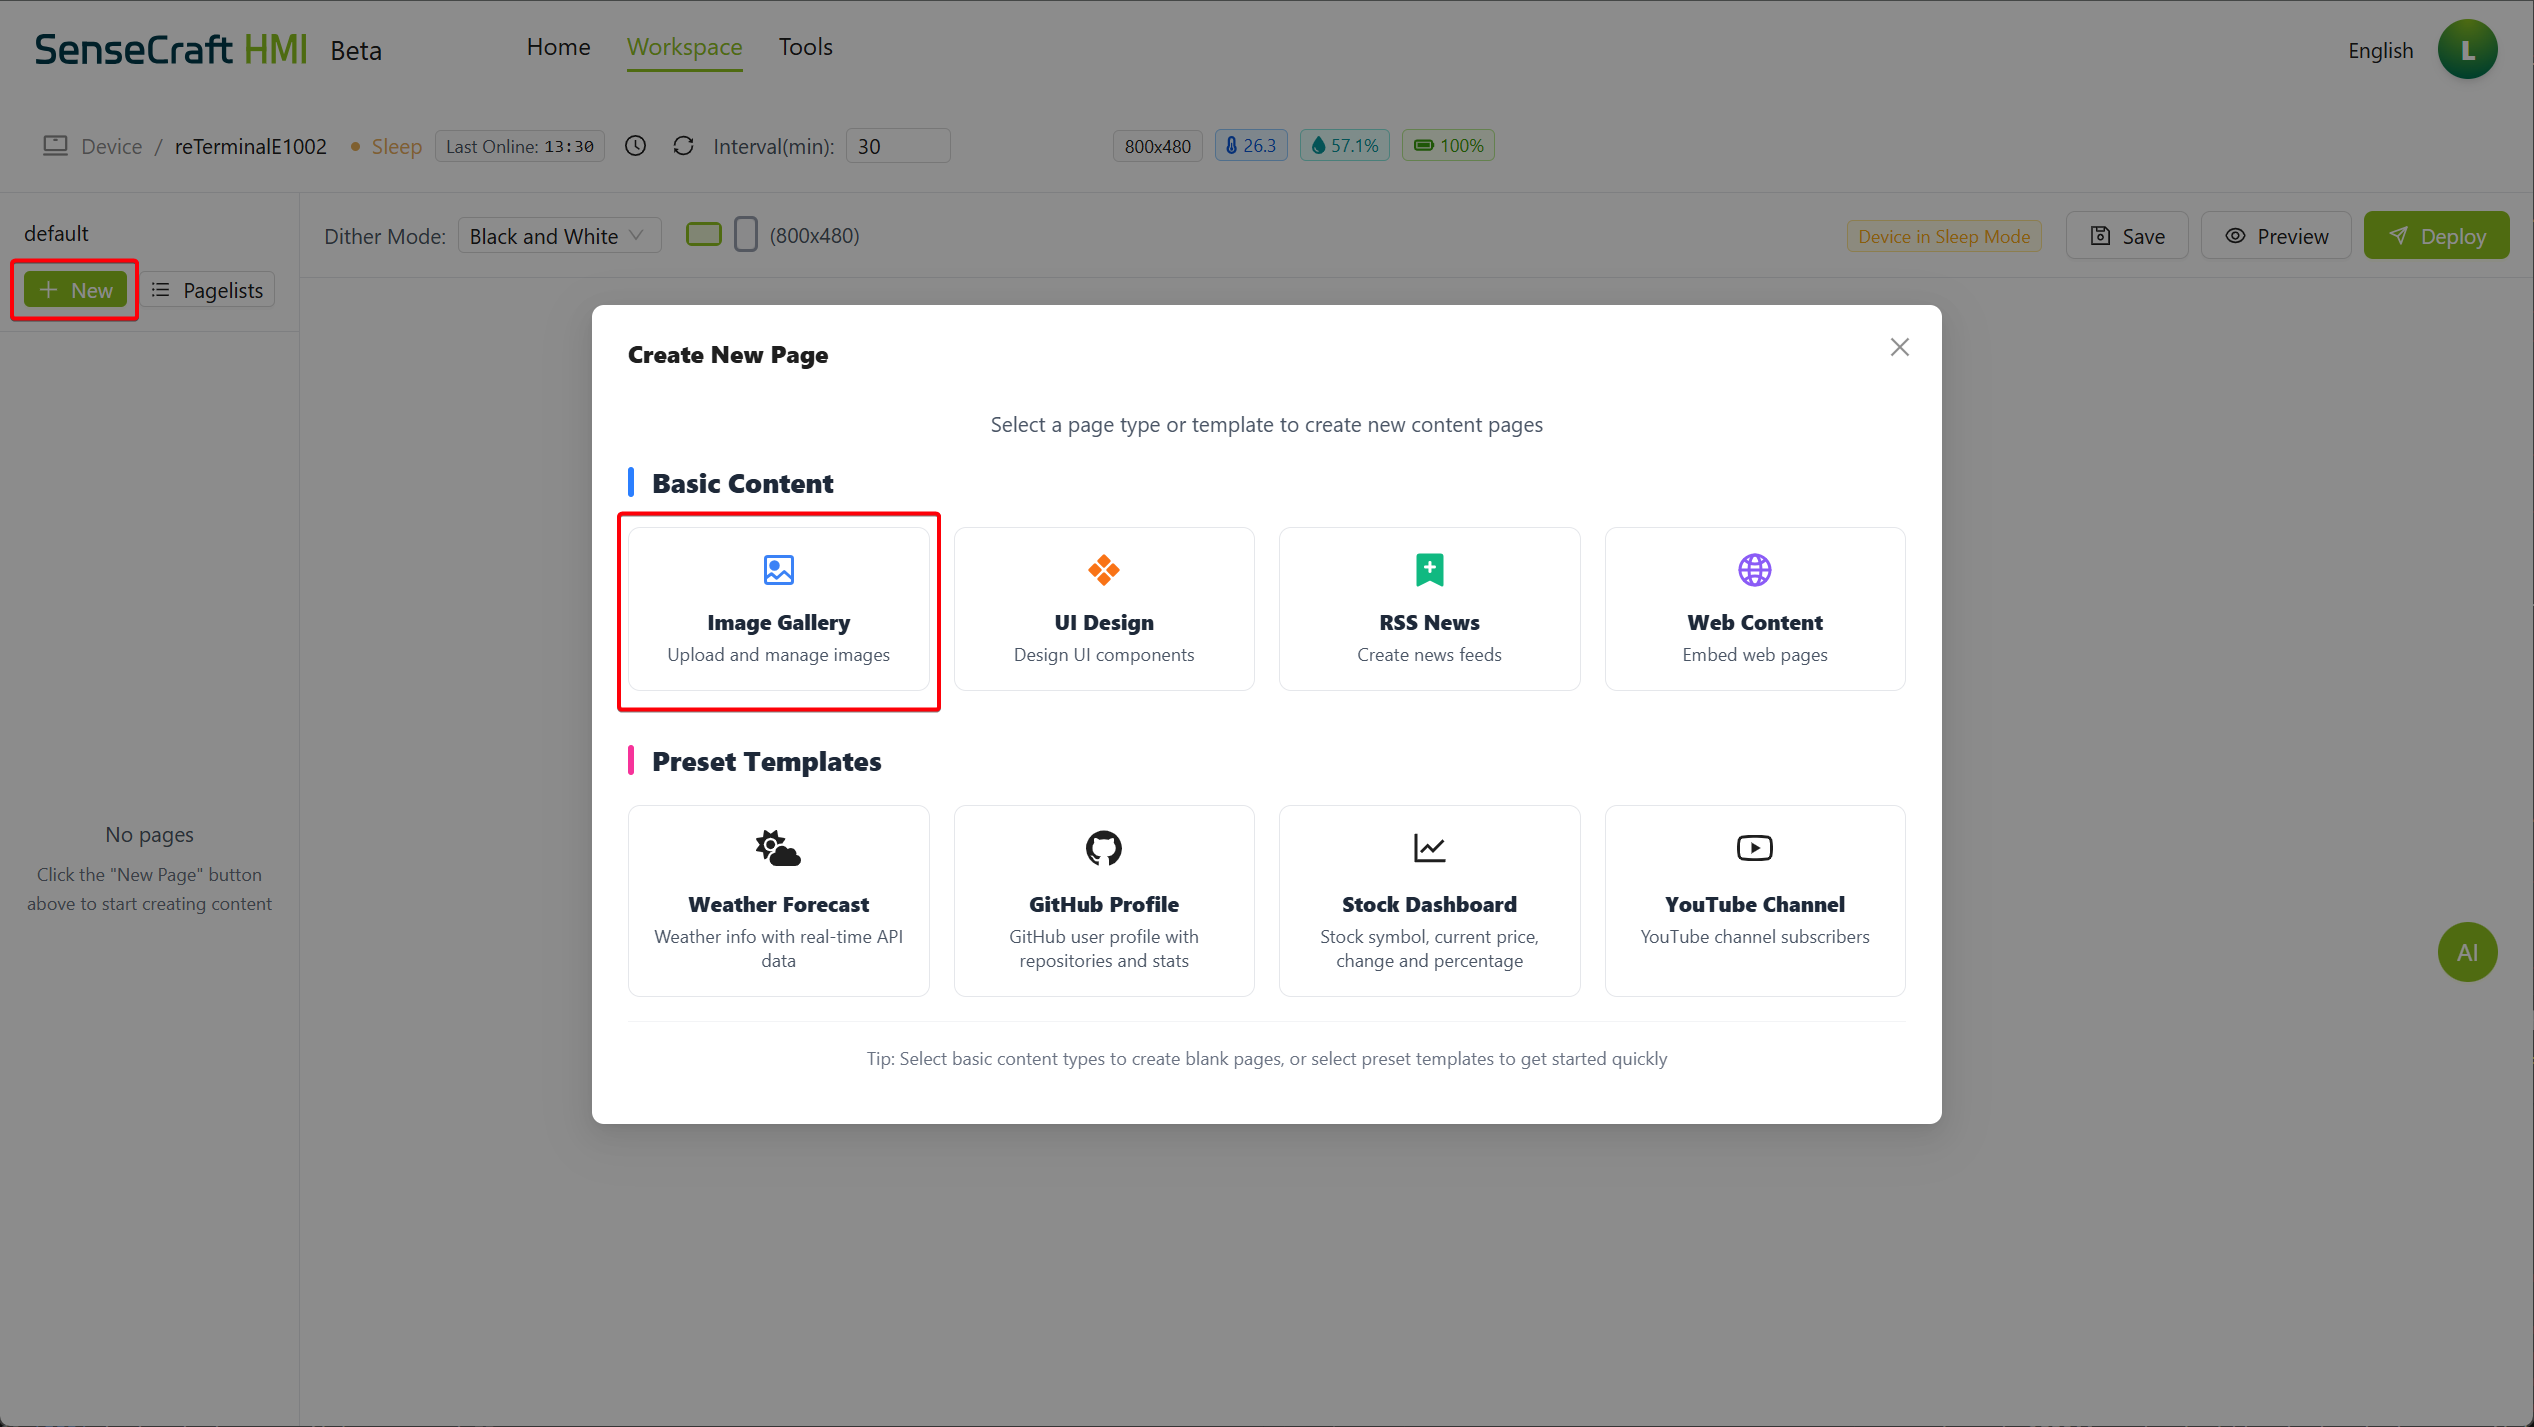
ステップ3: Image Gallery をクリックすると、ローカル画像をアップロードするか、URL から画像をインポートするかを選択できます
ギャラリーインターフェースの理解
Section titled “ギャラリーインターフェースの理解”ギャラリーインターフェースは、いくつかの主要な要素で構成されています:
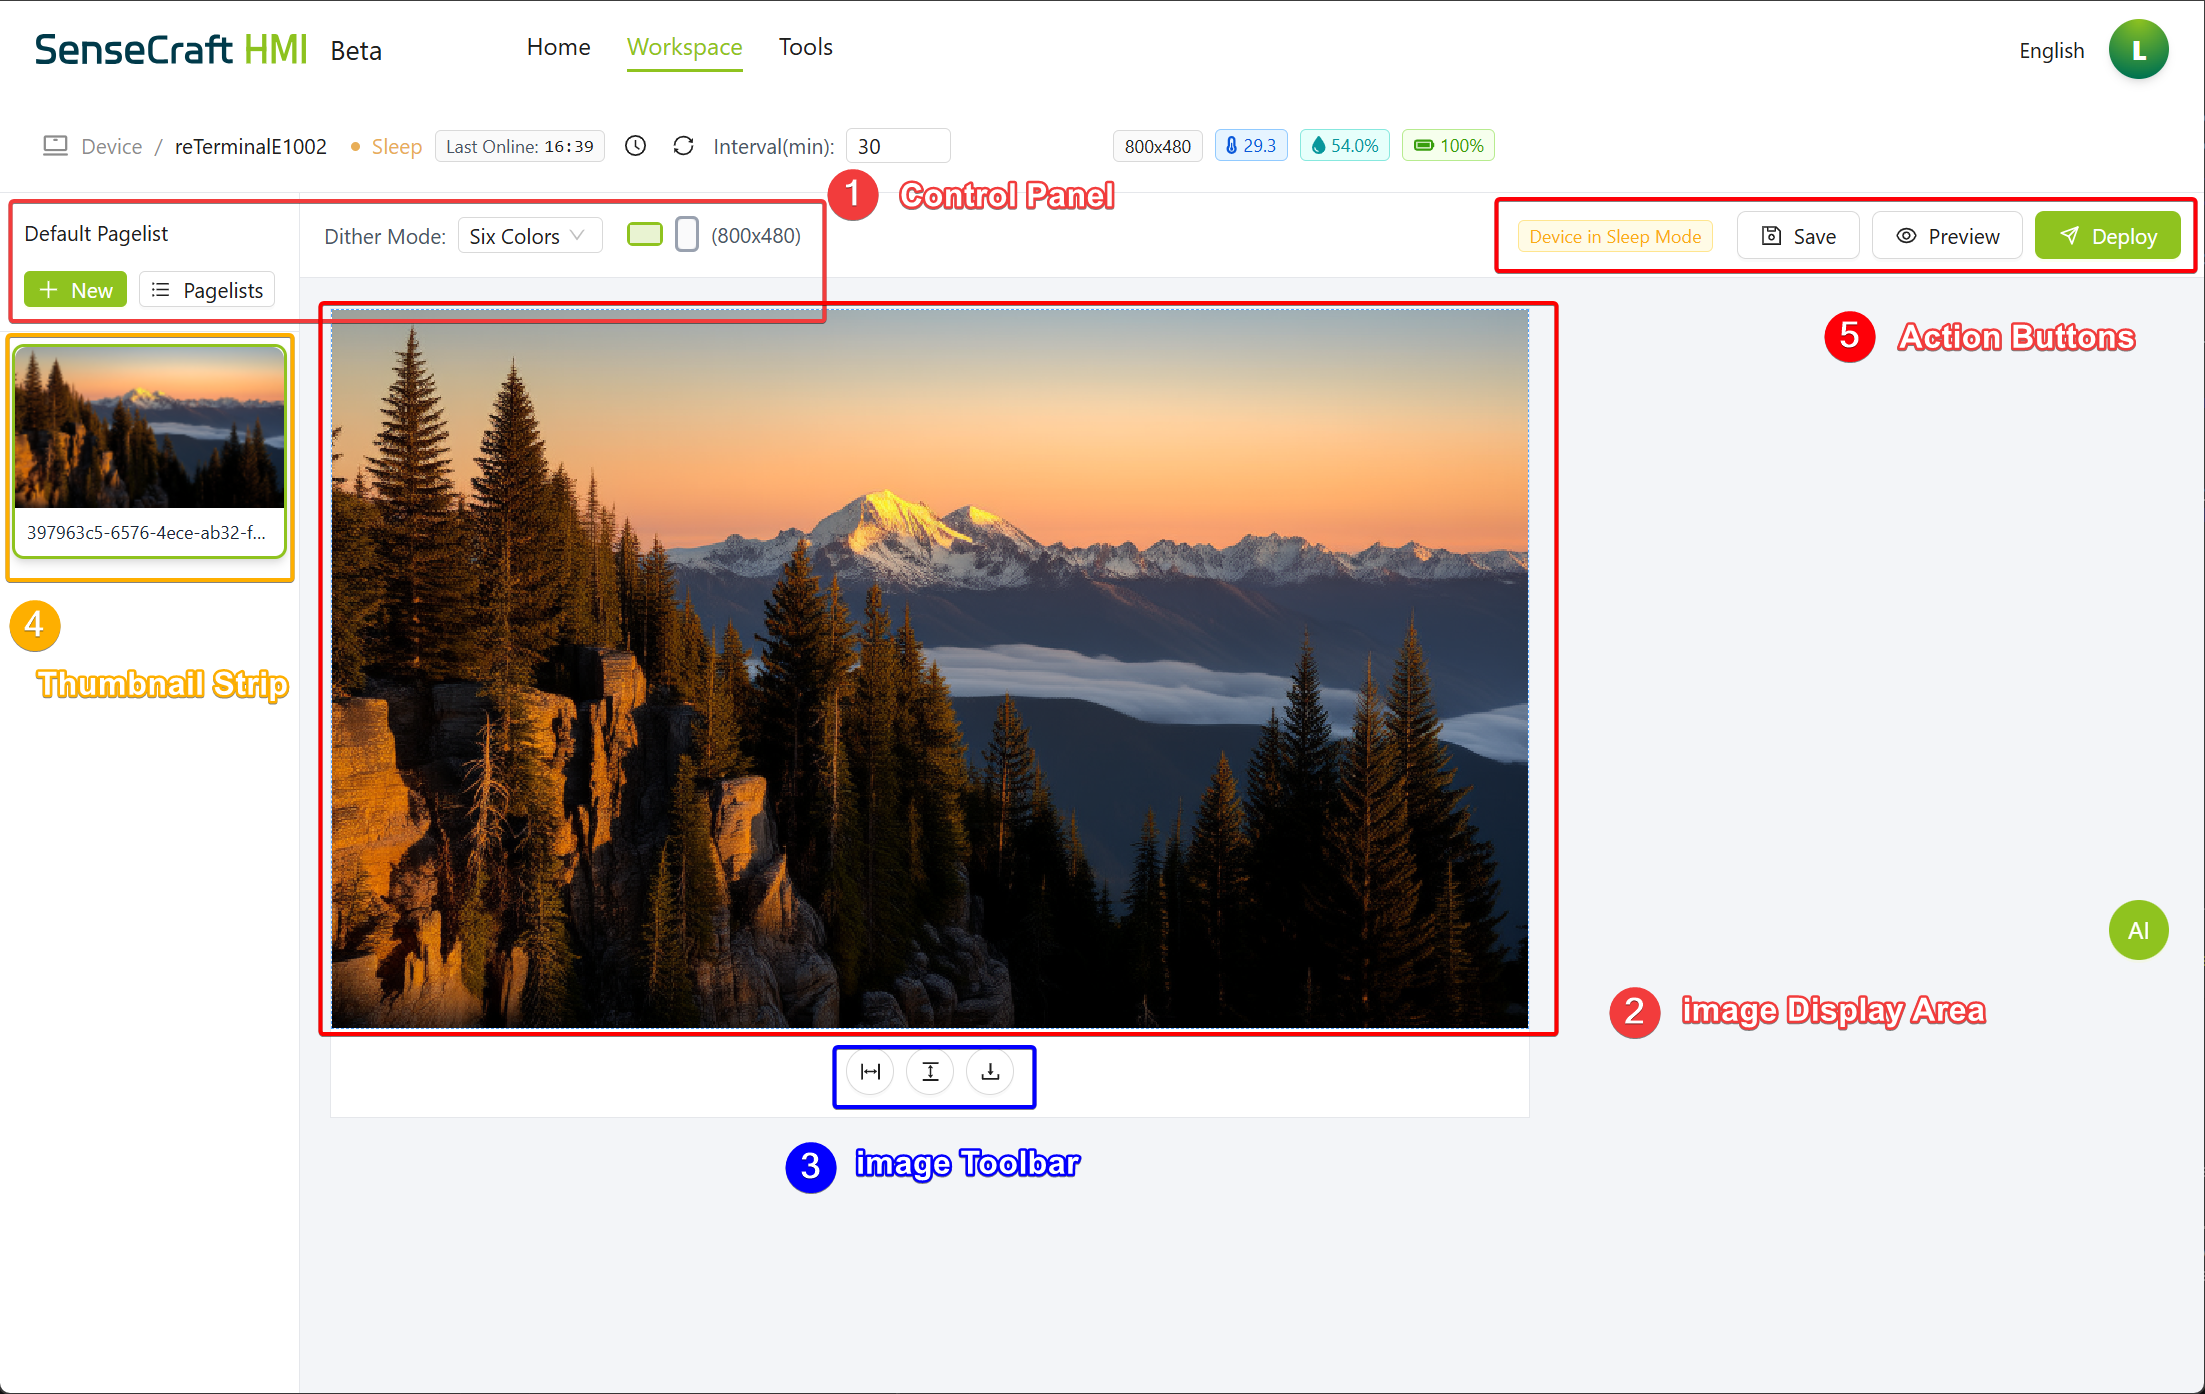
- コントロールパネル:このセクションには、追加されたアイテムの設定、Pagelists、ジッターモード、画像の表示方向が含まれます。
- 画像表示エリア:現在の画像が表示されるメインセクション
- 画像ツールバー:現在の画像を調整またはダウンロードするためのツールを含みます
- サムネイルストリップ:ギャラリー内のすべてのアップロードされた画像を表示
- アクションボタン:テストとギャラリーのデバイスへの適用のための Save、Preview、Deploy ボタン
ギャラリーへの画像の追加
Section titled “ギャラリーへの画像の追加”SenseCraft HMI は、ギャラリーに画像を追加するための2つの方法を提供します:ローカルファイルのアップロードまたは URL からのインポート。
ローカル画像のアップロード
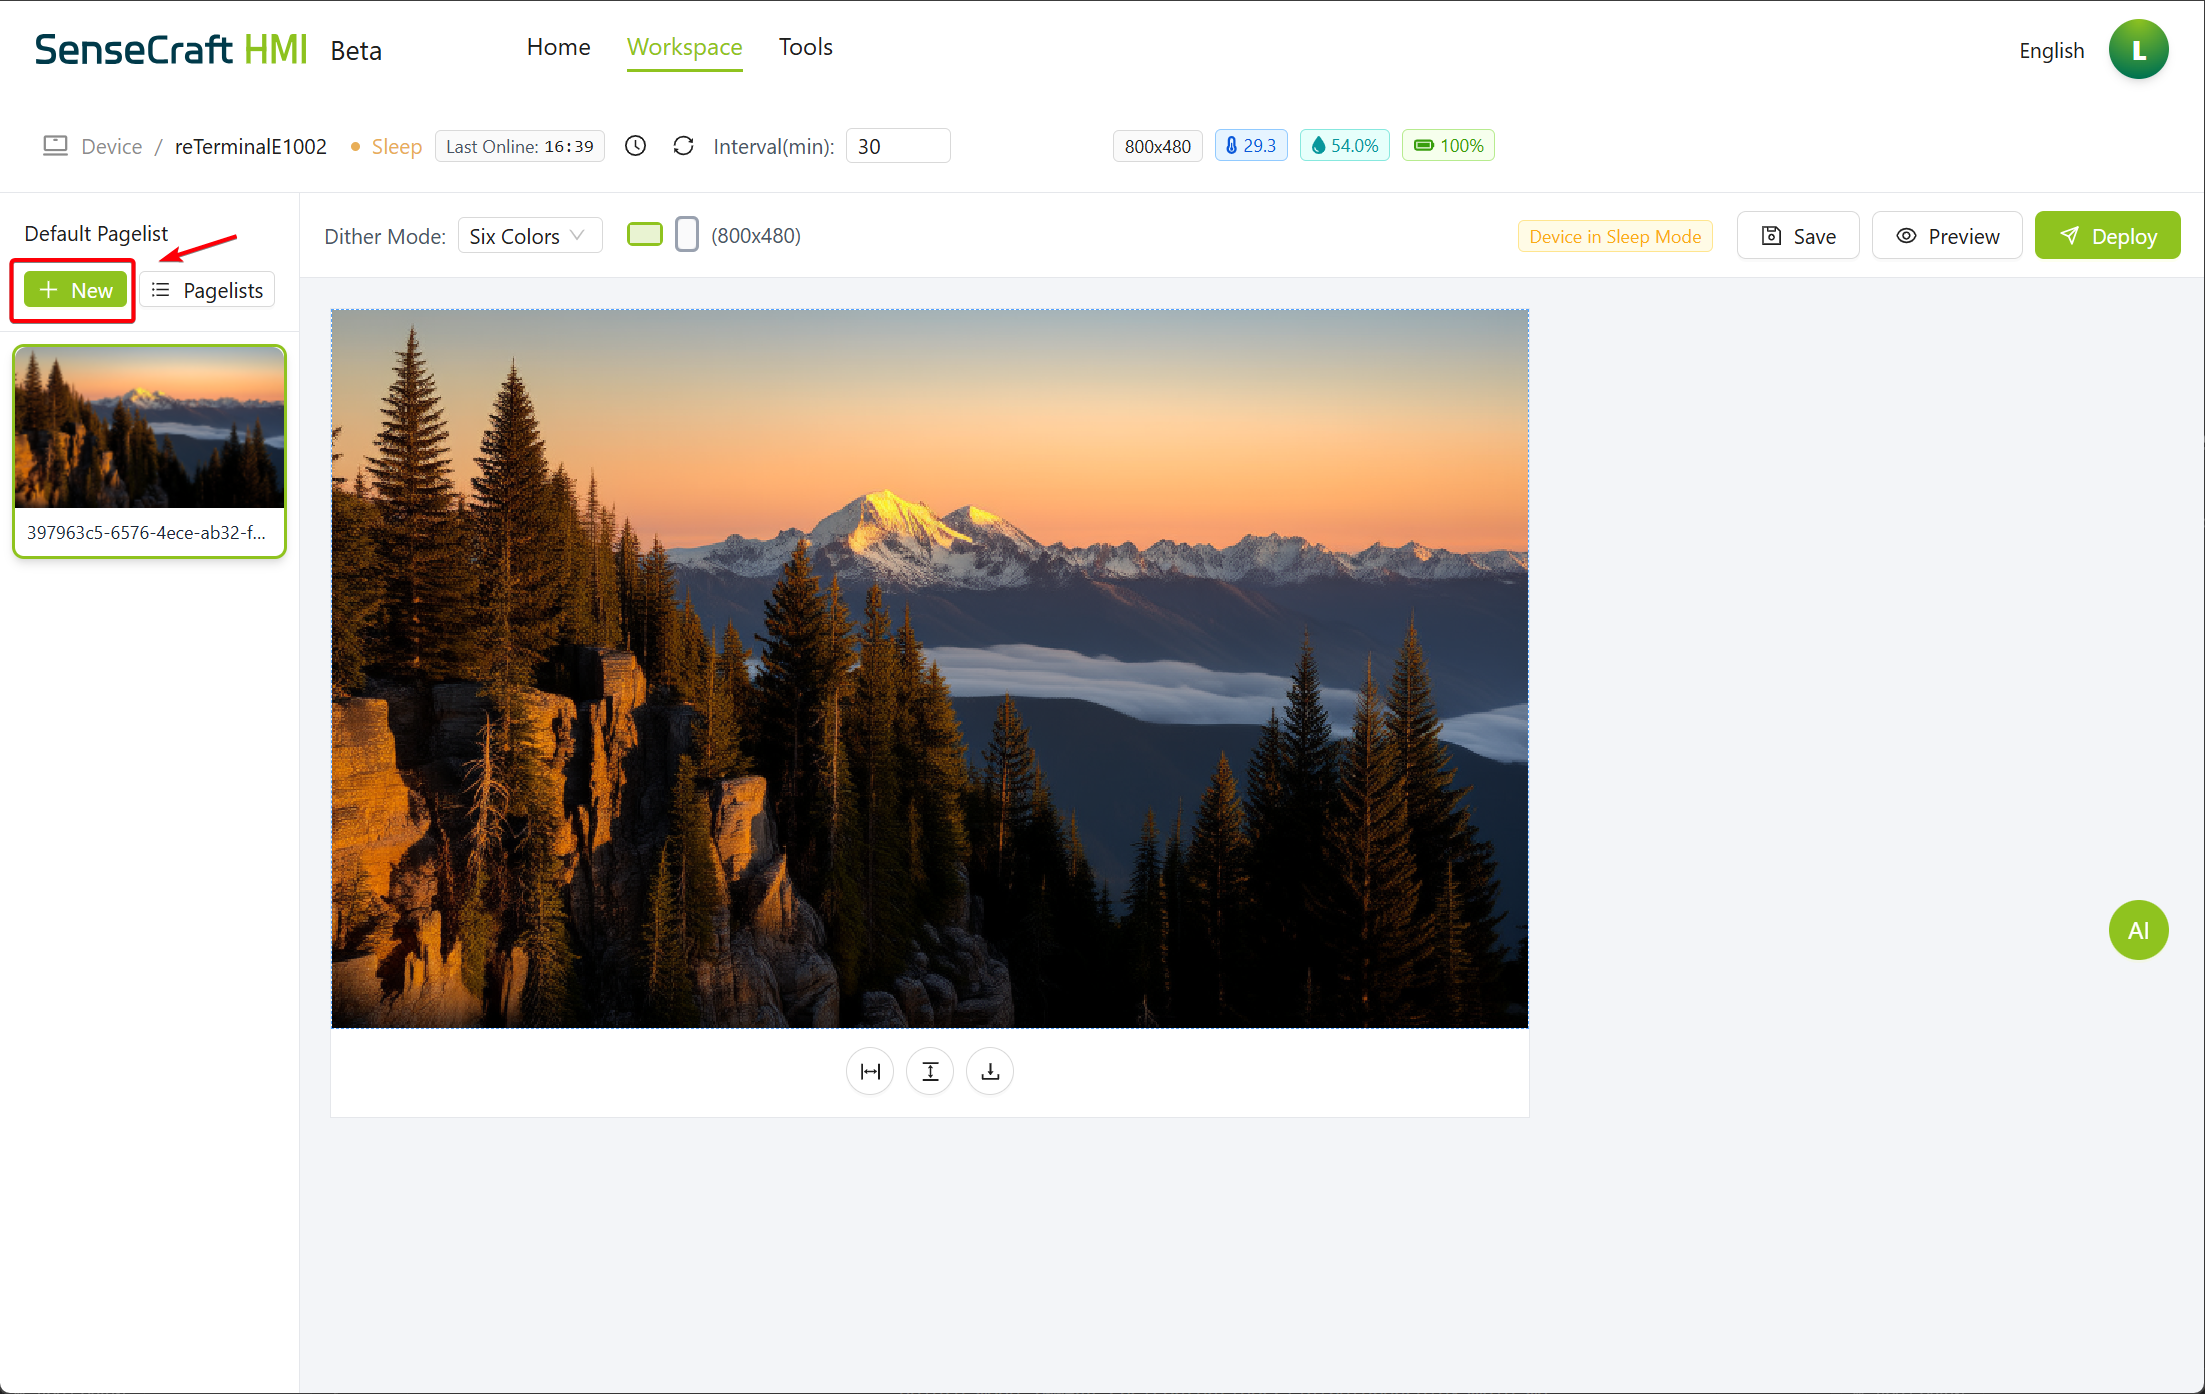
Section titled “ローカル画像のアップロード”ステップ1:コントロールパネルの New ボタンをクリック
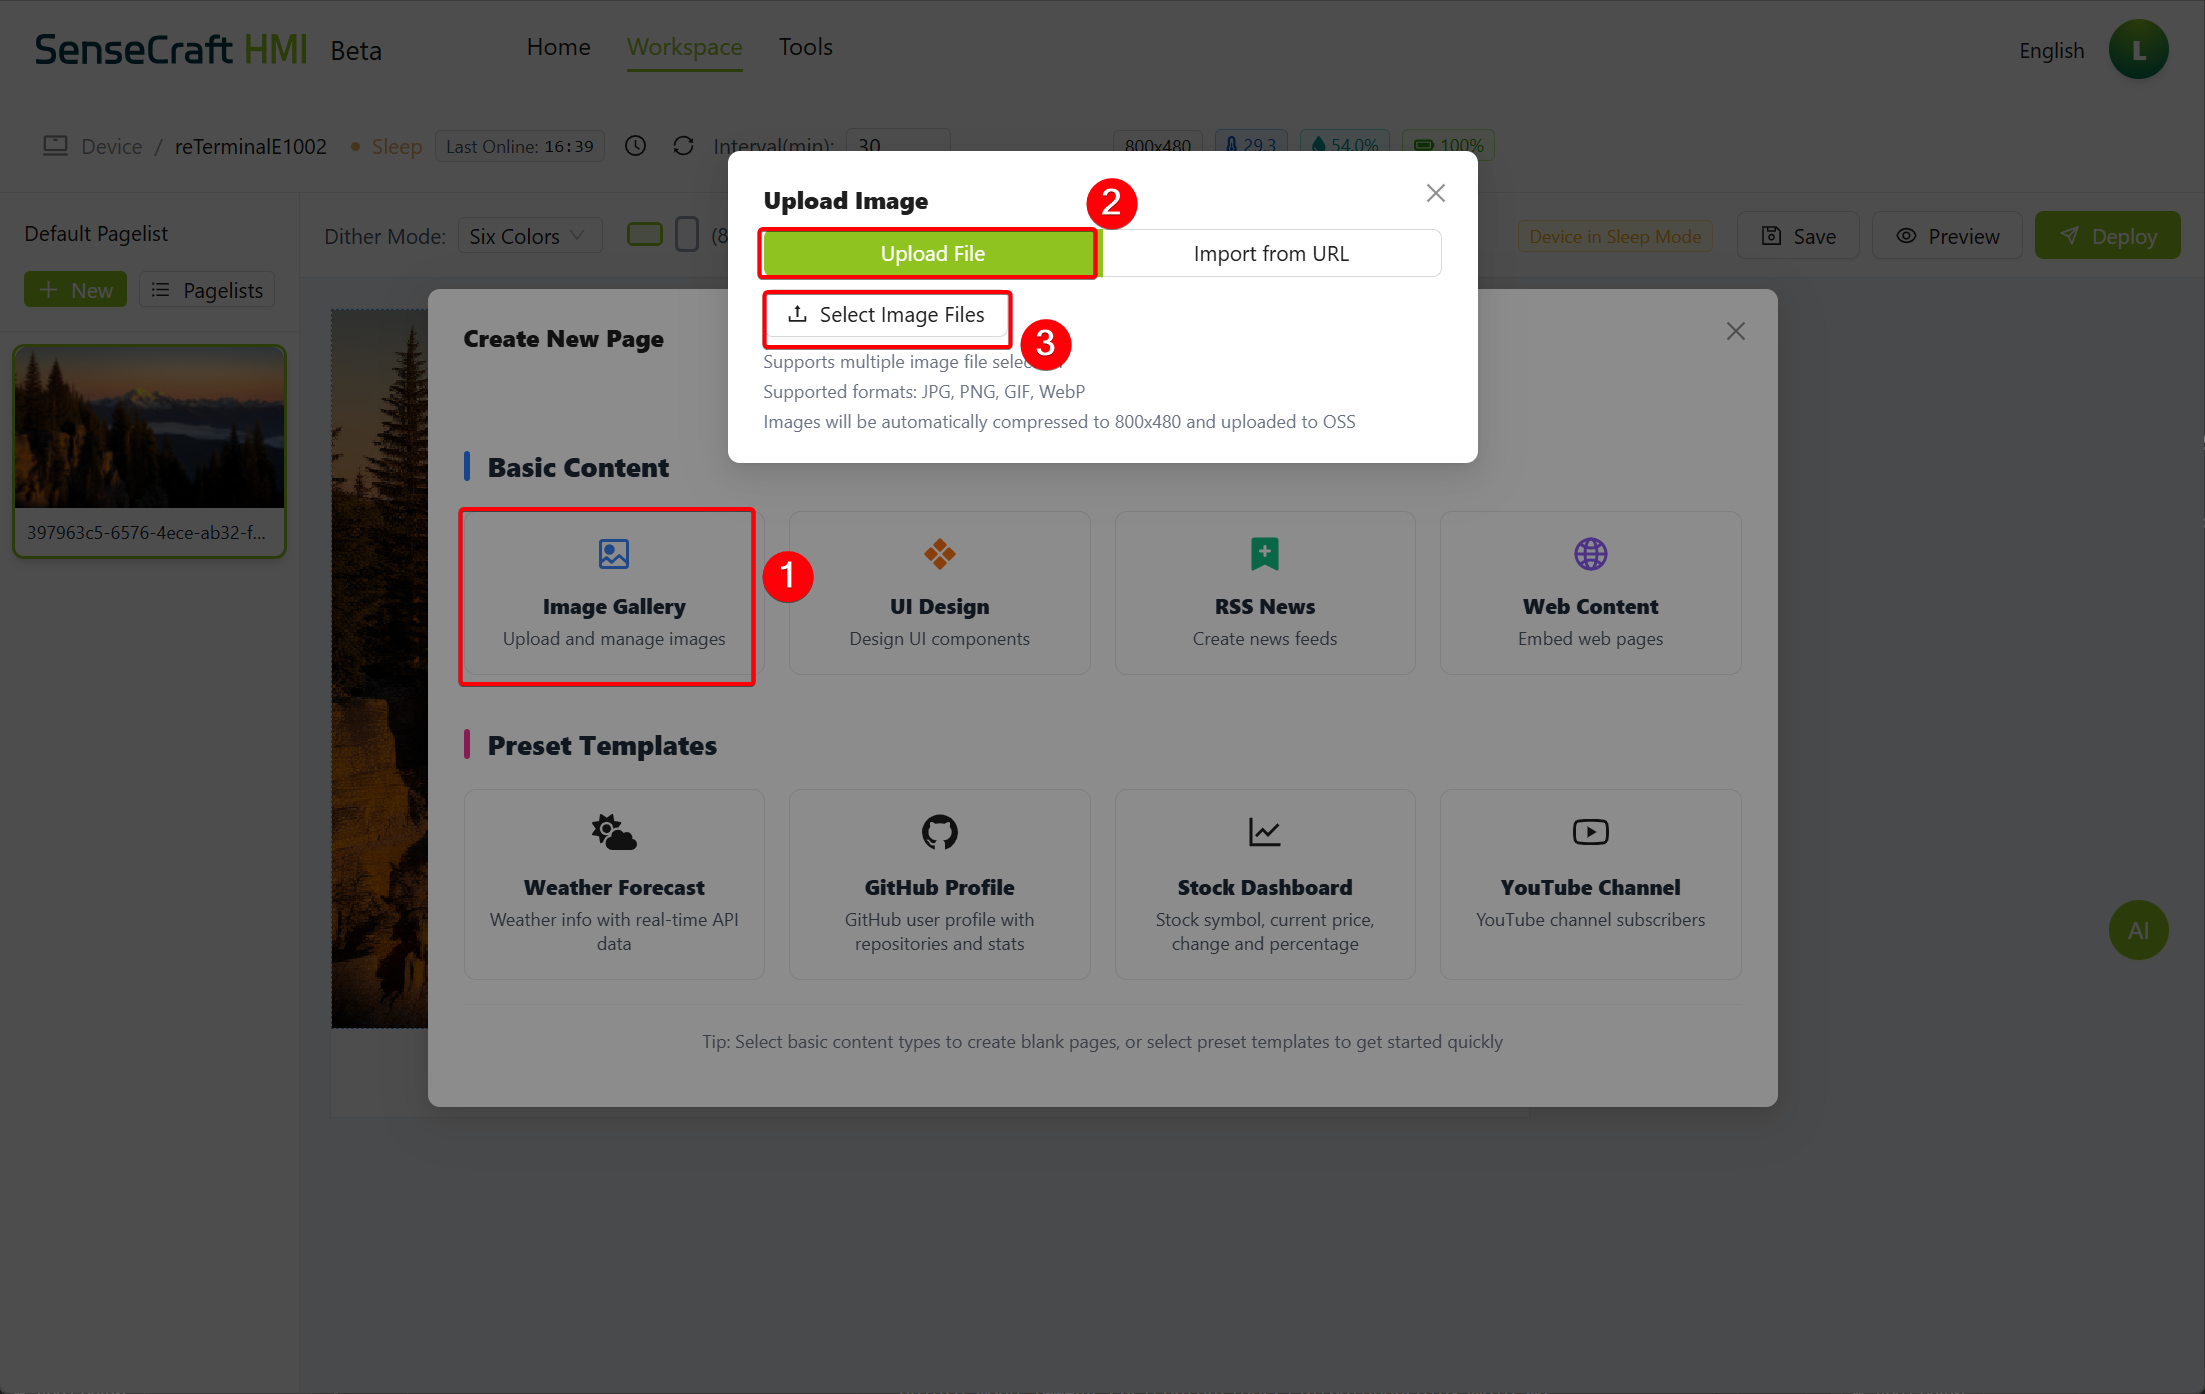
ステップ2: 表示されるダイアログで、Image Gallery を選択し、ポップアップダイアログボックスで選択を行います。Upolad File
ステップ3: Select Image Files をクリックし、コンピュータからアップロードしたい画像を選択
ステップ4: 重要な画像の要件と制限:
- JPG、PNG、GIF 形式をサポート
- 2MB を超える写真は自動的に圧縮されます
- 5:3 以外のアスペクト比は、白いパディングで調整されます
- ターゲット解像度:800x480 ピクセル(またはデバイスのネイティブ解像度)
- MicroSD カードなしで、最大3枚の写真をアップロードできます
- MicroSD カードありで、最大20枚の写真をアップロードできます
ステップ5:必要に応じて、Ctrl/Cmd + Click を使用して複数のファイルを選択
ステップ6:「Open」をクリックして、選択した画像をアップロード
URL から画像をインポート
Section titled “URL から画像をインポート”ステップ1: コントロールパネルの New ボタンをクリック
ステップ2: 表示されるダイアログで、Image Gallery を選択し、Import for URL を選択
ステップ3: 提供されたフィールドに直接画像 URL を入力
ステップ4: 「Import」をクリックして、ギャラリーに画像を追加
ギャラリーの管理
Section titled “ギャラリーの管理”表示間隔の設定
Section titled “表示間隔の設定”間隔設定は、次の画像にトランジションする前に各画像が表示される時間を決定します:
ステップ1:コントロールパネルの「Interval(min):」フィールドを見つける
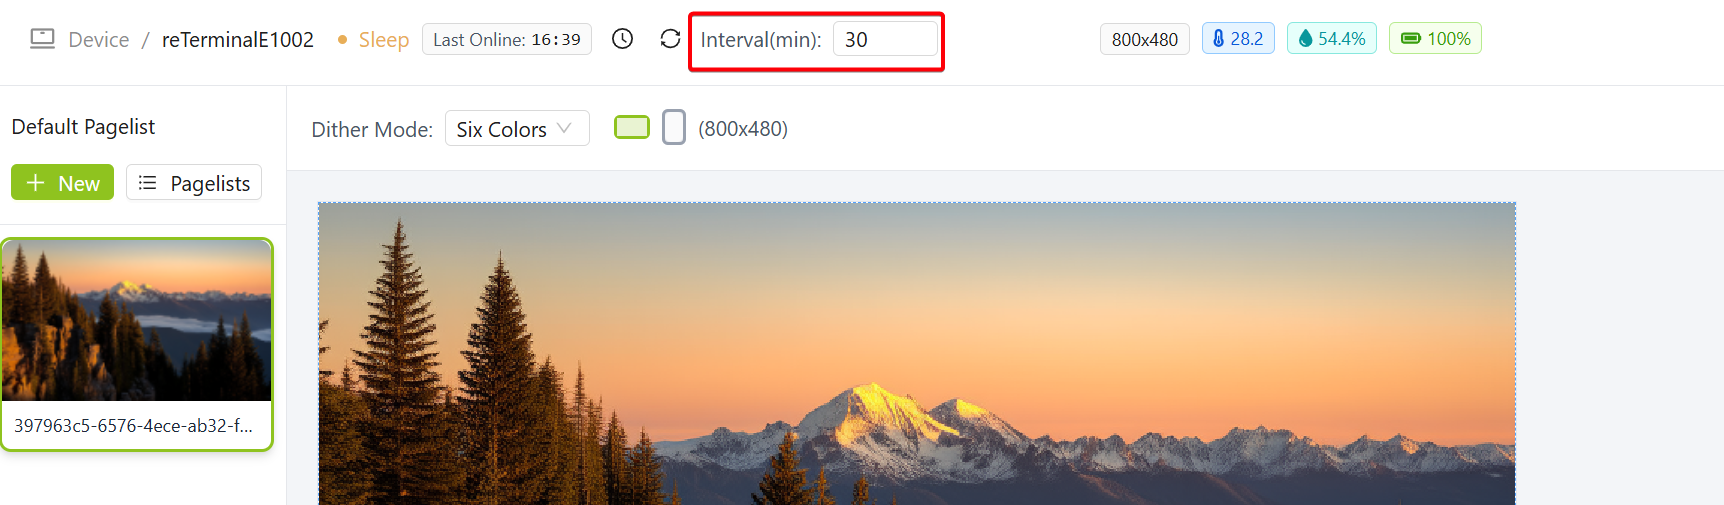
ステップ2:希望する表示時間を分単位で入力(例:画像あたり1分の場合は1)
ディザーモードの選択
Section titled “ディザーモードの選択”ディザーモードは、特定のデバイスで最適に表示されるように画像を処理する方法に影響します:
ステップ1:コントロールパネルの「Dither Mode:」ドロップダウンを見つける
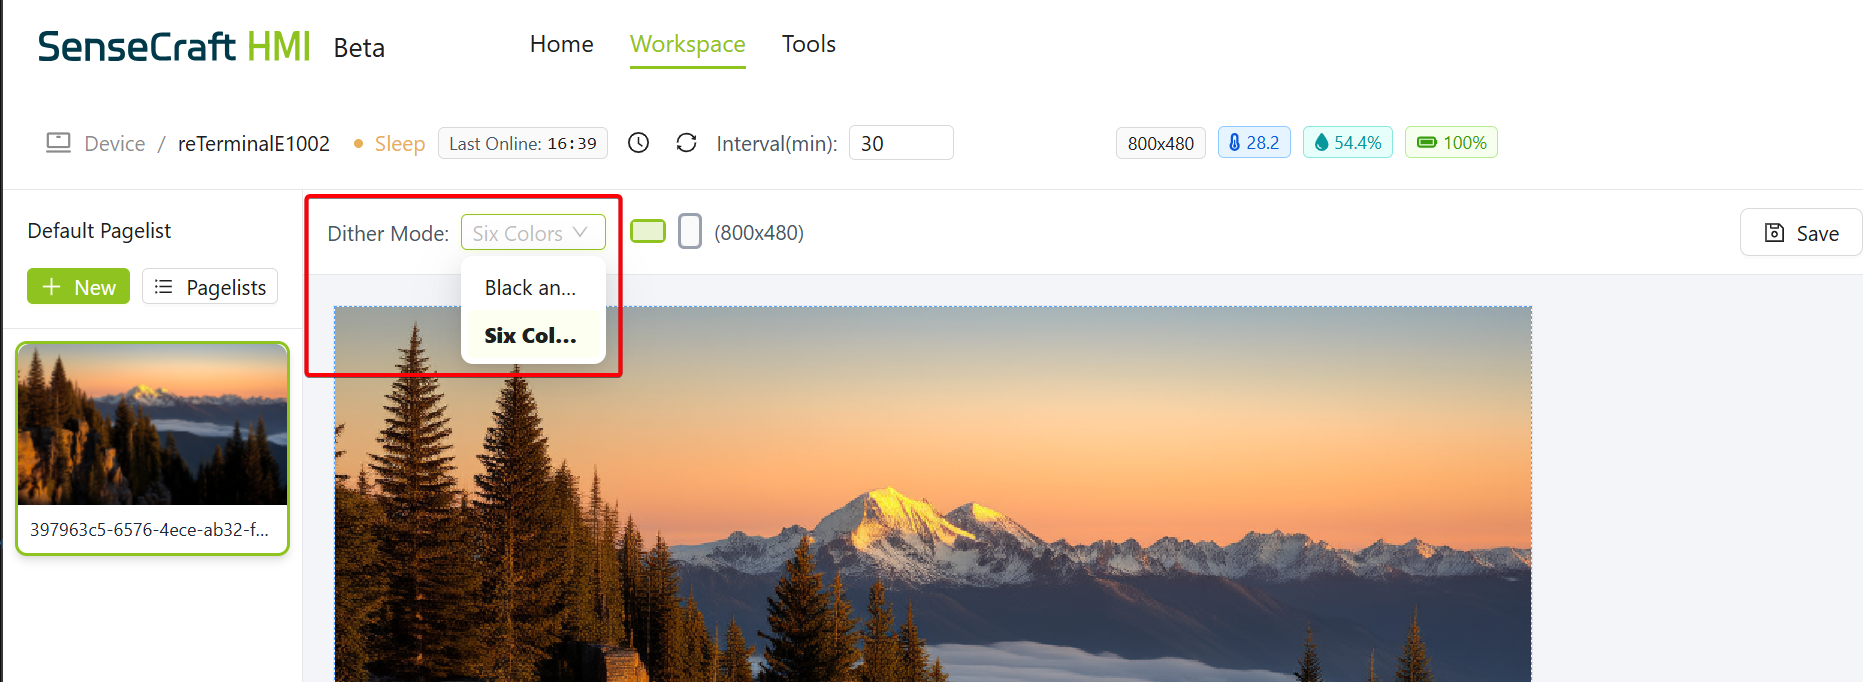
ステップ2:デバイスに適したオプションを選択:
- Six Colors:カラー LCD ディスプレイに最適、すべてのカラー情報を保持
- Black and White:画像を純粋な白黒に変換、モノクロ電子ペーパーディスプレイに最適
画像ツールバーの使用
Section titled “画像ツールバーの使用”ギャラリー内の各画像は、画像の下に表示されるツールバーを使用して調整できます:
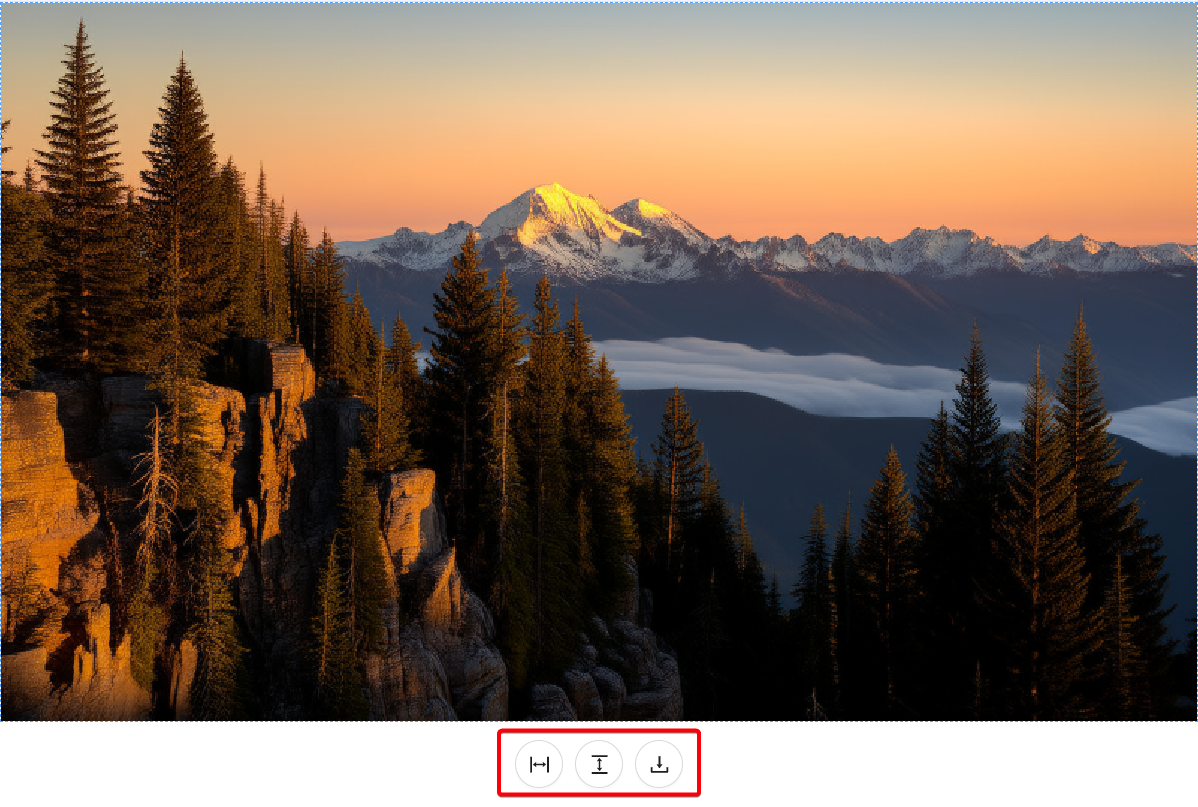
左から右へ、ツールは次のとおりです:
- Fill Horizontally:アスペクト比を維持しながら、画面を水平に埋めるように画像を調整
- Fill Vertically:アスペクト比を維持しながら、画面を垂直に埋めるように画像を調整
- Download:処理された画像をコンピュータに保存
画像の並べ替え
Section titled “画像の並べ替え”サムネイルストリップを使用して、画像の表示順序を変更できます:
ステップ1: 画面下部のストリップで移動したい画像サムネイルを見つける
ステップ2: サムネイルをクリックしてドラッグし、シーケンス内の新しい位置に移動
ステップ3: リリースして新しい順序を設定
ギャラリーのデバイスへのデプロイ
Section titled “ギャラリーのデバイスへのデプロイ”画像を追加して構成したら、接続されたデバイスにギャラリーをデプロイできます:
ステップ1: 「Save」ボタンをクリックして、ギャラリー構成を保存
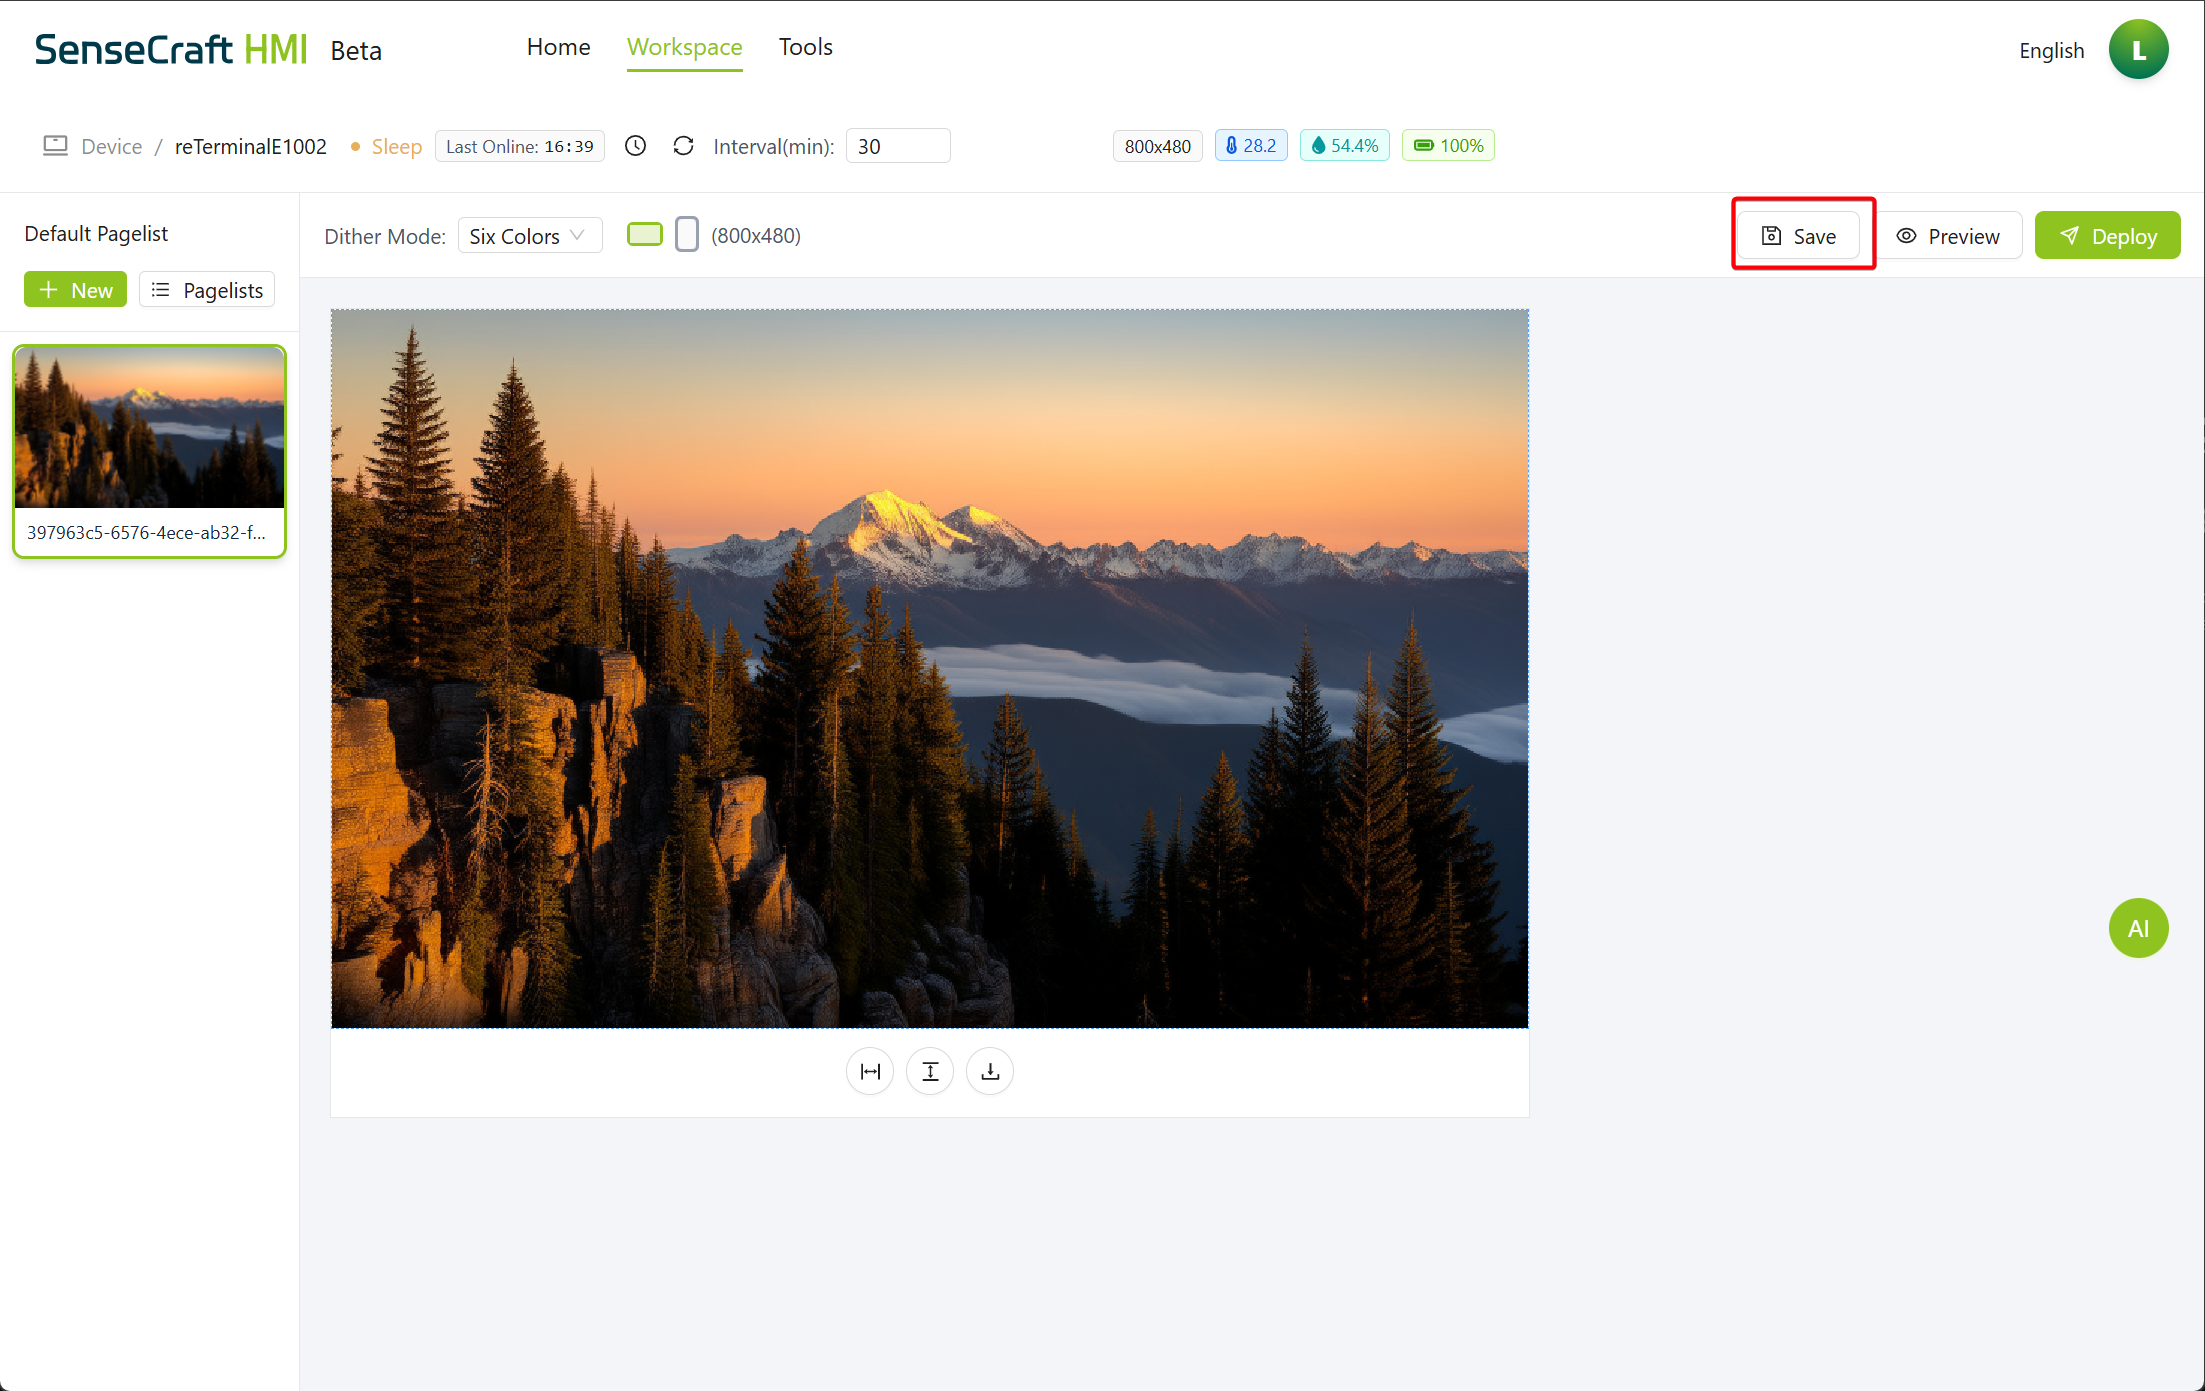
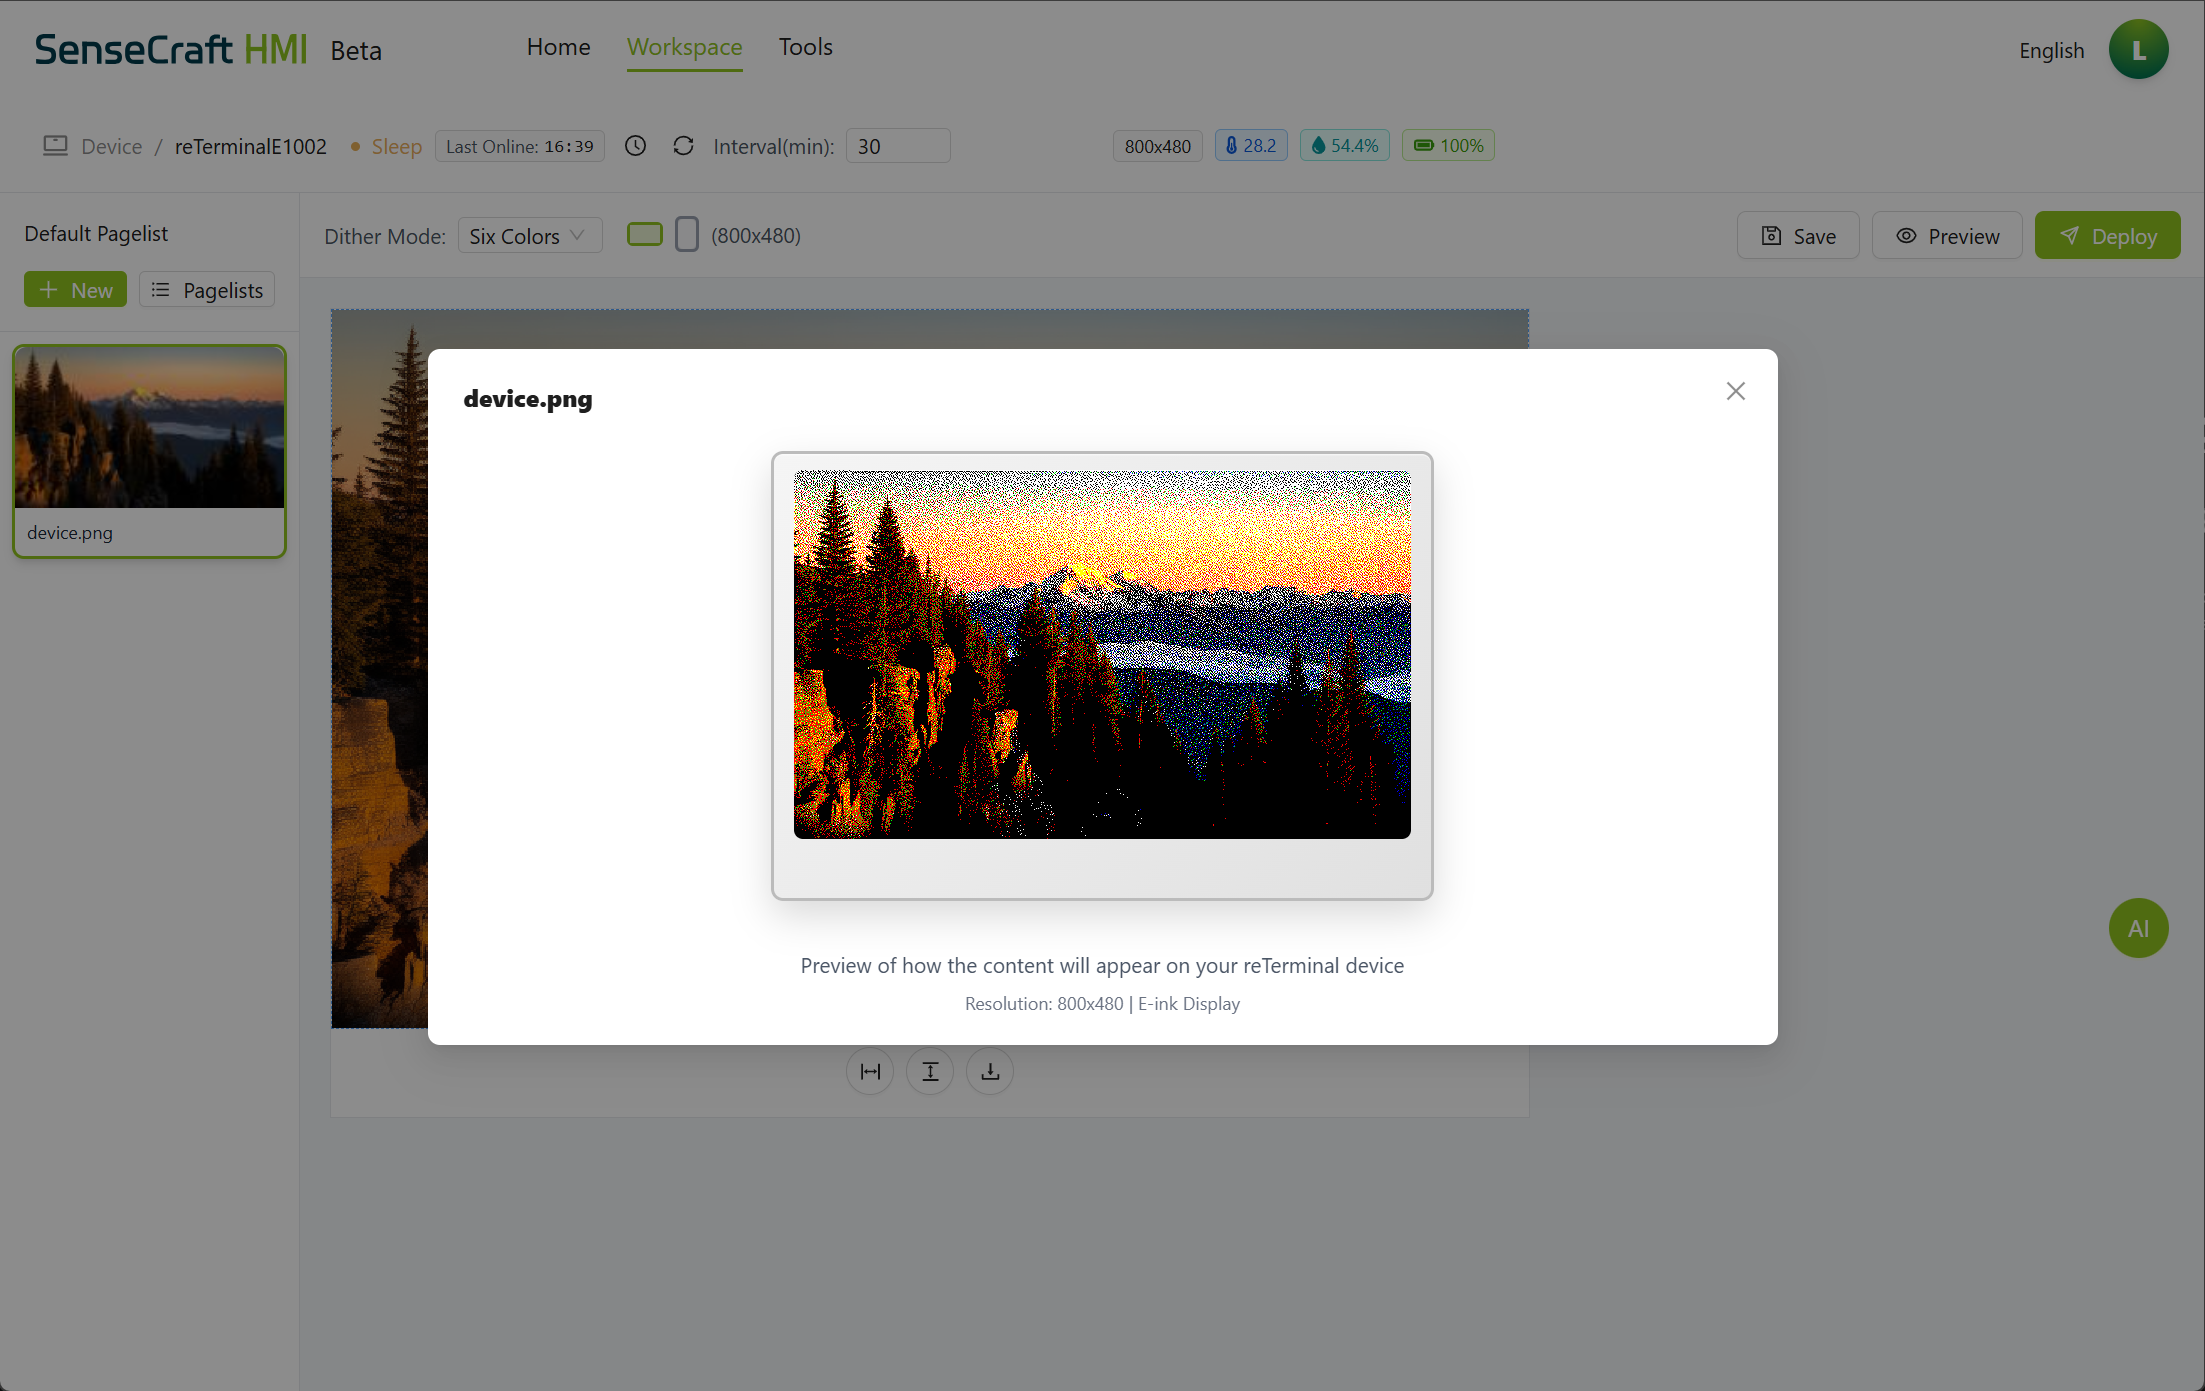
ステップ2: (オプション)「Preview」をクリックして、完全にデプロイせずに、ギャラリーがデバイスにどのように表示されるかを確認
ステップ3: 「Deploy」をクリックして、接続されたデバイスにギャラリーを送信
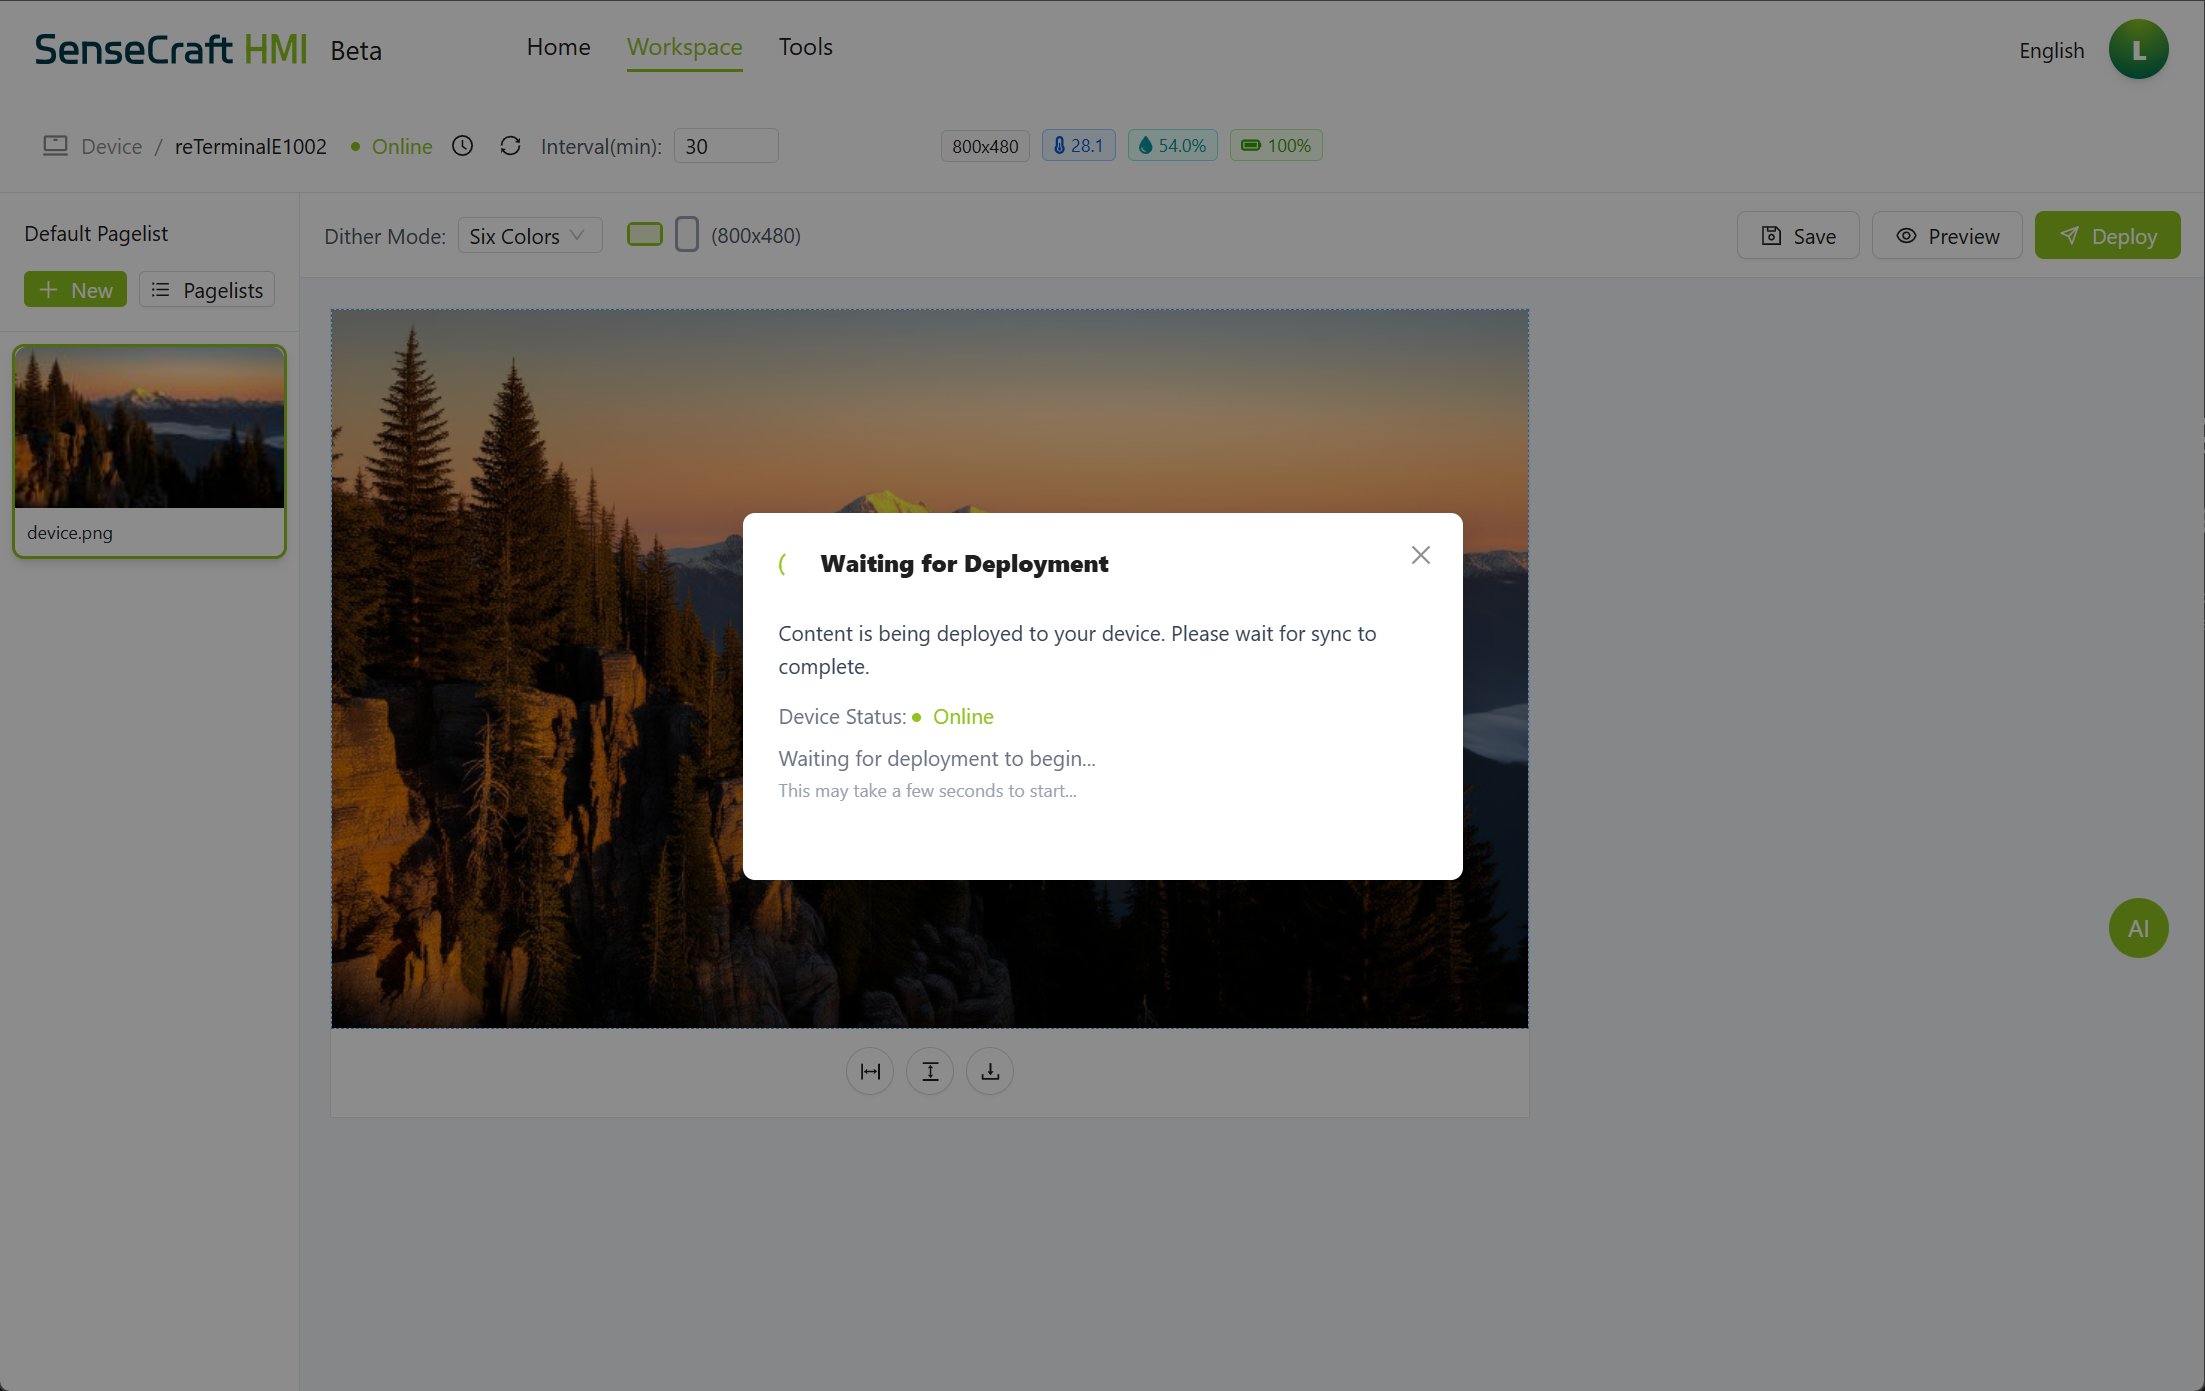
ステップ4: デプロイ確認メッセージを待つ
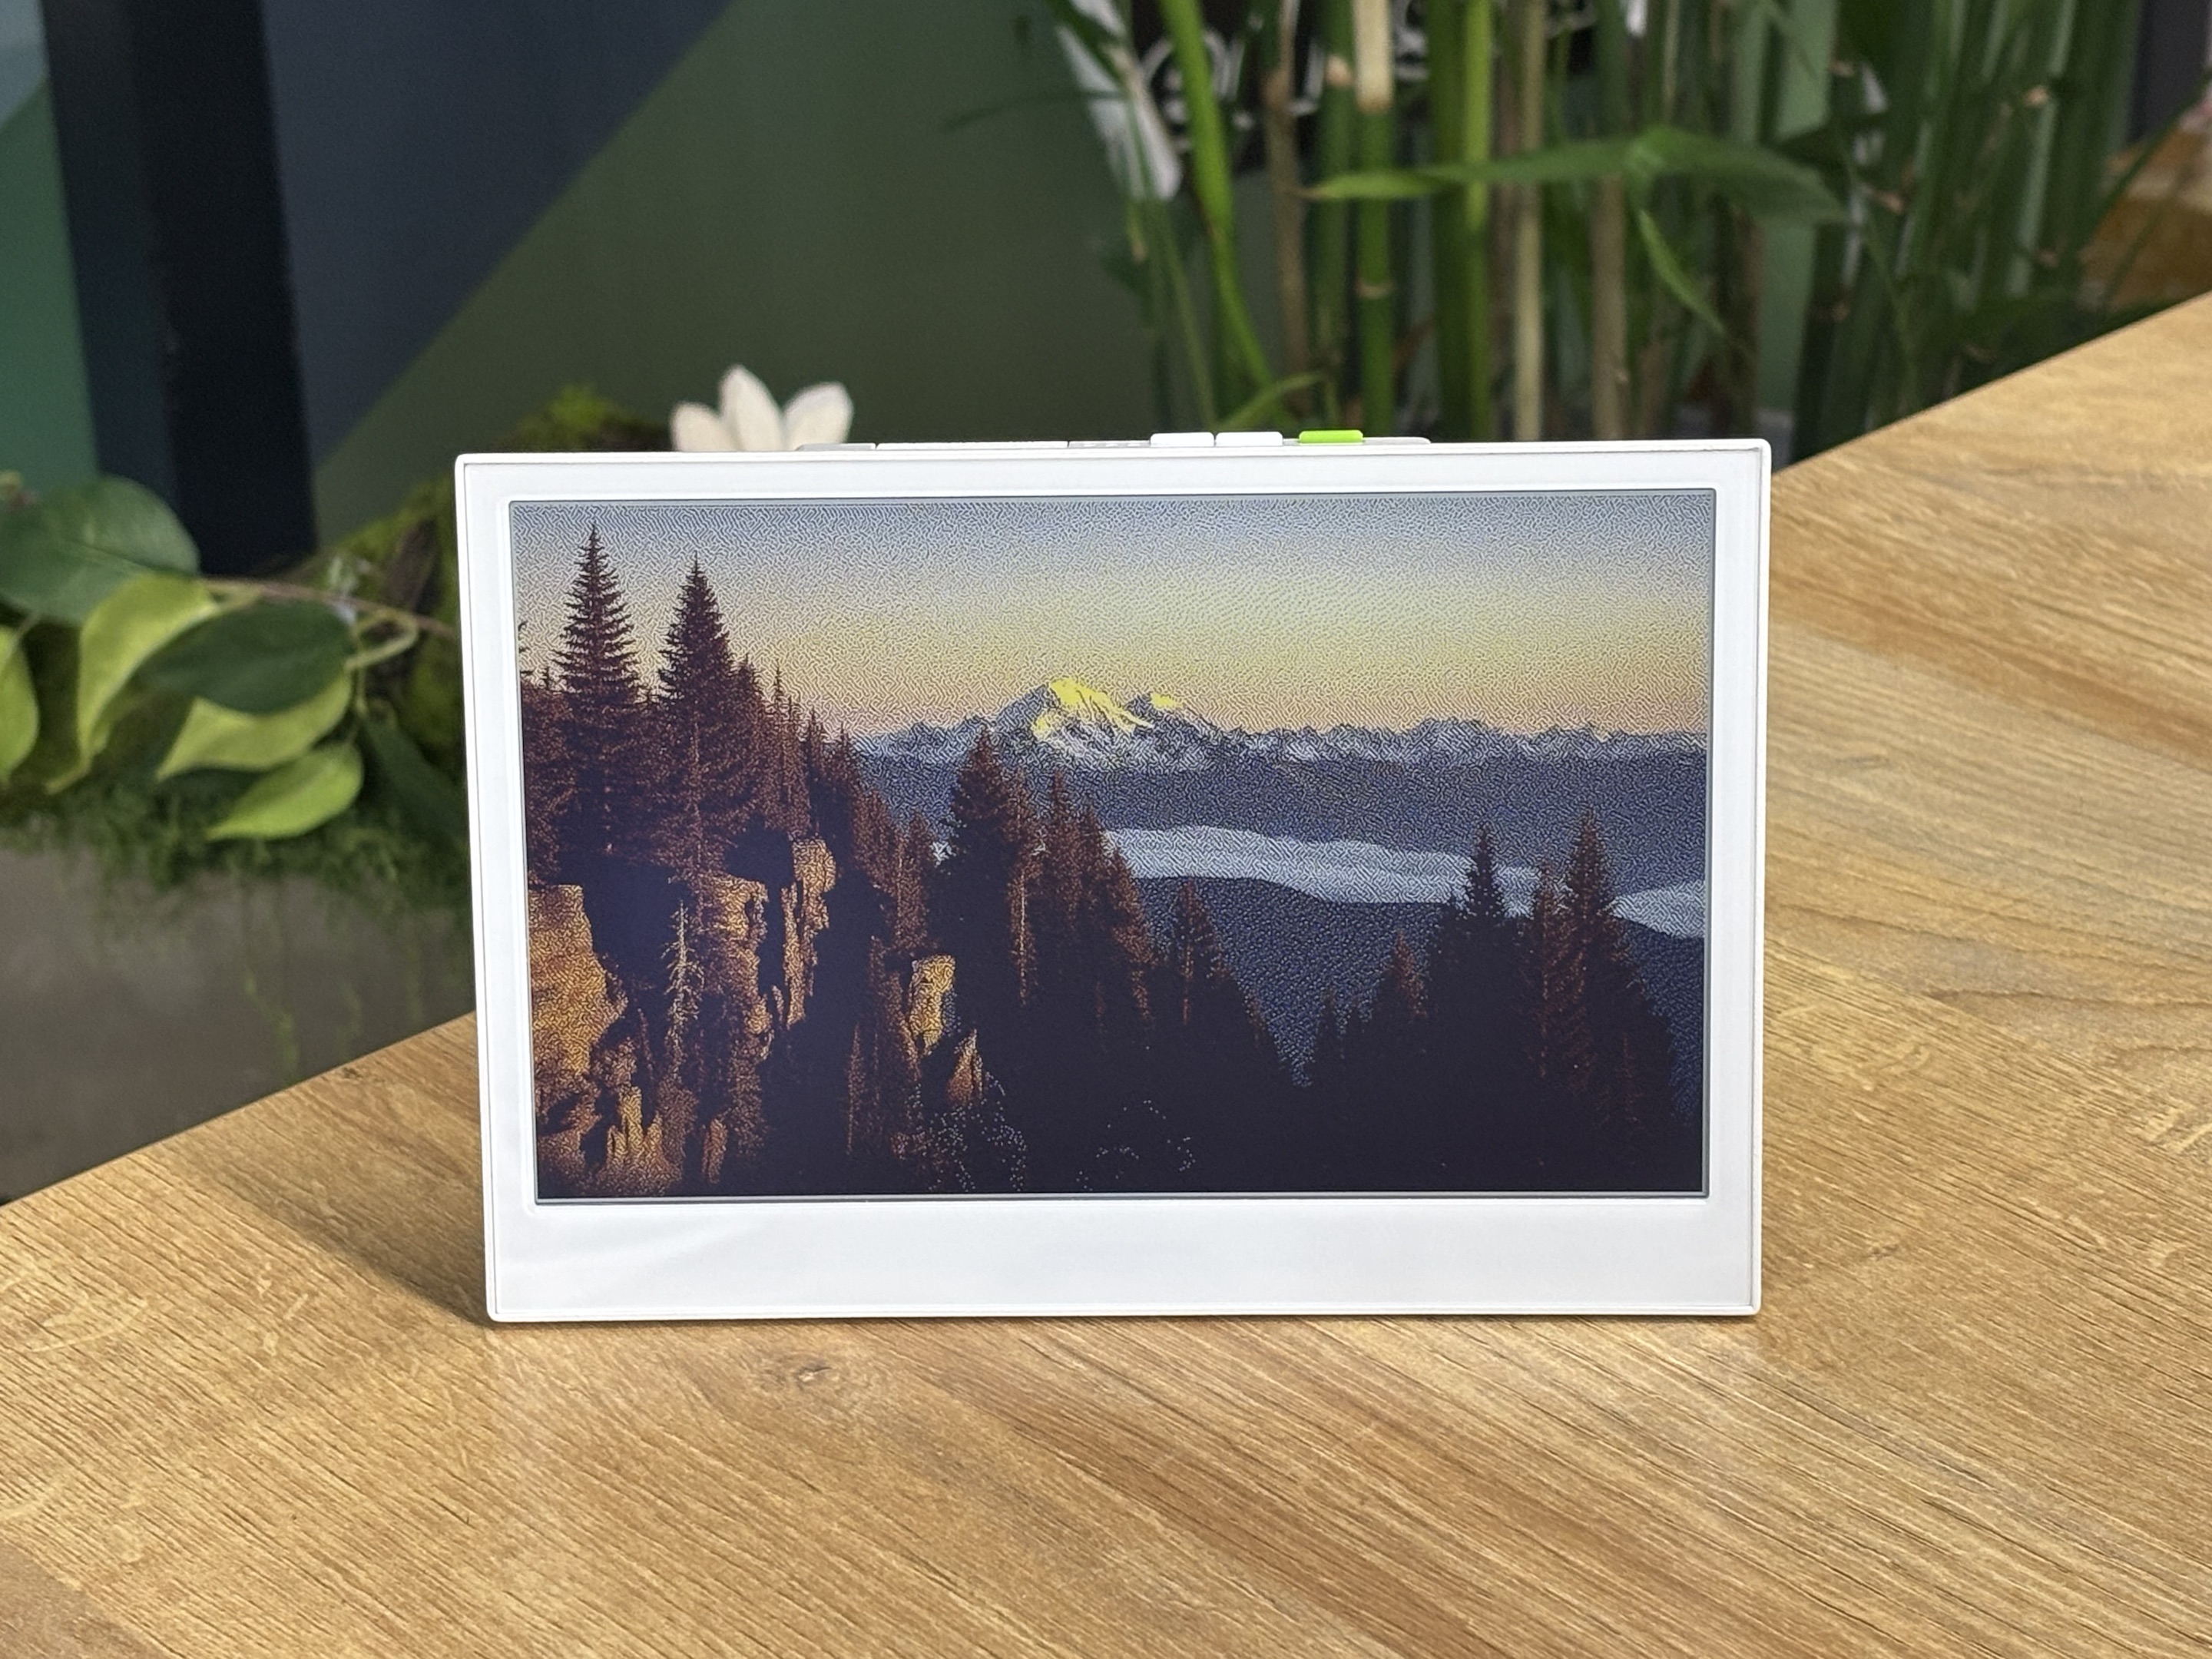
デプロイ後、デバイスは間隔設定に従って画像の表示を開始します。 効果のデモンストレーション:
ストレージの考慮事項
Section titled “ストレージの考慮事項”MicroSD カードの要件
Section titled “MicroSD カードの要件”デバイスに3枚を超える画像を保存するには、MicroSD カードを使用する必要があります:
- フォーマット:MicroSD カードは FAT32 としてフォーマットする必要があります
- サイズ:8GB 以上を推奨(最大32GB サポート)
- 速度:より良いパフォーマンスのために Class 10 以上を推奨
MicroSD カードを FAT32 としてフォーマットする方法
Section titled “MicroSD カードを FAT32 としてフォーマットする方法”-
Windows の場合:
ステップ1:MicroSD カードをコンピュータに挿入
ステップ2:ファイルエクスプローラーを開き、MicroSD カードを右クリック
ステップ3:「フォーマット…」を選択
ステップ4:ファイルシステムドロップダウンから「FAT32」を選択
ステップ5:「開始」をクリックしてフォーマットを開始 -
Mac の場合:
ステップ1:MicroSD カードをコンピュータに挿入
ステップ2:ディスクユーティリティを開く(アプリケーション > ユーティリティ > ディスクユーティリティ)
ステップ3:サイドバーから MicroSD カードを選択
ステップ4:「消去」をクリック
ステップ5:フォーマットとして「MS-DOS(FAT)」を選択
ステップ6:「消去」をクリックしてカードをフォーマット
MicroSD カードの挿入
Section titled “MicroSD カードの挿入”ステップ1:デバイスの電源を切る
ステップ2:デバイスの MicroSD カードスロットを見つける
ステップ3:適切にフォーマットされた MicroSD カードを挿入

ステップ4:デバイスの電源を入れる
ステップ5:SenseCraft HMI に再接続して、拡張ストレージが認識されていることを確認
ディスプレイ用の画像の最適化
Section titled “ディスプレイ用の画像の最適化”デバイスのディスプレイで最高のビジュアル結果を得るために:
- 解像度を一致させる:デバイスのネイティブ解像度(通常は800x480ピクセル)に一致する画像を準備
- アスペクト比を考慮:白いパディングを避けるために5:3のアスペクト比の画像を使用
- ディスプレイタイプに最適化:
- カラー LCD の場合:標準のカラー画像がうまく機能
- 電子ペーパー/電子インクの場合:色のグラデーションが少ない高コントラスト画像
- 2色電子ペーパーの場合:白黒または高コントラスト画像
- ファイルサイズ:自動圧縮を避けるために、画像を2MB未満に保つ
- 明るさ/コントラスト:特定のディスプレイの特性に基づいて調整
HMI ツールを使用して画像を最適化
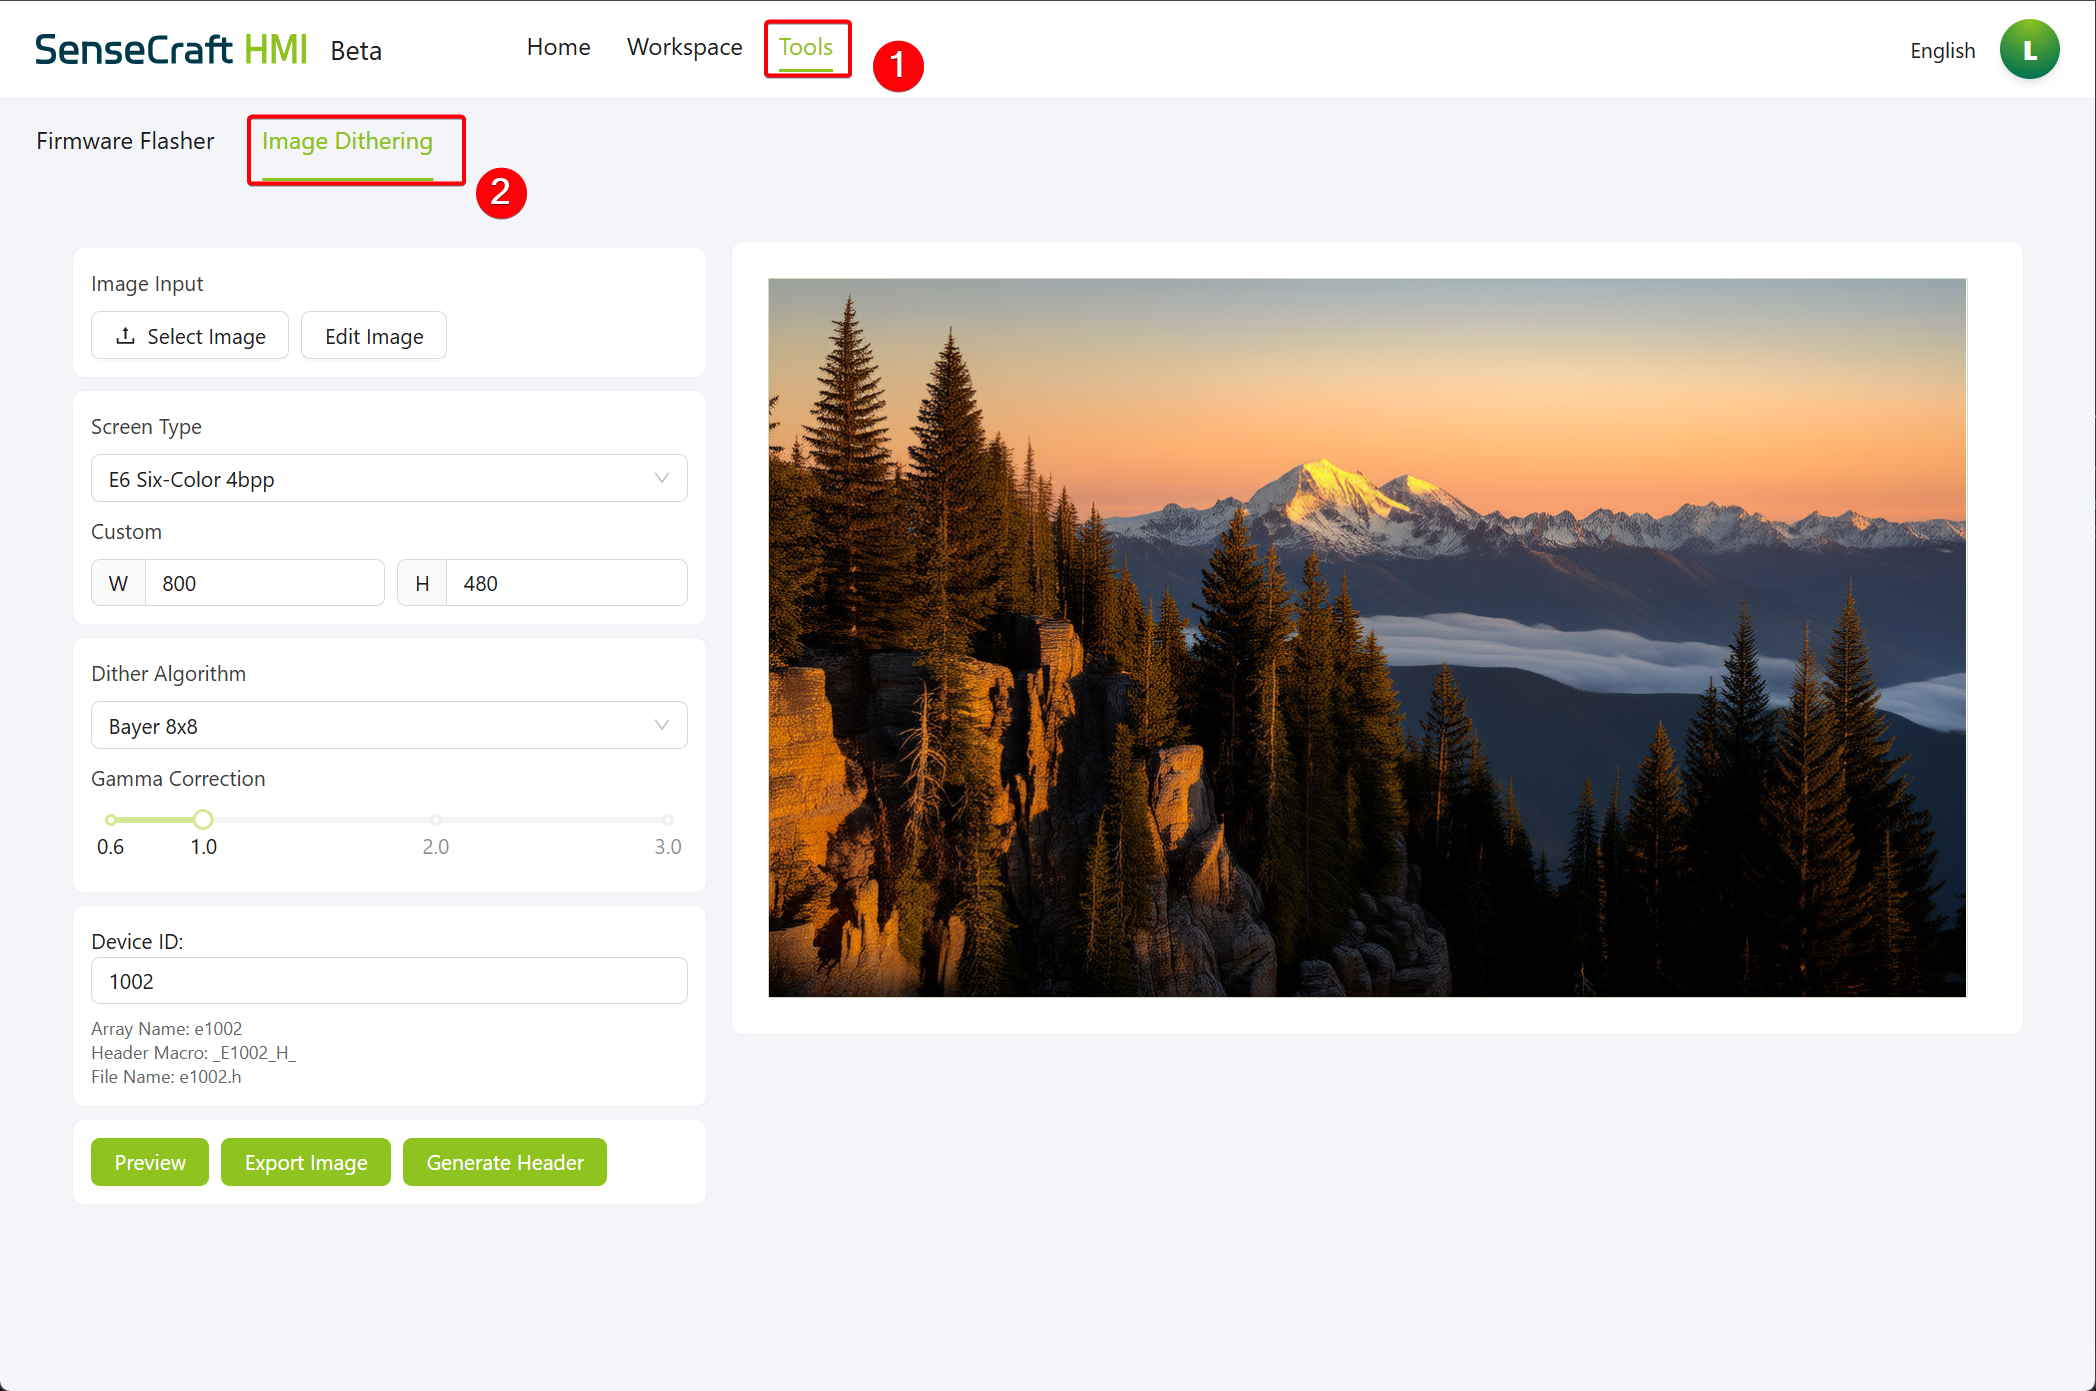
Section titled “HMI ツールを使用して画像を最適化”SenseCraft HMI の画像ツールを選択して、画像を最適化できます。SenseCraft HMI での使用をプレビューするだけでなく、コードで編集して使用するための C コードヘッダーファイルを生成することもできます。 ステップ1:SenseCraft HMI ページで、Tools を選択し、次に Image Dithering を選択
ステップ2:最適化したい画像をアップロード
ステップ3:必要に応じて必要な変更を行います。
- Edit Image:画像のサイズを変更できます
- Screen Type:ディスプレイ画面タイプを選択
- Custom:使用している画面解像度のサイズに基づく
- Dither Algorithm:アルゴリズムを使用して画像を処理し、一般的に使用されるさまざまなアルゴリズムをサポート
- Device ID:デバイス識別子は、デバイスを区別するために使用され、エンジニアリング要件に従って定義されます
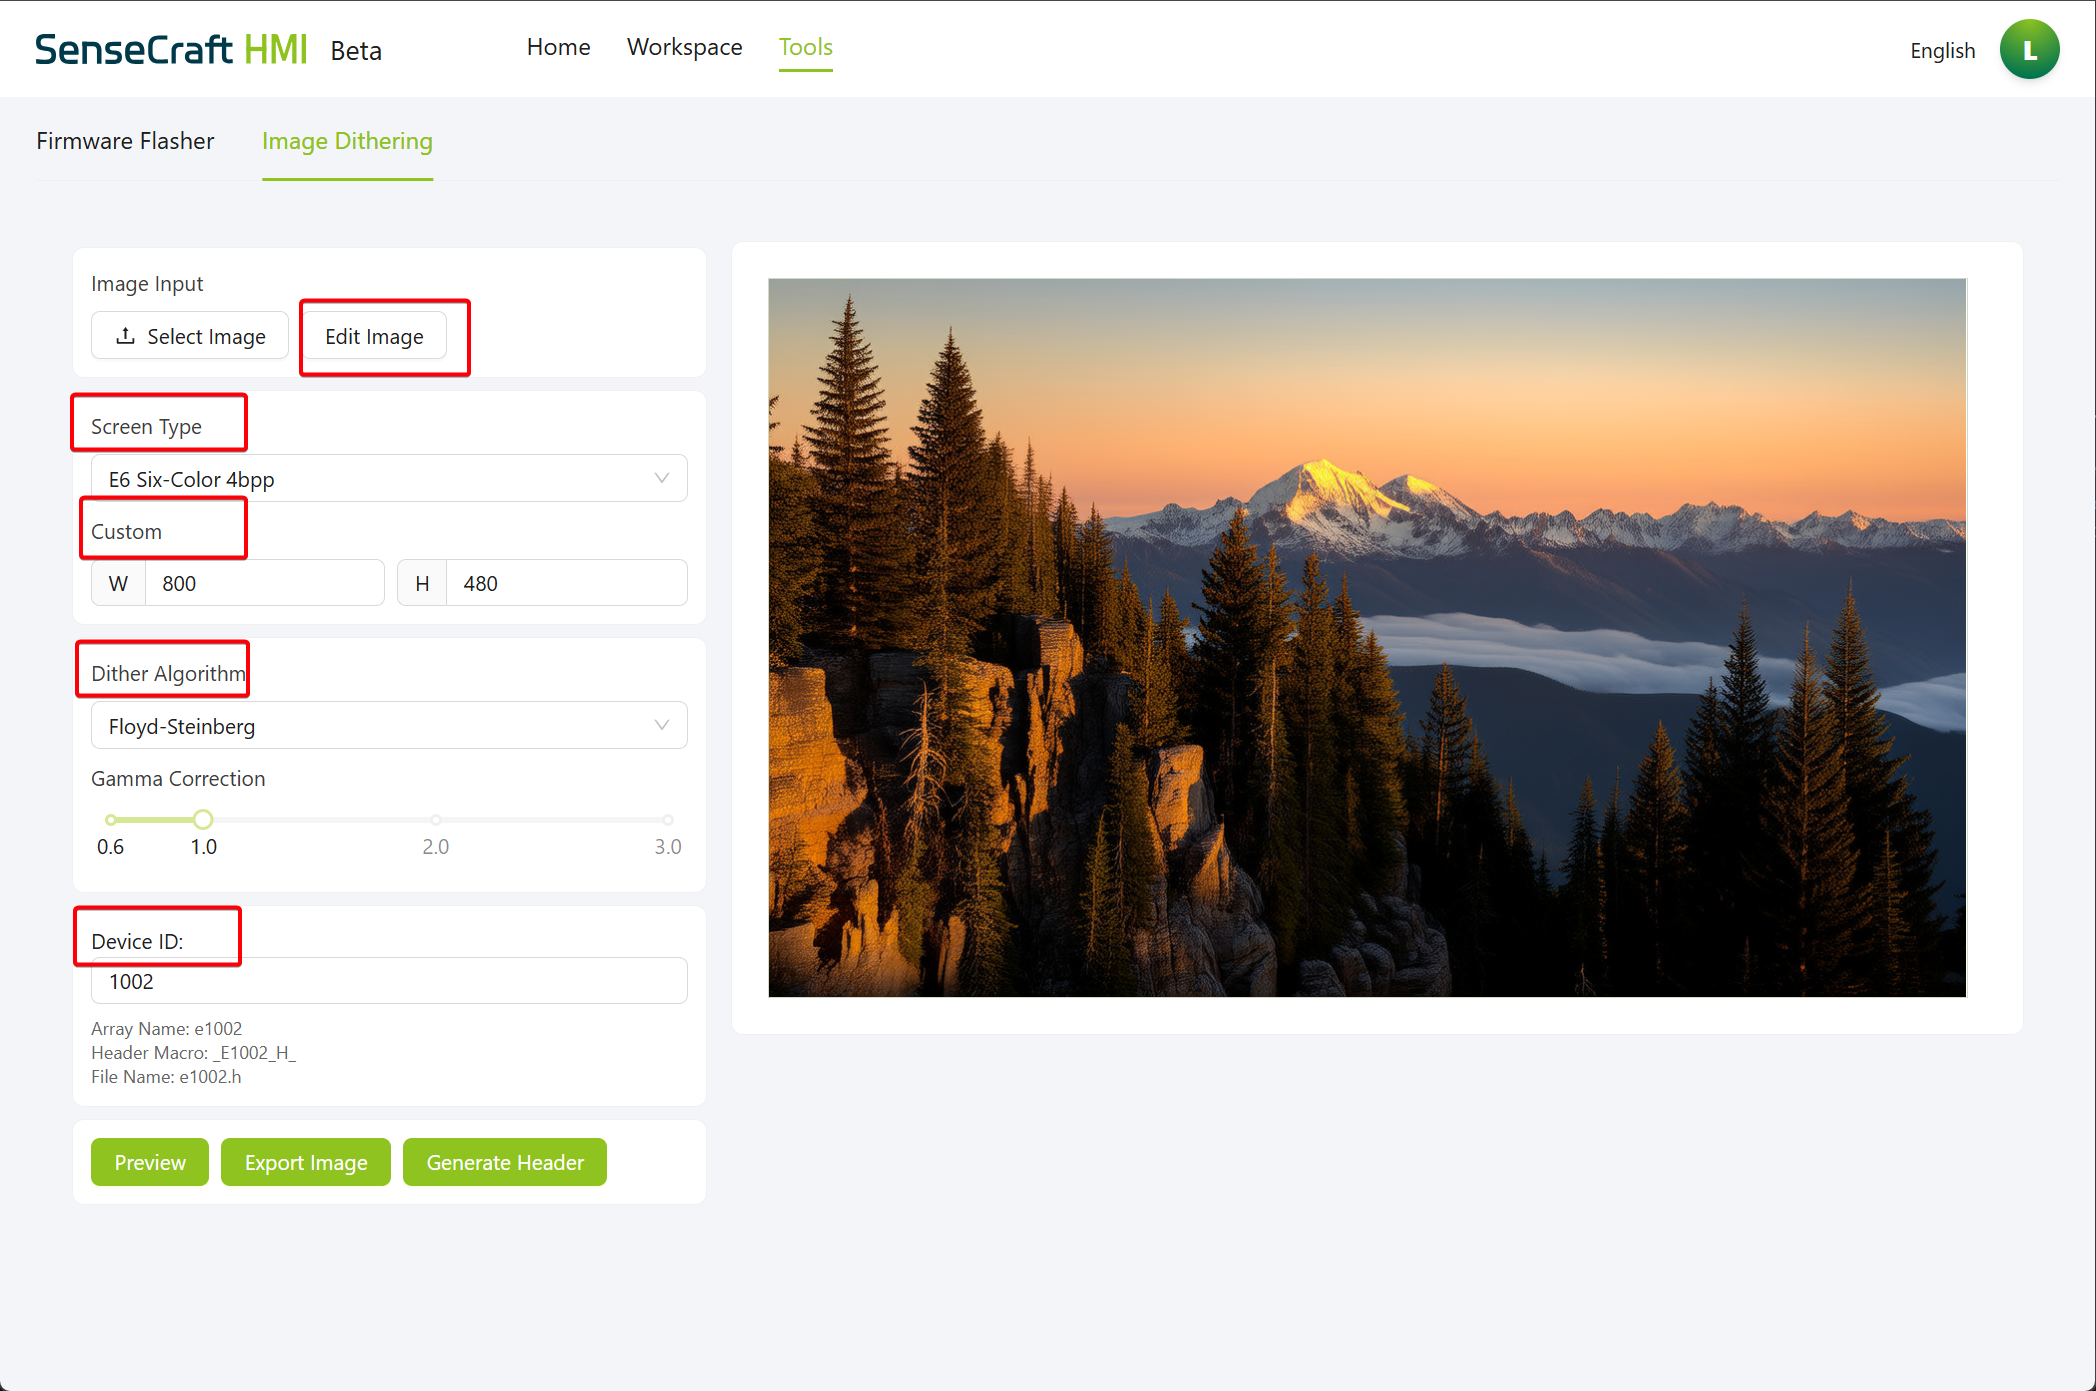
ステップ4:Preview を選択して、画面に表示される画像を表示します。具体的な状況に応じて、画像をエクスポートするか、ヘッダーファイルを生成するかを選択できます。

トラブルシューティング
Section titled “トラブルシューティング”一般的な問題と解決策
Section titled “一般的な問題と解決策”- 画像がアップロードされない:
- 画像がサポートされている形式(JPG、PNG、GIF)であることを確認
- ファイルサイズが大きすぎないことを確認(理想的には2MB未満)
- 別のブラウザを試すか、ブラウザのキャッシュをクリア
- 3枚を超える画像をアップロードできない:
- デバイスに適切にフォーマットされた MicroSD カードが挿入されていることを確認
- MicroSD カードが FAT32 としてフォーマットされていることを確認
- デバイスが MicroSD カードを正しく検出していることを確認
- 画像が正しく表示されない:
- 画像ツールバーを使用して明るさ/コントラストを調整
- デバイスの解像度に一致する画像を準備
- デプロイ失敗:
- デバイスが SenseCraft HMI に正しく接続されていることを確認
- デバイスに十分なストレージスペースがあることを確認
- デバイスを再起動して、再度デプロイしてみてください
SenseCraft HMI のギャラリー機能は、画面ベースのデバイスをデジタルフォトフレームに変換する簡単な方法を提供します。このガイドに従うことで、最適な表示のためにカスタマイズされた設定で、デバイスに画像をアップロード、管理、表示できます。
3枚を超える画像を保存するには、デバイスに適切にフォーマットされた MicroSD カードが挿入されている必要があることを覚えておいてください。適切なセットアップで、Seeed Studio ディスプレイデバイスでお気に入りの画像を紹介する美しいスライドショーとディスプレイを作成できます。