Advanced Tools
Introduction
Section titled “Introduction”The Tools page in SenseCraft HMI provides a suite of advanced utilities designed to help you optimize content for your display and manage your device’s software. This section is separate from the main design workspace and focuses on two key functions:
- Image Dithering: A powerful tool to process and prepare images for optimal quality on displays with limited color palettes, such as e-paper screens.
- Firmware Flasher: An integrated utility to update your device’s firmware, ensuring it has the latest features and bug fixes.
This guide will walk you through each of these tools, explaining their features and how to use them effectively.
Firmware Flasher
Section titled “Firmware Flasher”The Firmware Flasher is an essential tool for keeping your device’s software up to date. It provides a simple, step-by-step interface to flash new firmware directly from your web browser. You can install official SenseCraft HMI firmware or alternative firmware, such as TRMNL, on supported devices.

SenseCraft HMI vs TRMNL Firmware
Section titled “SenseCraft HMI vs TRMNL Firmware”Before flashing firmware, it’s important to understand the differences between the two available firmware options:
SenseCraft HMI Firmware
- Designed specifically for the SenseCraft HMI platform
- Full integration with SenseCraft HMI’s visual design tools, templates, and features
- Supports custom UI design through the Canvas editor
- Access to AI Generator, RSS feeds, Web pages, and Gallery features
- Real-time device management through the SenseCraft HMI dashboard
- Recommended for users who want a comprehensive, cloud-connected design platform
TRMNL Firmware
- Alternative firmware platform with its own ecosystem
- Different interface and feature set from SenseCraft HMI
- Managed through the TRMNL platform and documentation
- Not compatible with SenseCraft HMI platform features
Step-by-Step Flashing Guide
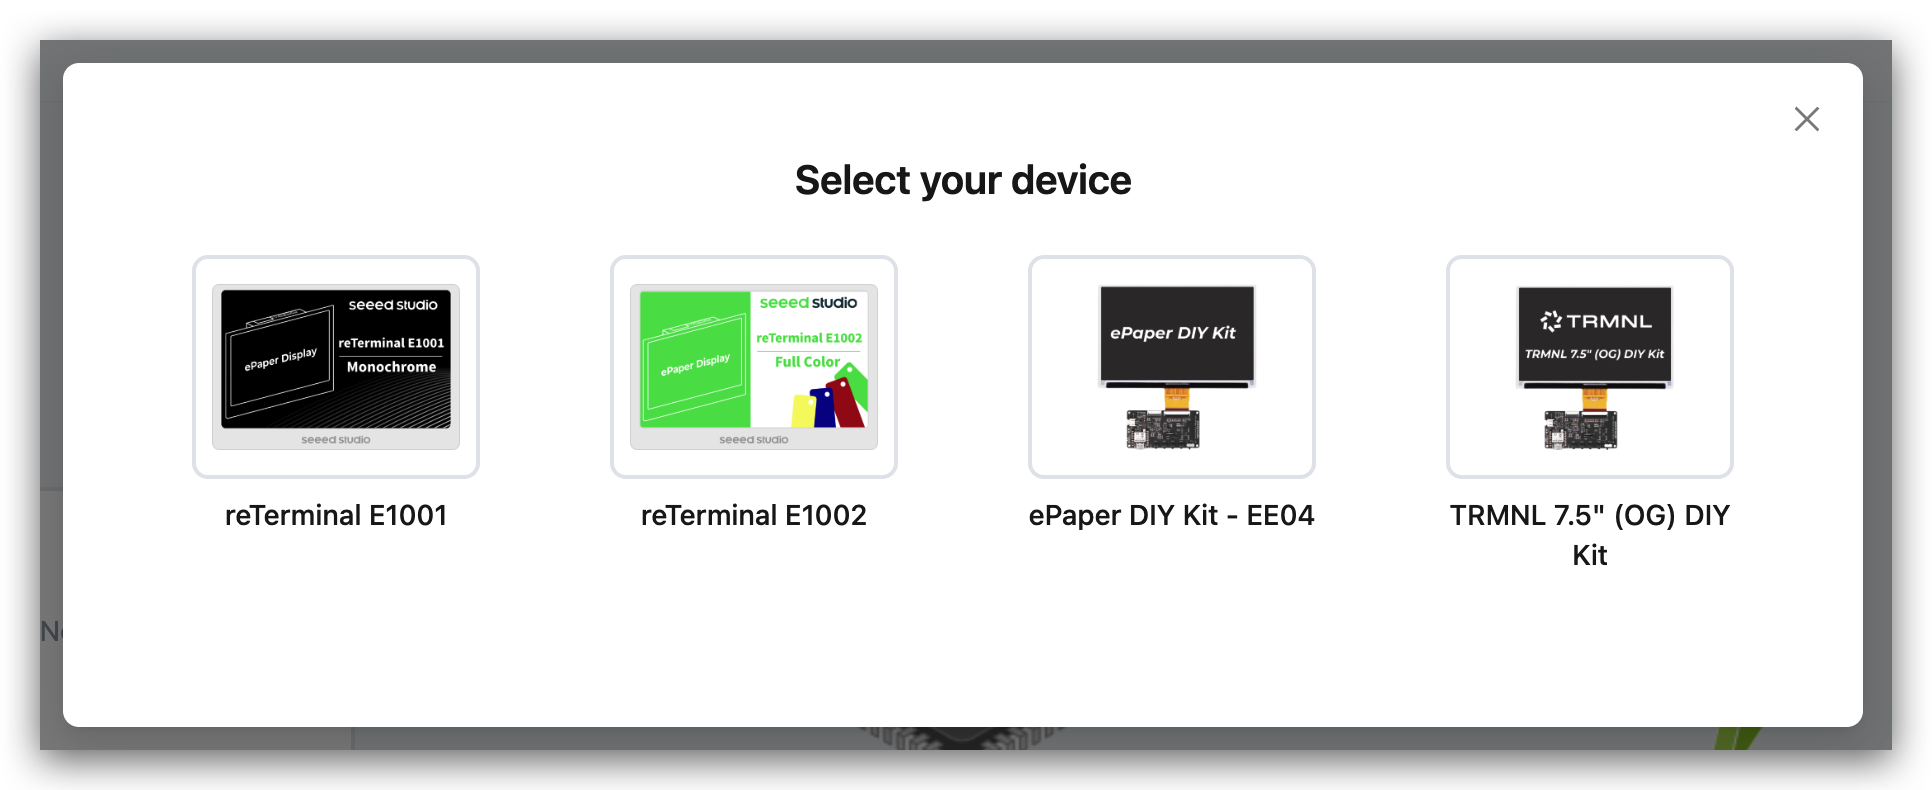
Section titled “Step-by-Step Flashing Guide”Step 1: Select Your Device
Section titled “Step 1: Select Your Device”Before you begin, ensure your device is connected to your computer via a USB cable.
- Click the Select button.
- A modal will appear asking you to choose your device from a list of supported hardware.
Step 2: Select Firmware
Section titled “Step 2: Select Firmware”Once a device is selected, the firmware options will become available.
- Click the dropdown menu under Select firmware to see a list of available firmware versions for your device
- Choose the firmware type and version you wish to install:
- SenseCraft HMI Firmware (Recommended for SenseCraft HMI platform users)
- TRMNL Firmware (Alternative platform - see comparison above)
Additional Options:
- Connect Serial Monitor: This button opens a serial monitor in your browser, which is an advanced tool for viewing debug messages and logs from the device during the flashing process
Step 3: Flash
Section titled “Step 3: Flash”This is the final step where the firmware is written to the device.
- Click the Flash button to begin the process. Do not disconnect the device or close the browser tab until it is complete.
- The tool will show a progress bar indicating the status of the flash.
Image Dithering
Section titled “Image Dithering”E-paper displays have unique characteristics and often a limited color palette. The Image Dithering tool processes your images to look their best on these screens by using special algorithms to simulate shades and colors. It can also be used to generate C-style header files for developers who wish to embed images directly into their code.
Using the Image Dithering Tool
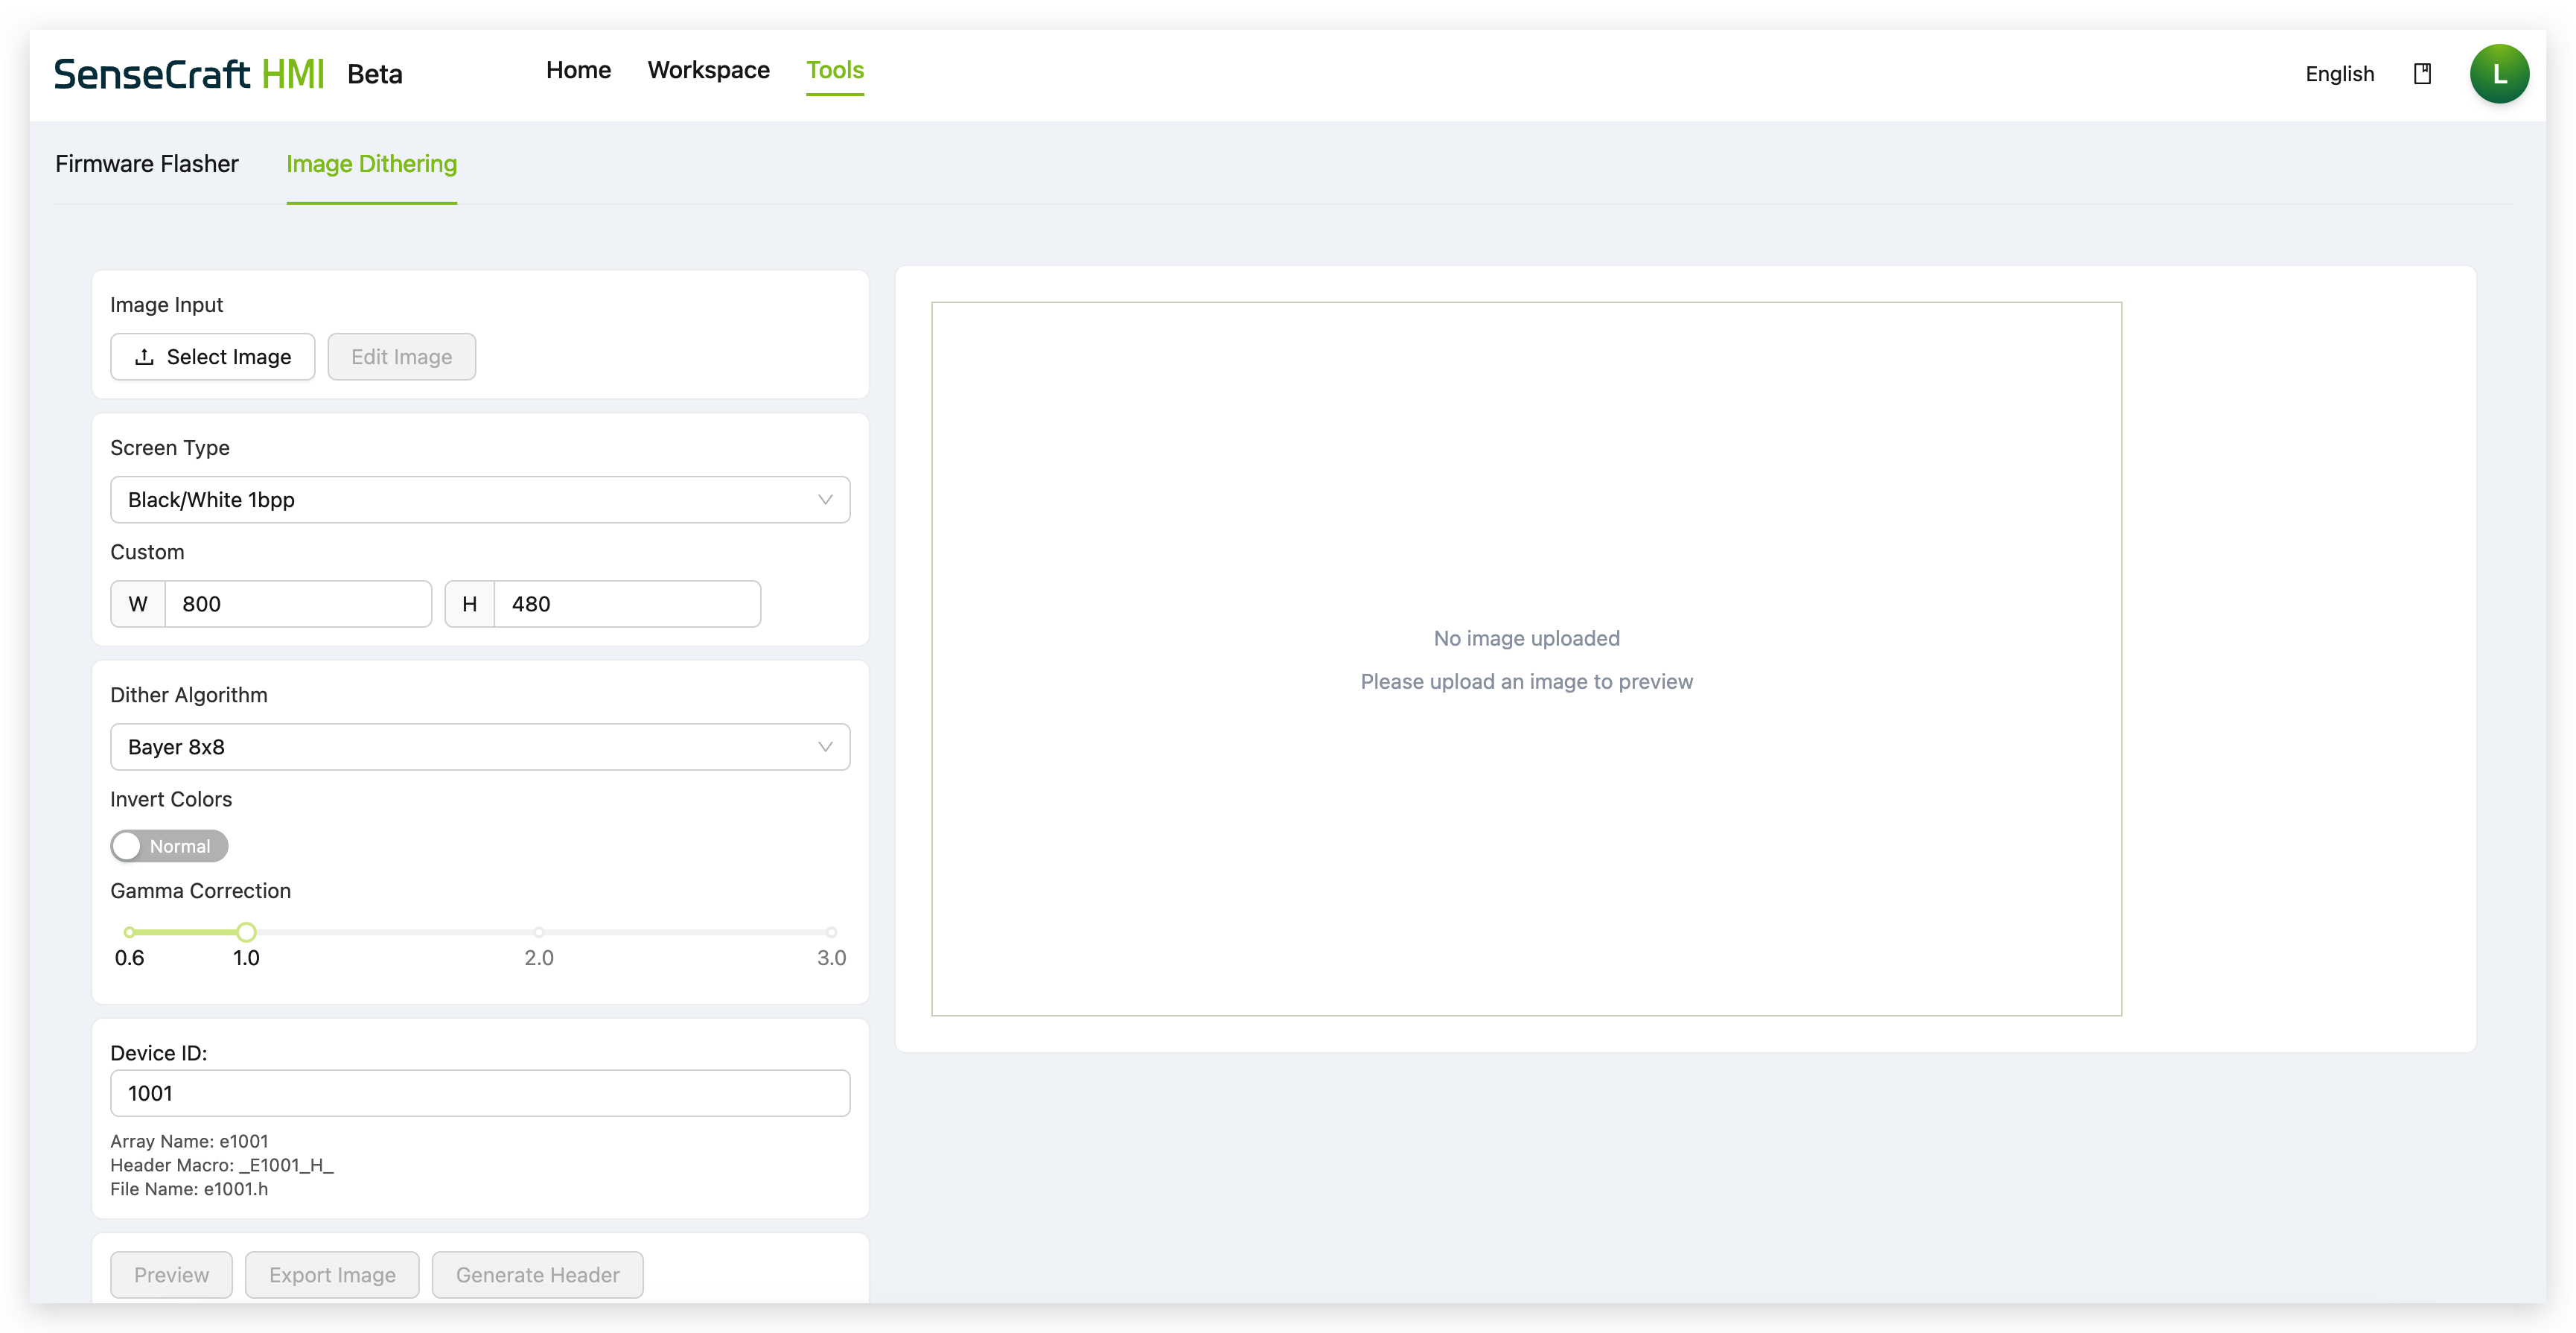
Section titled “Using the Image Dithering Tool”Step 1. Navigate and Upload
- Click on Tools in the top navigation bar.
- Ensure the Image Dithering tab is selected.
- Click Select Image to upload a picture from your computer. You can also click Edit Image to make basic adjustments.
Step 2. Configure the Processing Options Once your image is uploaded, use the left-hand panel to configure how it will be processed:
- Screen Type: Select the target display type (e.g.,
Black/White 1bpp,E6 Six-Color 4bpp). This tells the tool how to optimize the image. - Custom: Manually set the output resolution (Width and Height) of the image. This should typically match your device’s screen resolution.
- Dither Algorithm: Choose a dithering algorithm. Different algorithms (like
Bayer 8x8,Floyd-Steinberg) produce different visual textures when simulating colors. Experiment to see which looks best for your image. - Invert Colors: Toggles the image between its normal and inverted color state.
- Gamma Correction: Adjusts the brightness and contrast of the image. A lower value generally makes the image darker, while a higher value makes it brighter.
- Device ID: If you plan to generate a header file, you can set a custom ID here. This will influence the variable names (
Array Name,Header Macro) in the generated code.
Step 3. Preview and Export After configuring the options, you can choose one of the following actions at the bottom:
- Preview: Updates the main display area to show you a live preview of what the final processed image will look like.
- Export Image: Downloads the processed image to your computer as a standard image file (e.g., PNG).
- Generate Header: For developers, this creates and downloads a
.hheader file containing the image data as a byte array, ready to be included in a firmware project.
Conclusion
Section titled “Conclusion”The Tools page offers indispensable utilities for both designers and developers. With the Image Dithering tool, you can ensure your visuals are perfectly optimized for your screen, while the Firmware Flasher provides a safe and easy way to manage your device’s software. Mastering these tools will help you get the most out of your SenseCraft HMI experience.