Data Advanced Usage

This wiki serves as a comprehensive guide to data utilization within our system. While we offer seamless, out-of-the-box integration with standard data sources like Google Calendar, YouTube, and GitHub, our capabilities extend far beyond these native connectors.
You can also retrieve data from external sources via APIs, or programmatically push data directly to the HMI platform. The following sections will specifically focus on detailing the implementation of these two advanced modules
Getting Started
Section titled “Getting Started”At the top of the Workspace page in the SenseCraft platform, you will see four core modules: New Design, New Image, RSS new, and Web Content. These modules allow you to create rich content and interactive interfaces.
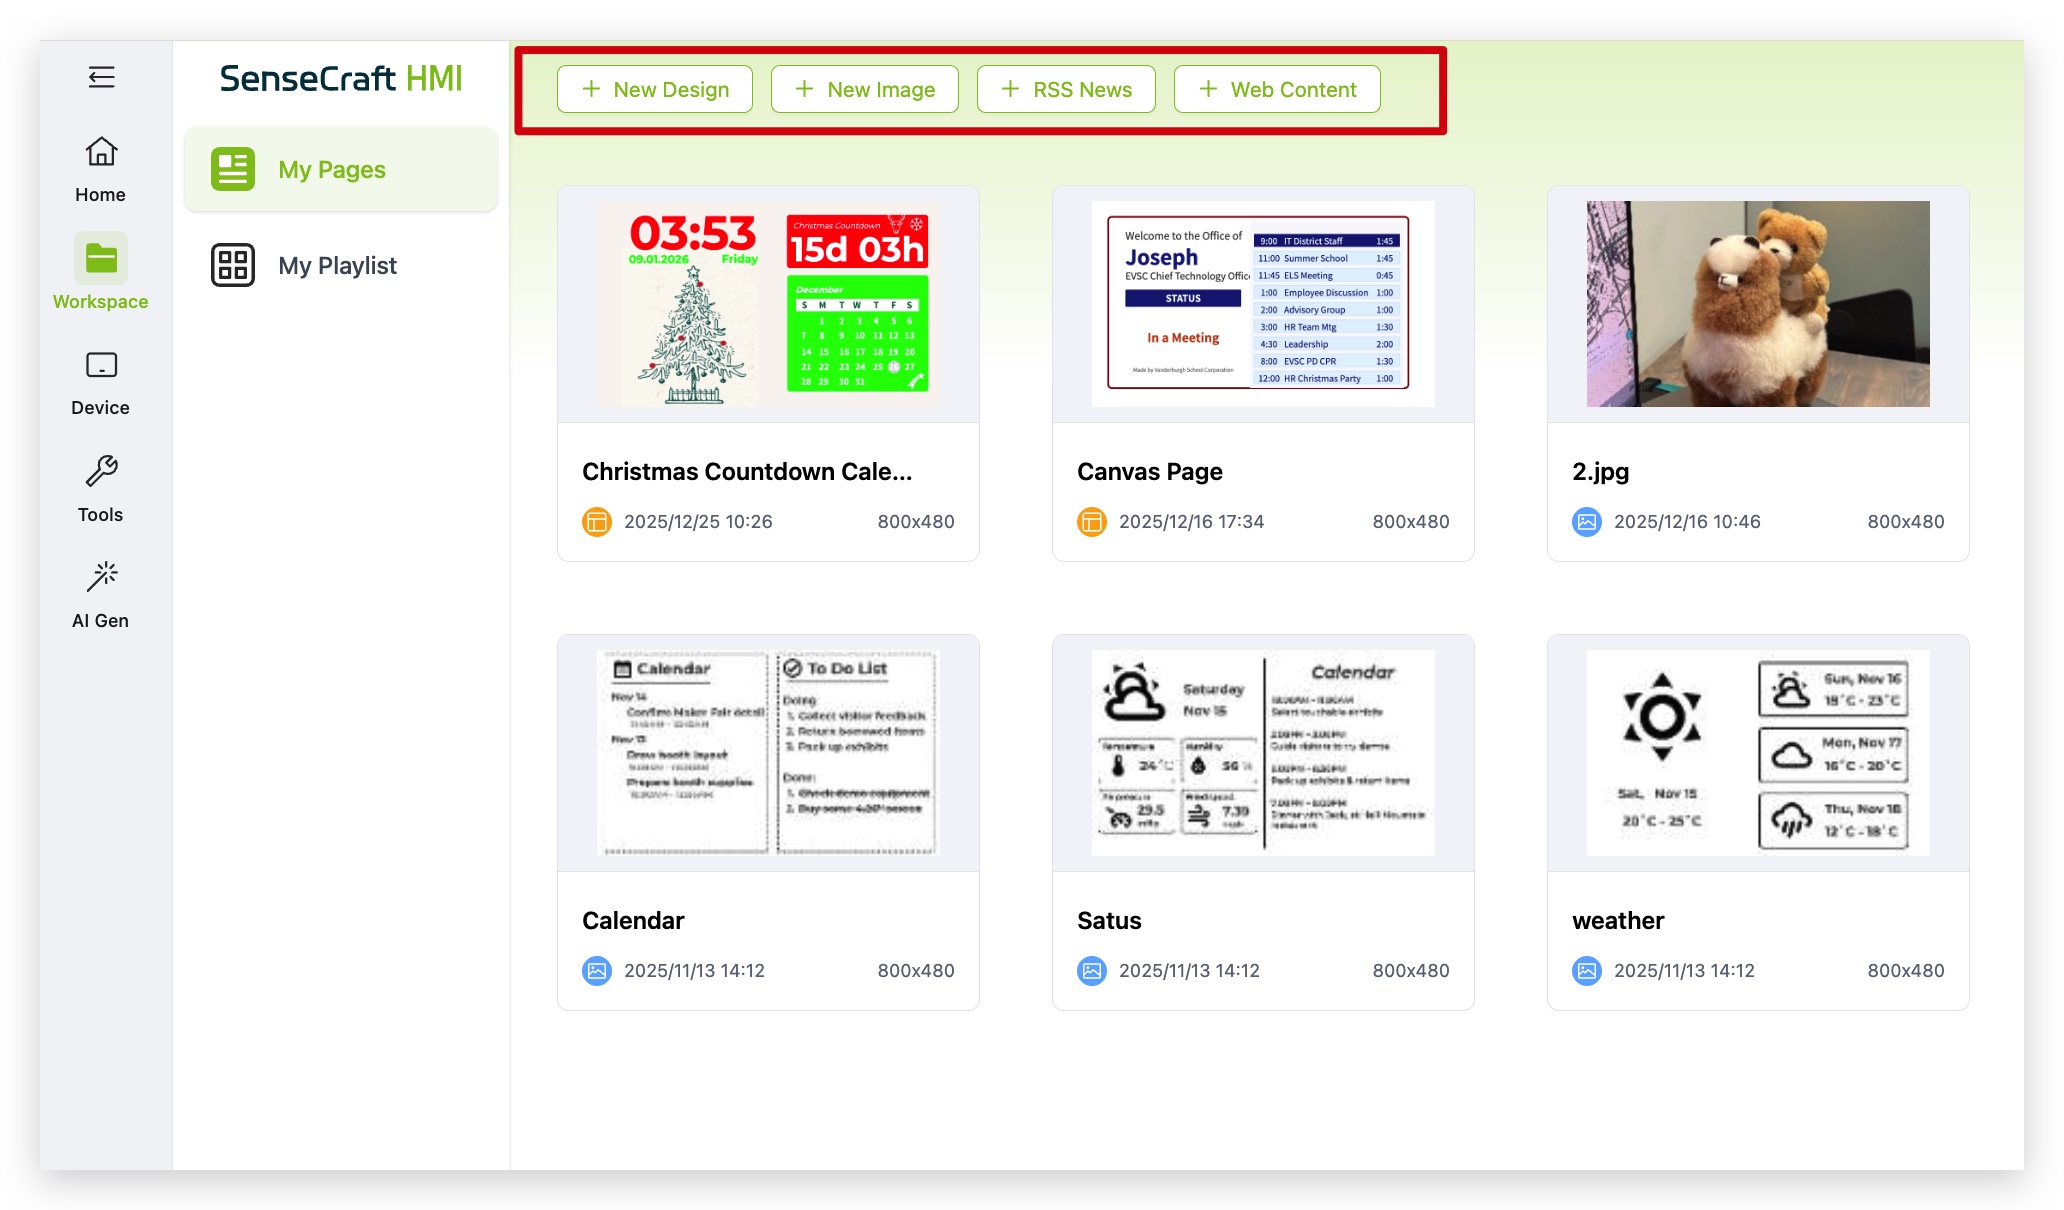
This guide focuses on the New Design module, specifically the Data section. This is one of the standout features of SenseCraft, allowing you to easily link external data. Whether using our provided standard application data interfaces or custom data sources, you can build powerful visual dashboards.
Module Overview
Section titled “Module Overview”In the Workspace, click on New Design. You will find that the operation experience is similar to creating a PowerPoint presentation, making it very intuitive.
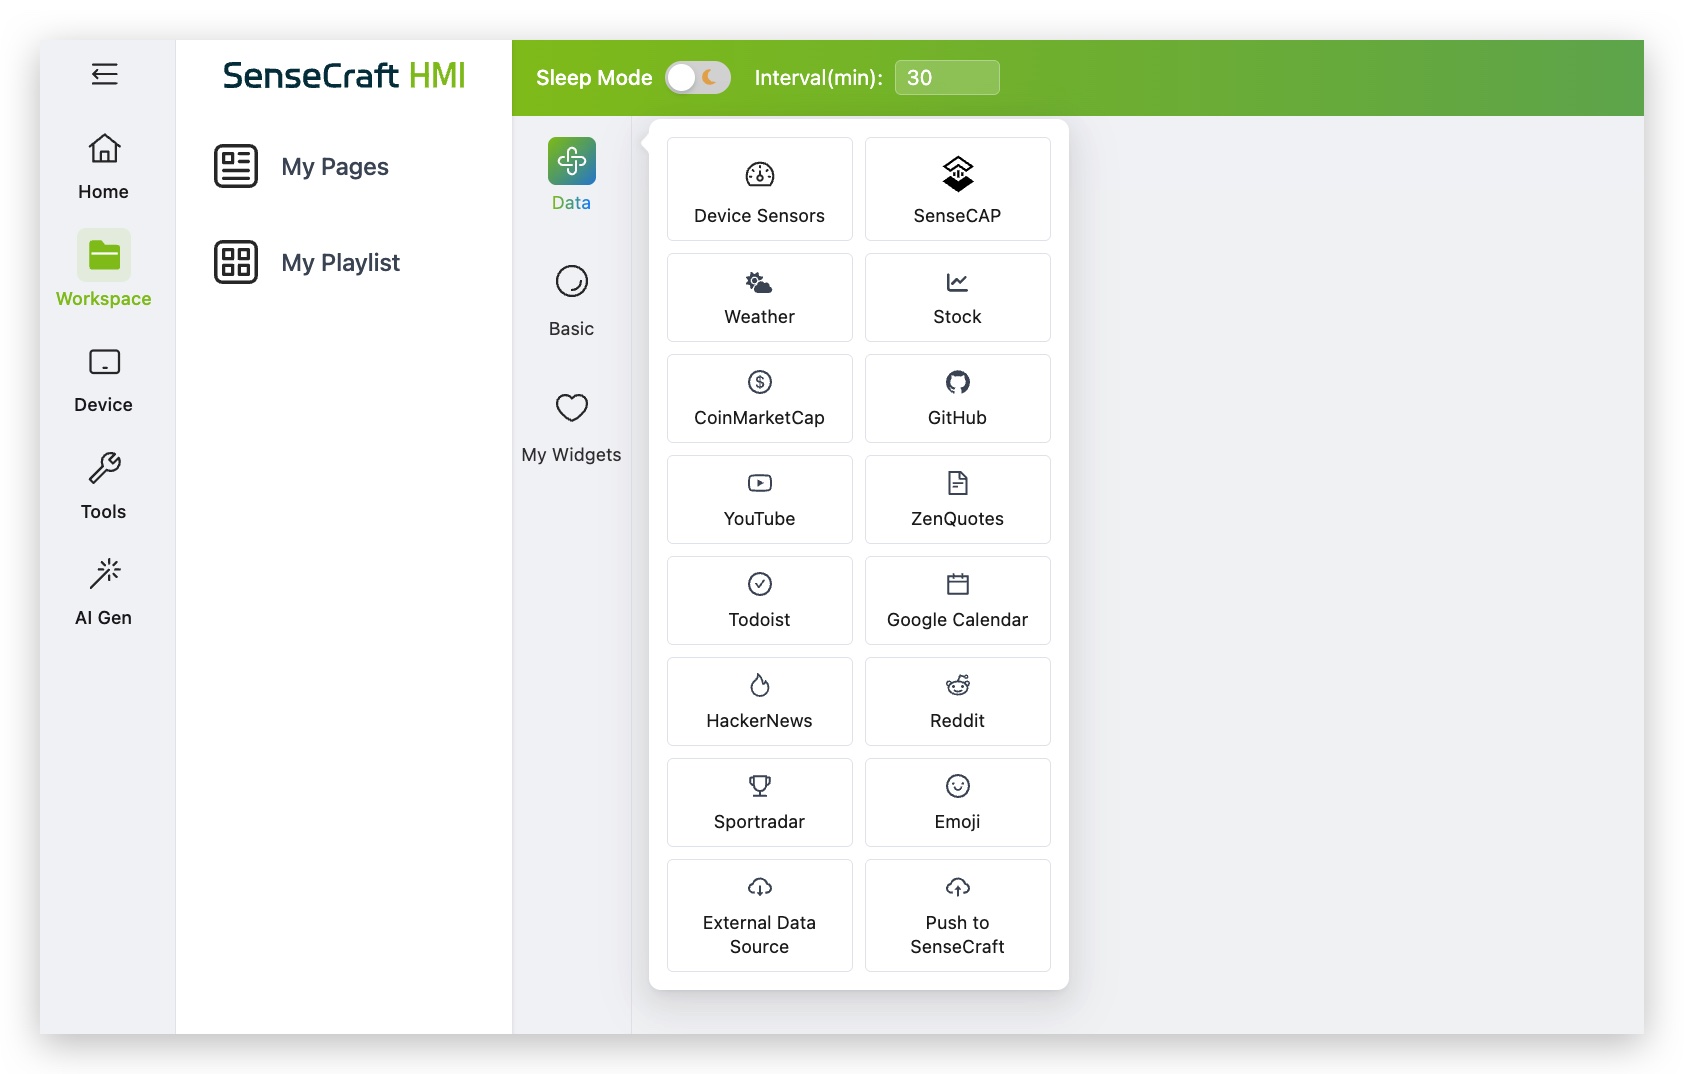
In the toolbar on the left, the Data section is the core feature we will explore today. It allows you to connect various data streams. Since the other modules are quite simple, there’s no need for excessive redundant introduction. Next, we will focus on the introduction of the latter two modules.
External Data Source (API Integration)
Section titled “External Data Source (API Integration)”The External Data Source component allows you to fetch external data using APIs and visualize it on your dashboard.
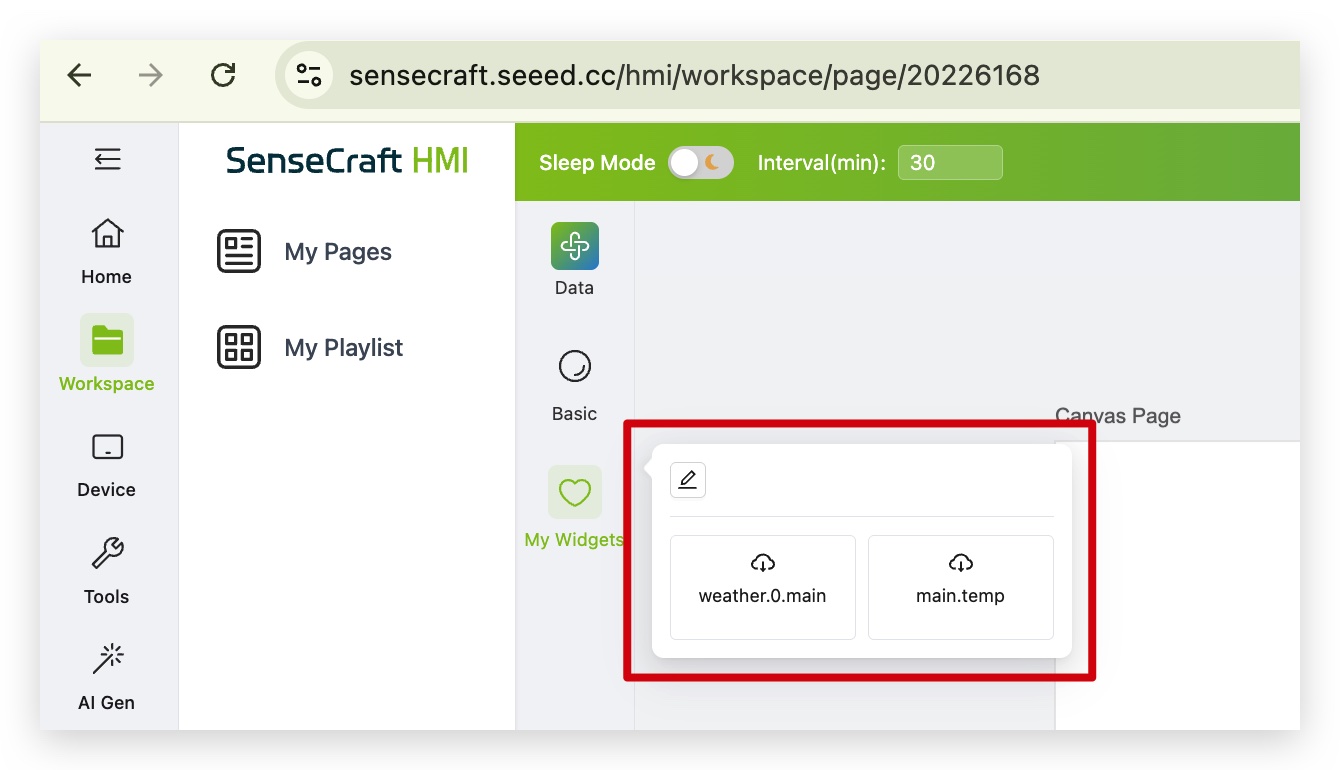
Step 1. inside the New Design canvas, click the Data tab on the left and locate the External Data Source component at the bottom.
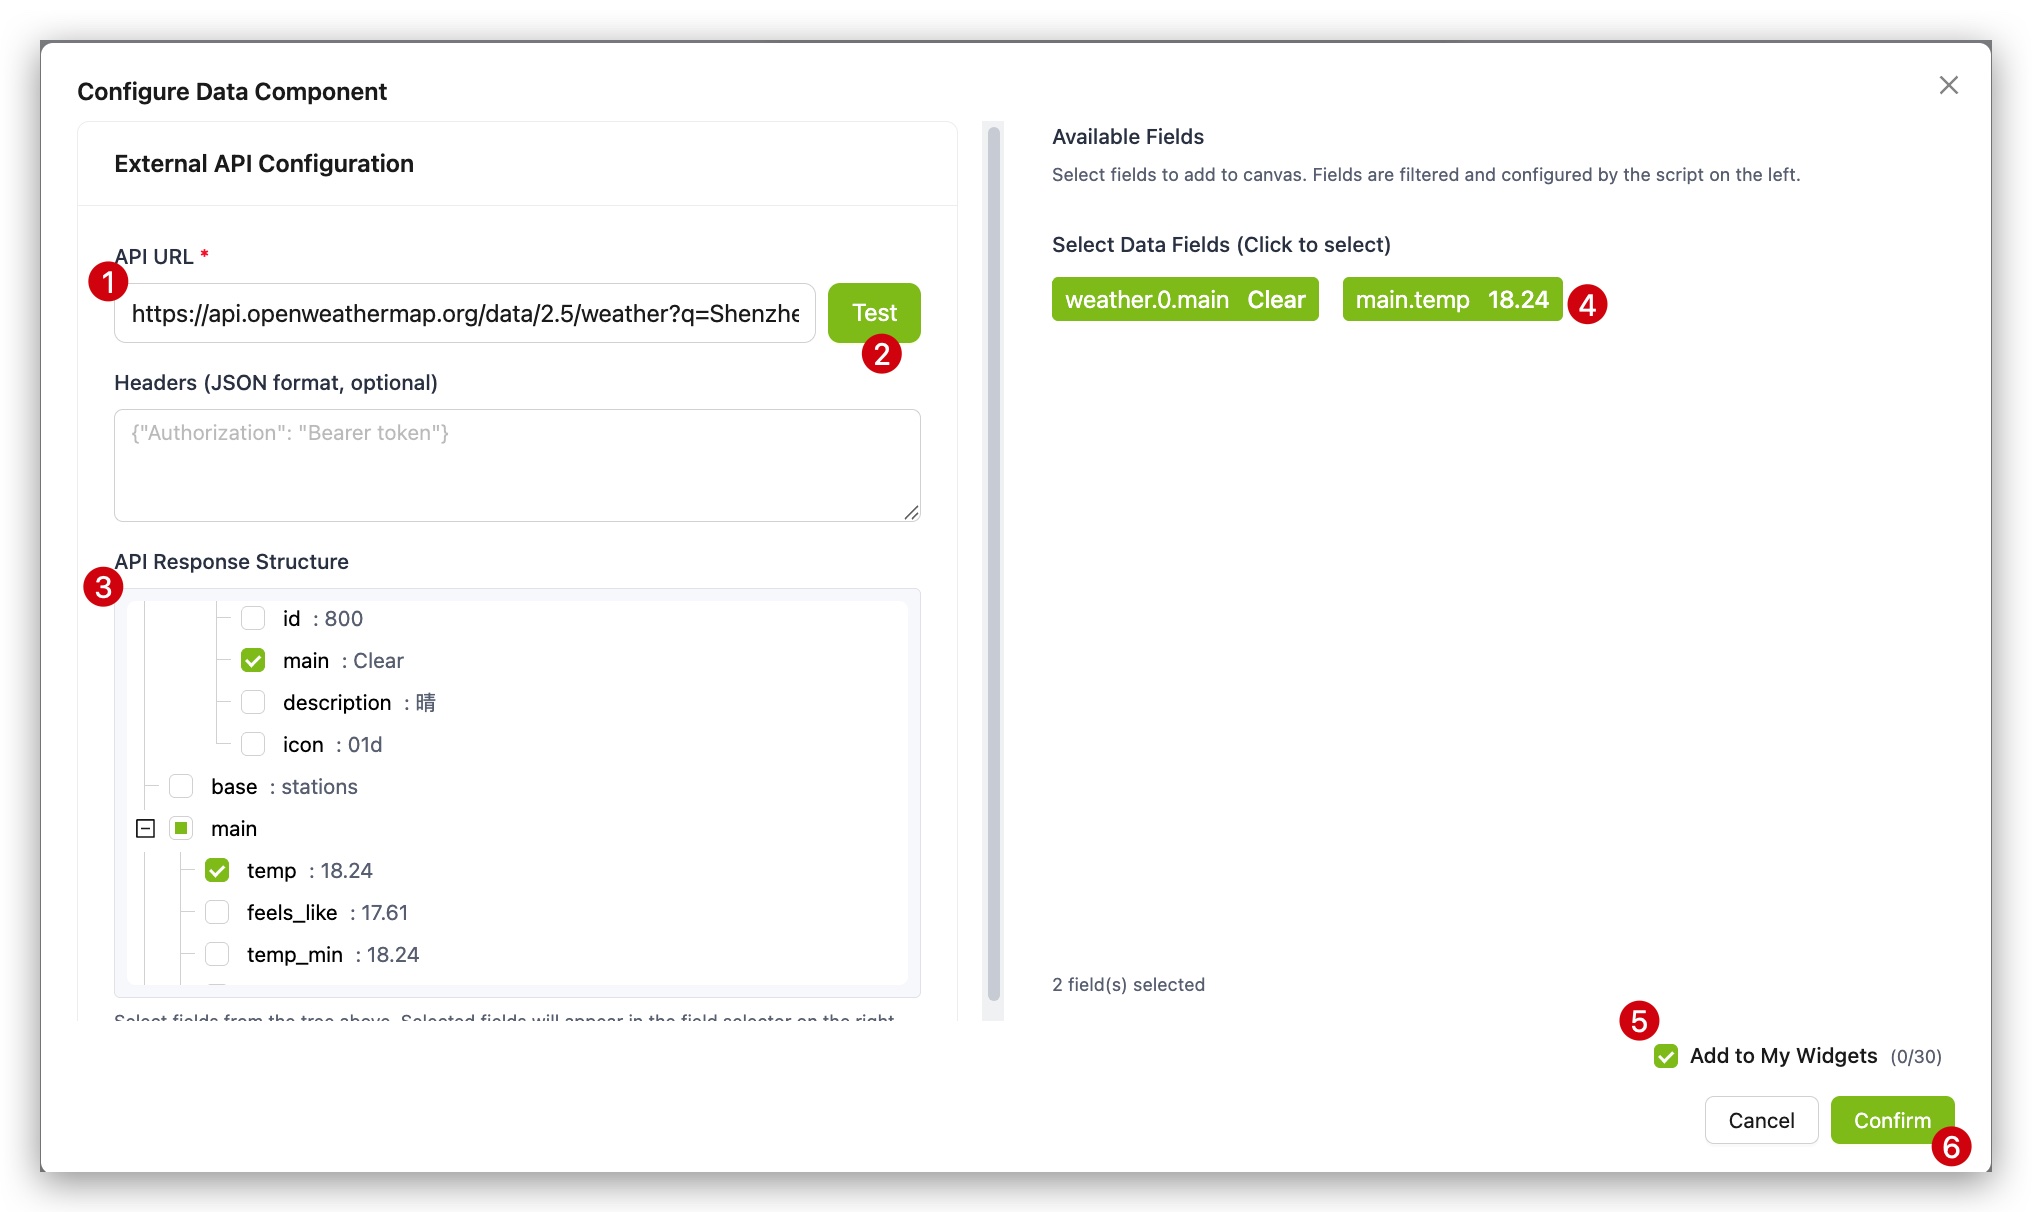
Step 2. Enter the API address (URL) from which you want to fetch data into the component configuration box.
Step 3. The system will automatically parse the data returned by the API and expand it below in a Tree Structure.
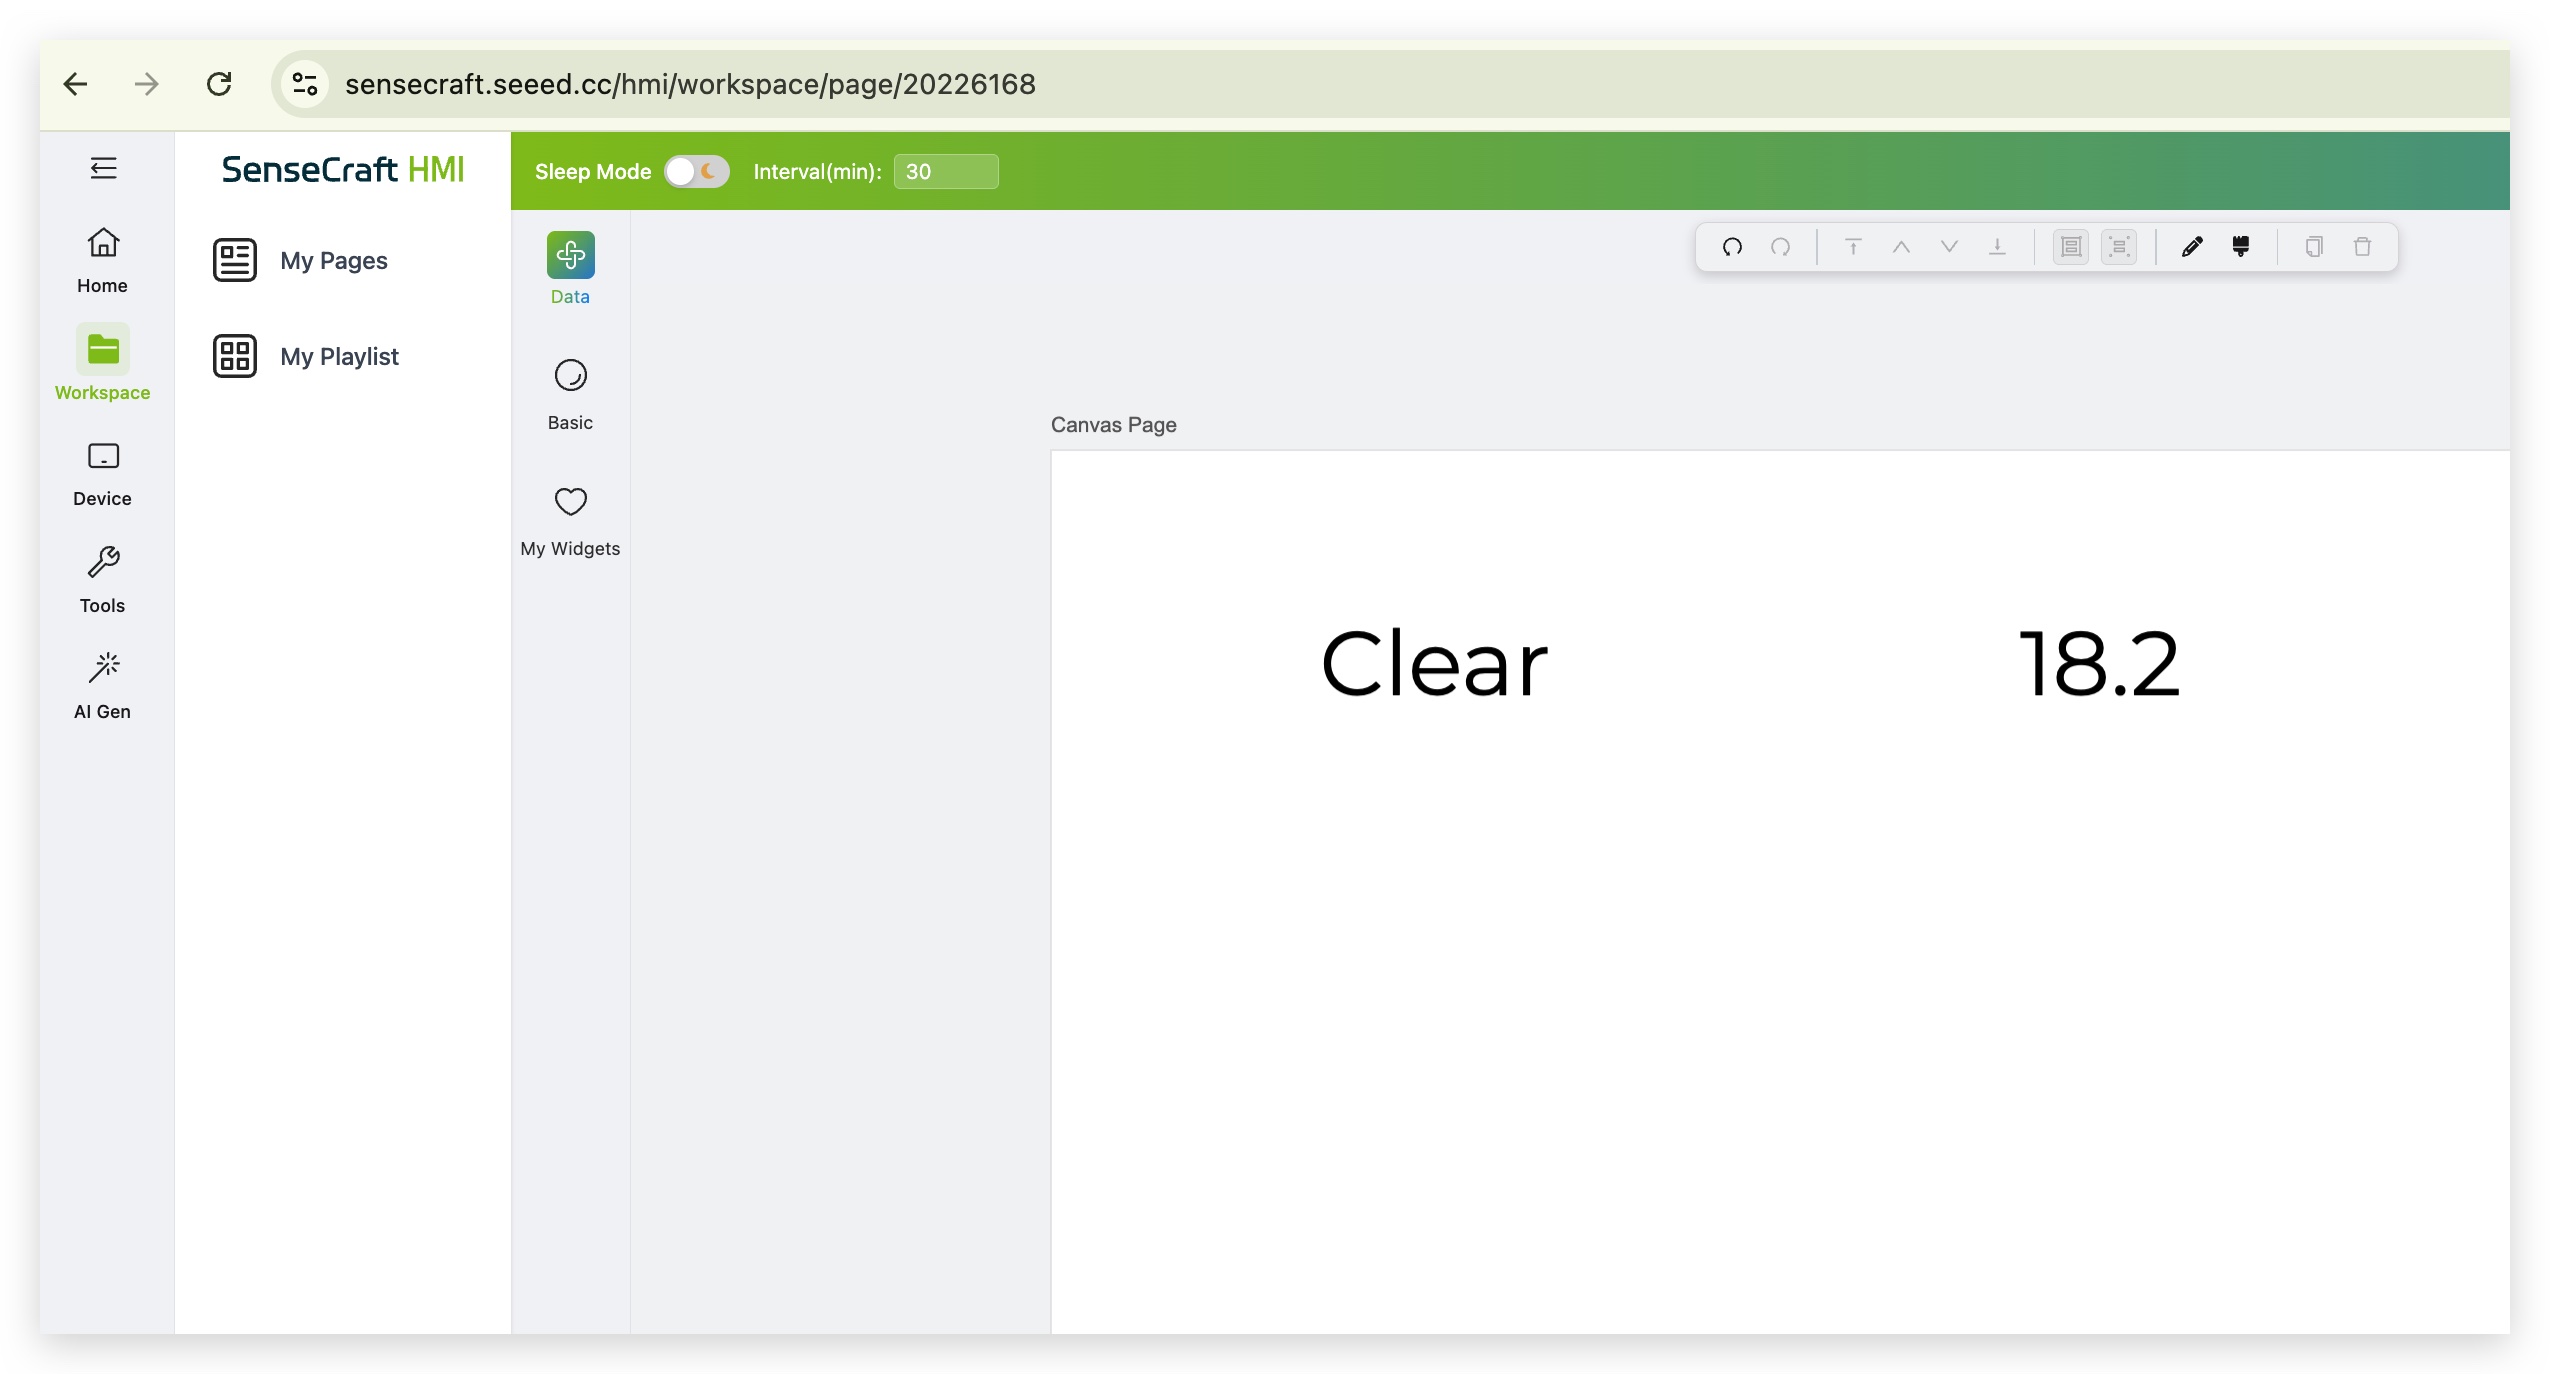
Step 4. In the tree structure, check the data fields you want to display. The selected data will automatically appear on the canvas to the right.
Step 5. Click the Save and Apply button on the top right corner of the canvas to push the data to device.
|
|
Push Data to SenseCraft
Section titled “Push Data to SenseCraft”In addition to pulling external data, we provide the Push to SenseCraft component. This allows you to actively push data from your hardware program (such as Arduino or ESP32 code) to the platform.
Step 1. Ensure your device is connected to the SenseCraft platform and is actively sending data.
Step 2. Select the Push to SenseCraft component from the Data tab.
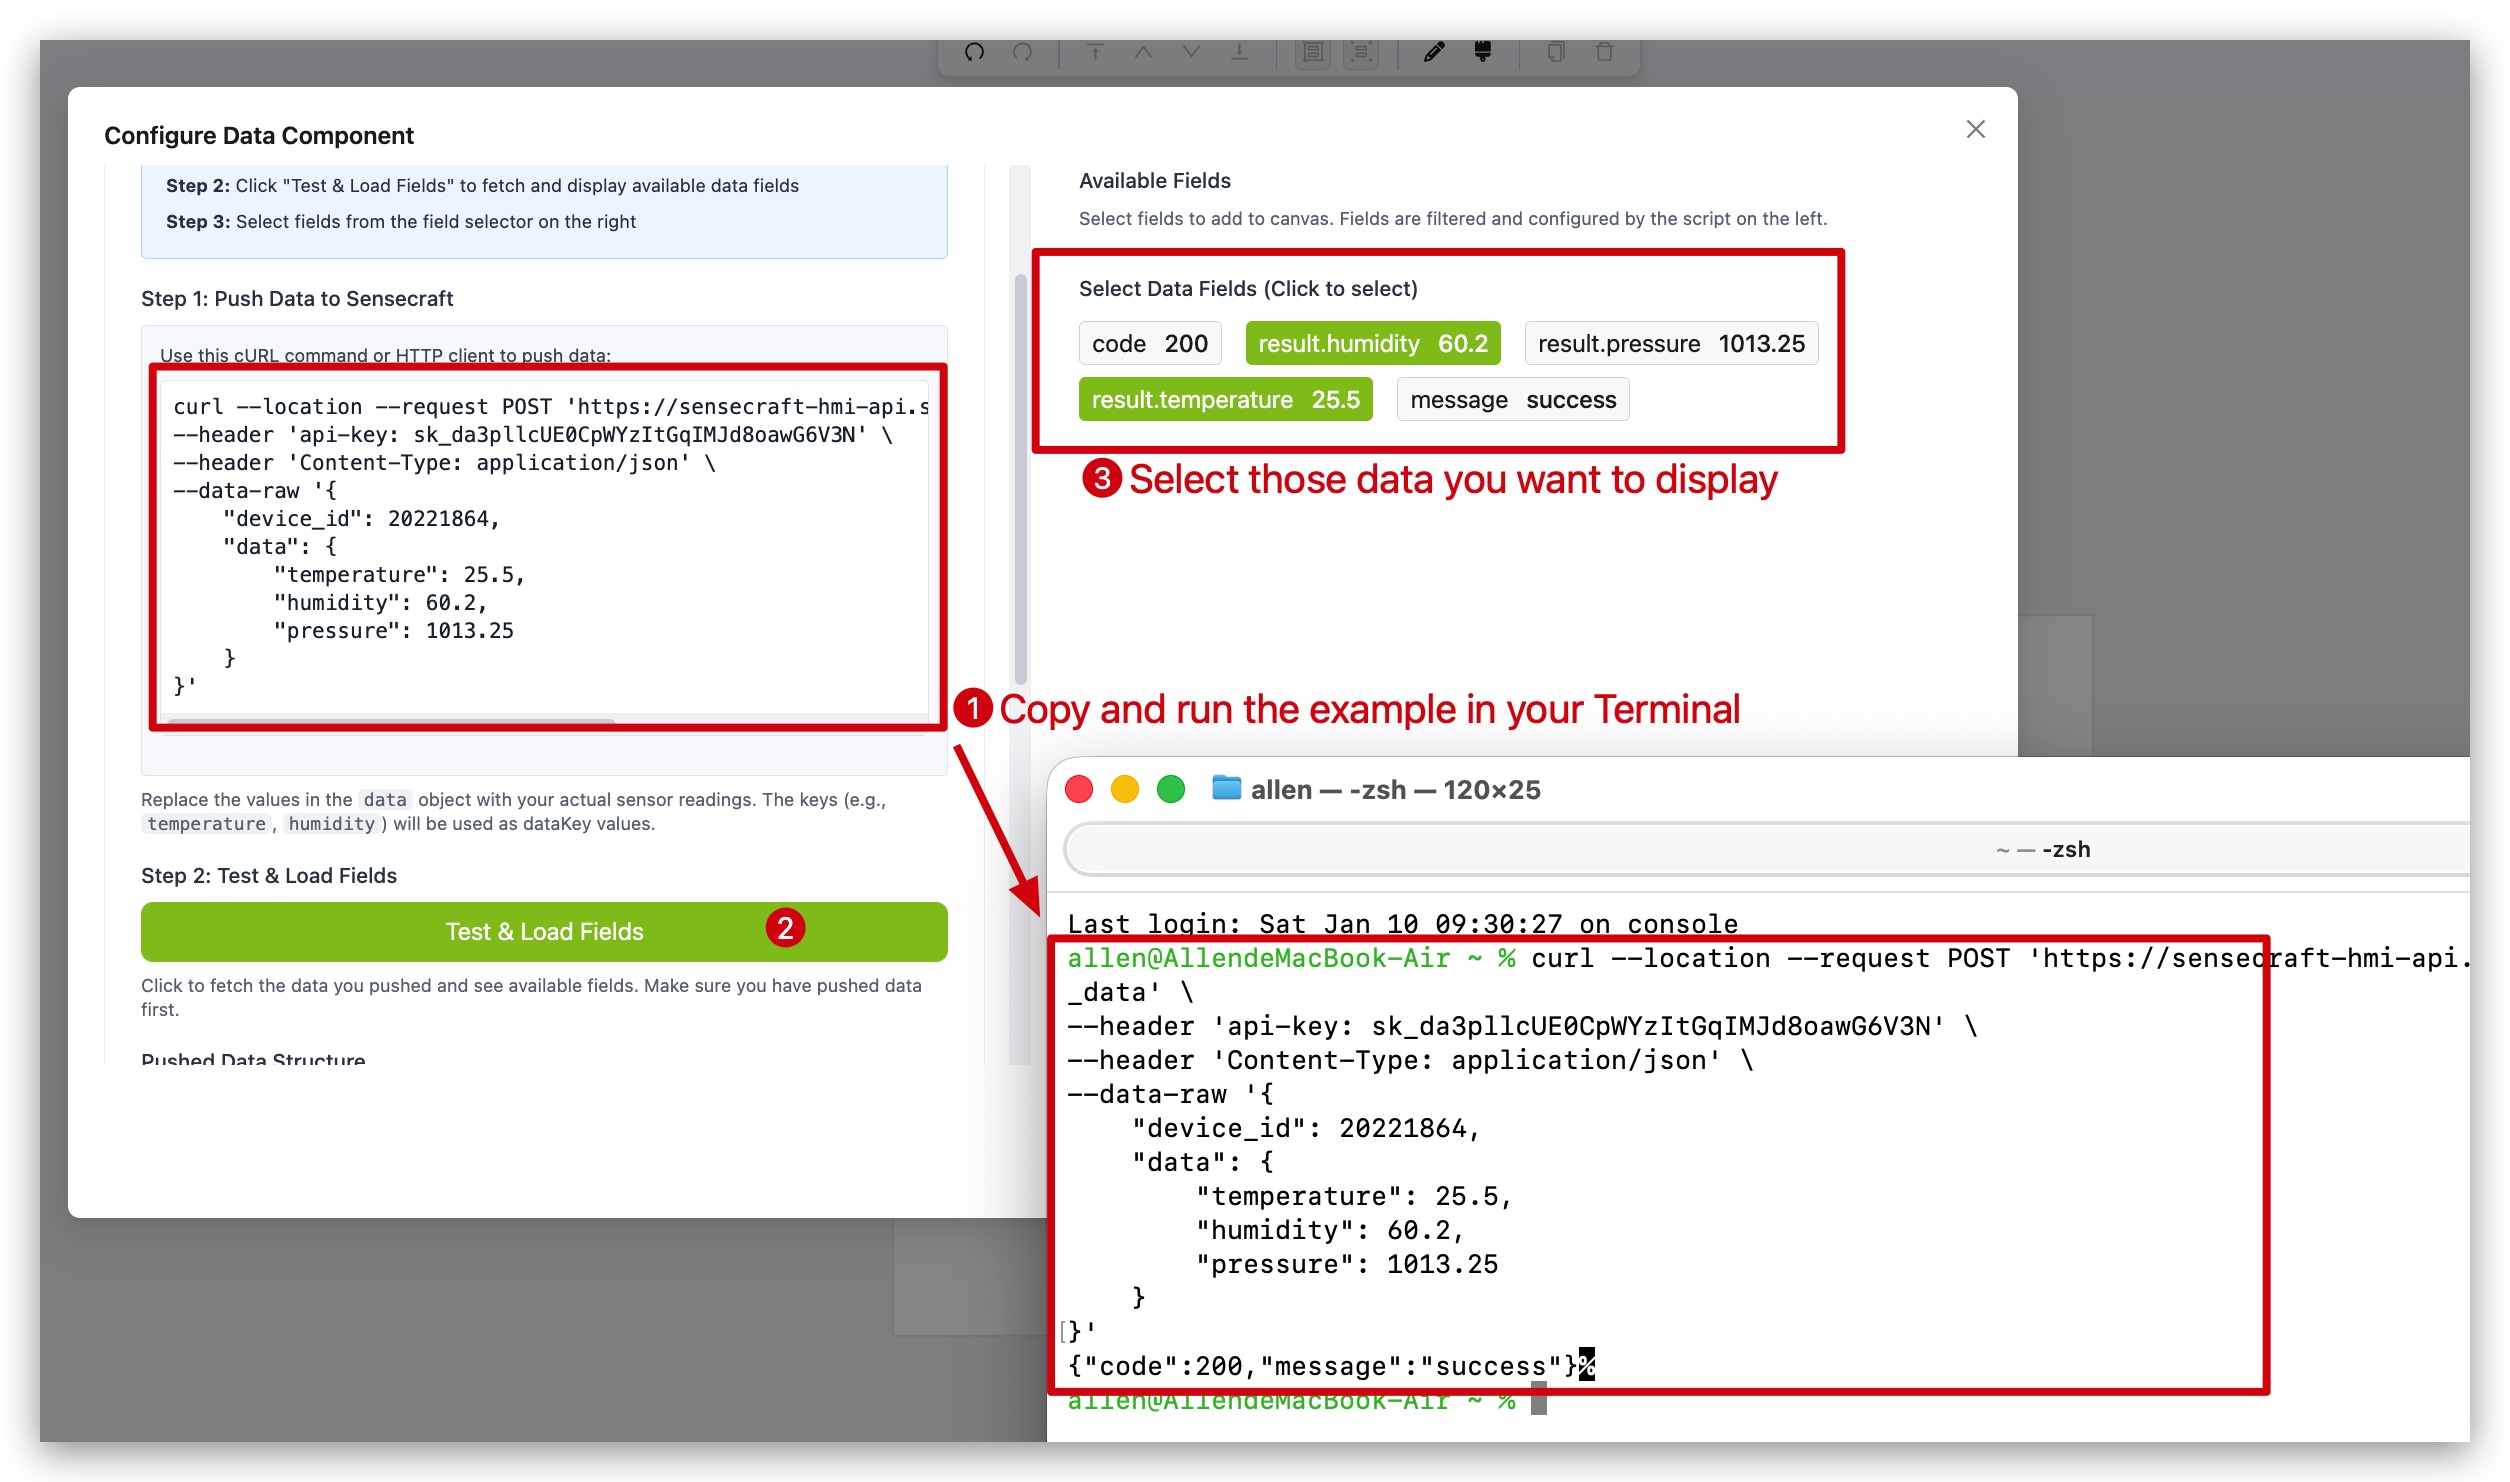
Step 3. Use the demo code to test and the data will immediately appear on the canvas.
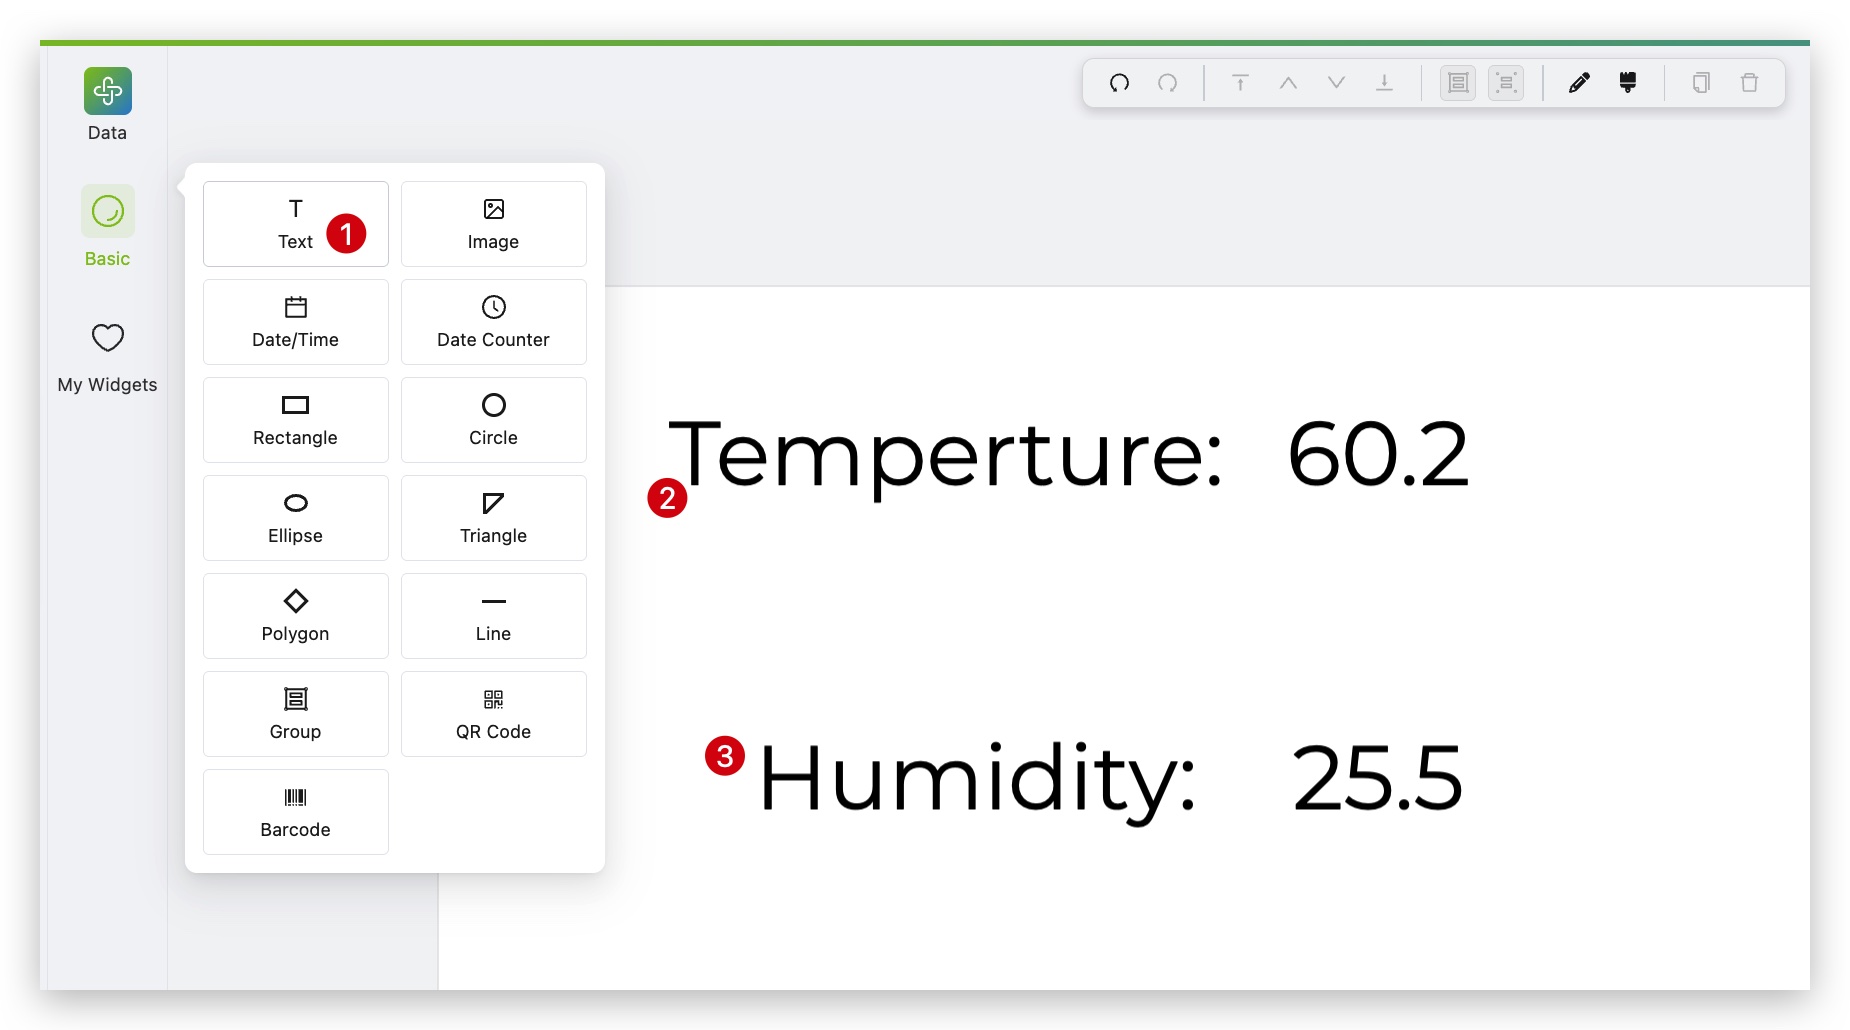
Step 4. Use basic text function to add some description to those data.
Step 5. Click the Save and Apply button on the top right corner of the canvas to push the data to device.
This is extremely useful for real-time monitoring of sensor data such as temperature, humidity, and light levels.
Troubleshooting
Section titled “Troubleshooting”Q1: The API data is not displaying.
Check if the API URL is correct and if the API requires specific Headers or Key authentication. Currently, the External Data Source primarily supports standard JSON response formats.
Q2: No data appears in the “Push to SenseCraft” list.
Please check if your hardware device is successfully connected to the network and confirm that the Topic or ID used for pushing data in your code matches the platform configuration.
Tech Support & Product Discussion
Section titled “Tech Support & Product Discussion”Thank you for choosing our products! We are here to provide you with different support to ensure that your experience with our products is as smooth as possible. We offer several communication channels to cater to different preferences and needs.