Getting Started with HMI Platform
Introduction
Section titled “Introduction”Welcome to the HMI Platform, a powerful and user-friendly interface designed to manage and customize your E-ink display devices. This platform serves as the central hub where you can explore creative templates, design your own dashboards, manage device settings, and optimize images for E-ink technology.
Whether you want to display a simple calendar, track stock markets, or create a personalized photo album, the HMI Platform streamlines the process from design to deployment.
Home Page: Exploring Templates
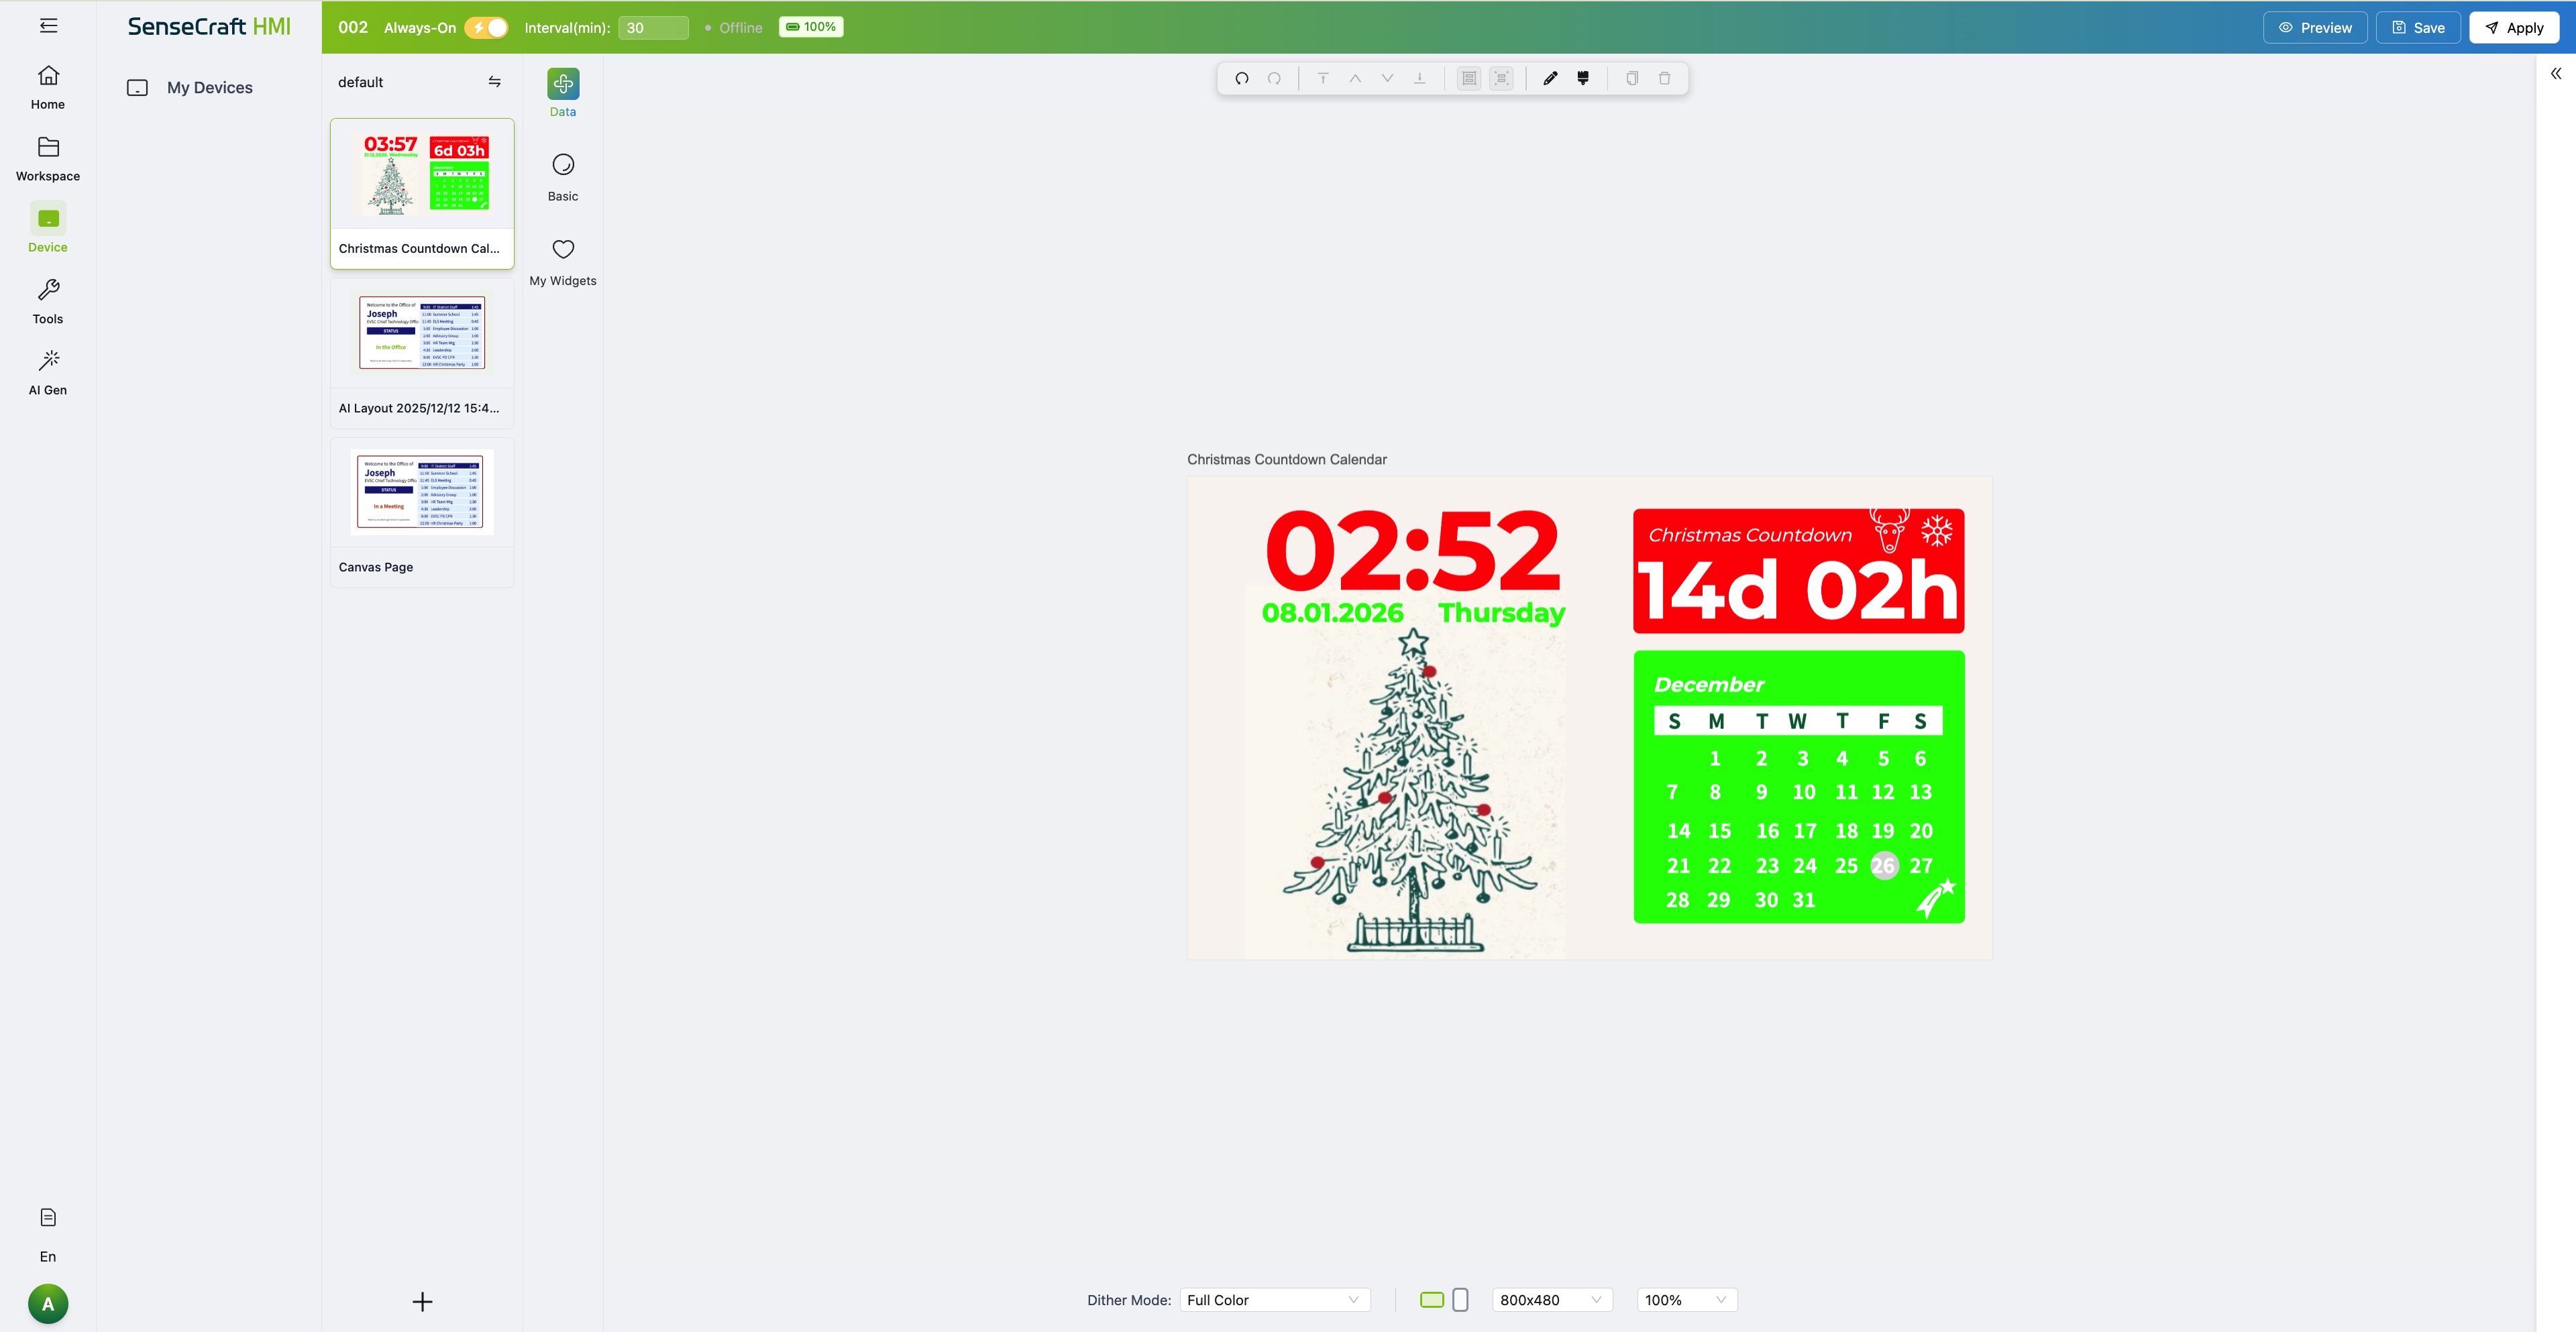
Section titled “Home Page: Exploring Templates”The Home Page is your starting point for creativity. It features a diverse collection of templates, ranging from monochromatic styles to colorful designs suitable for various E-ink displays.
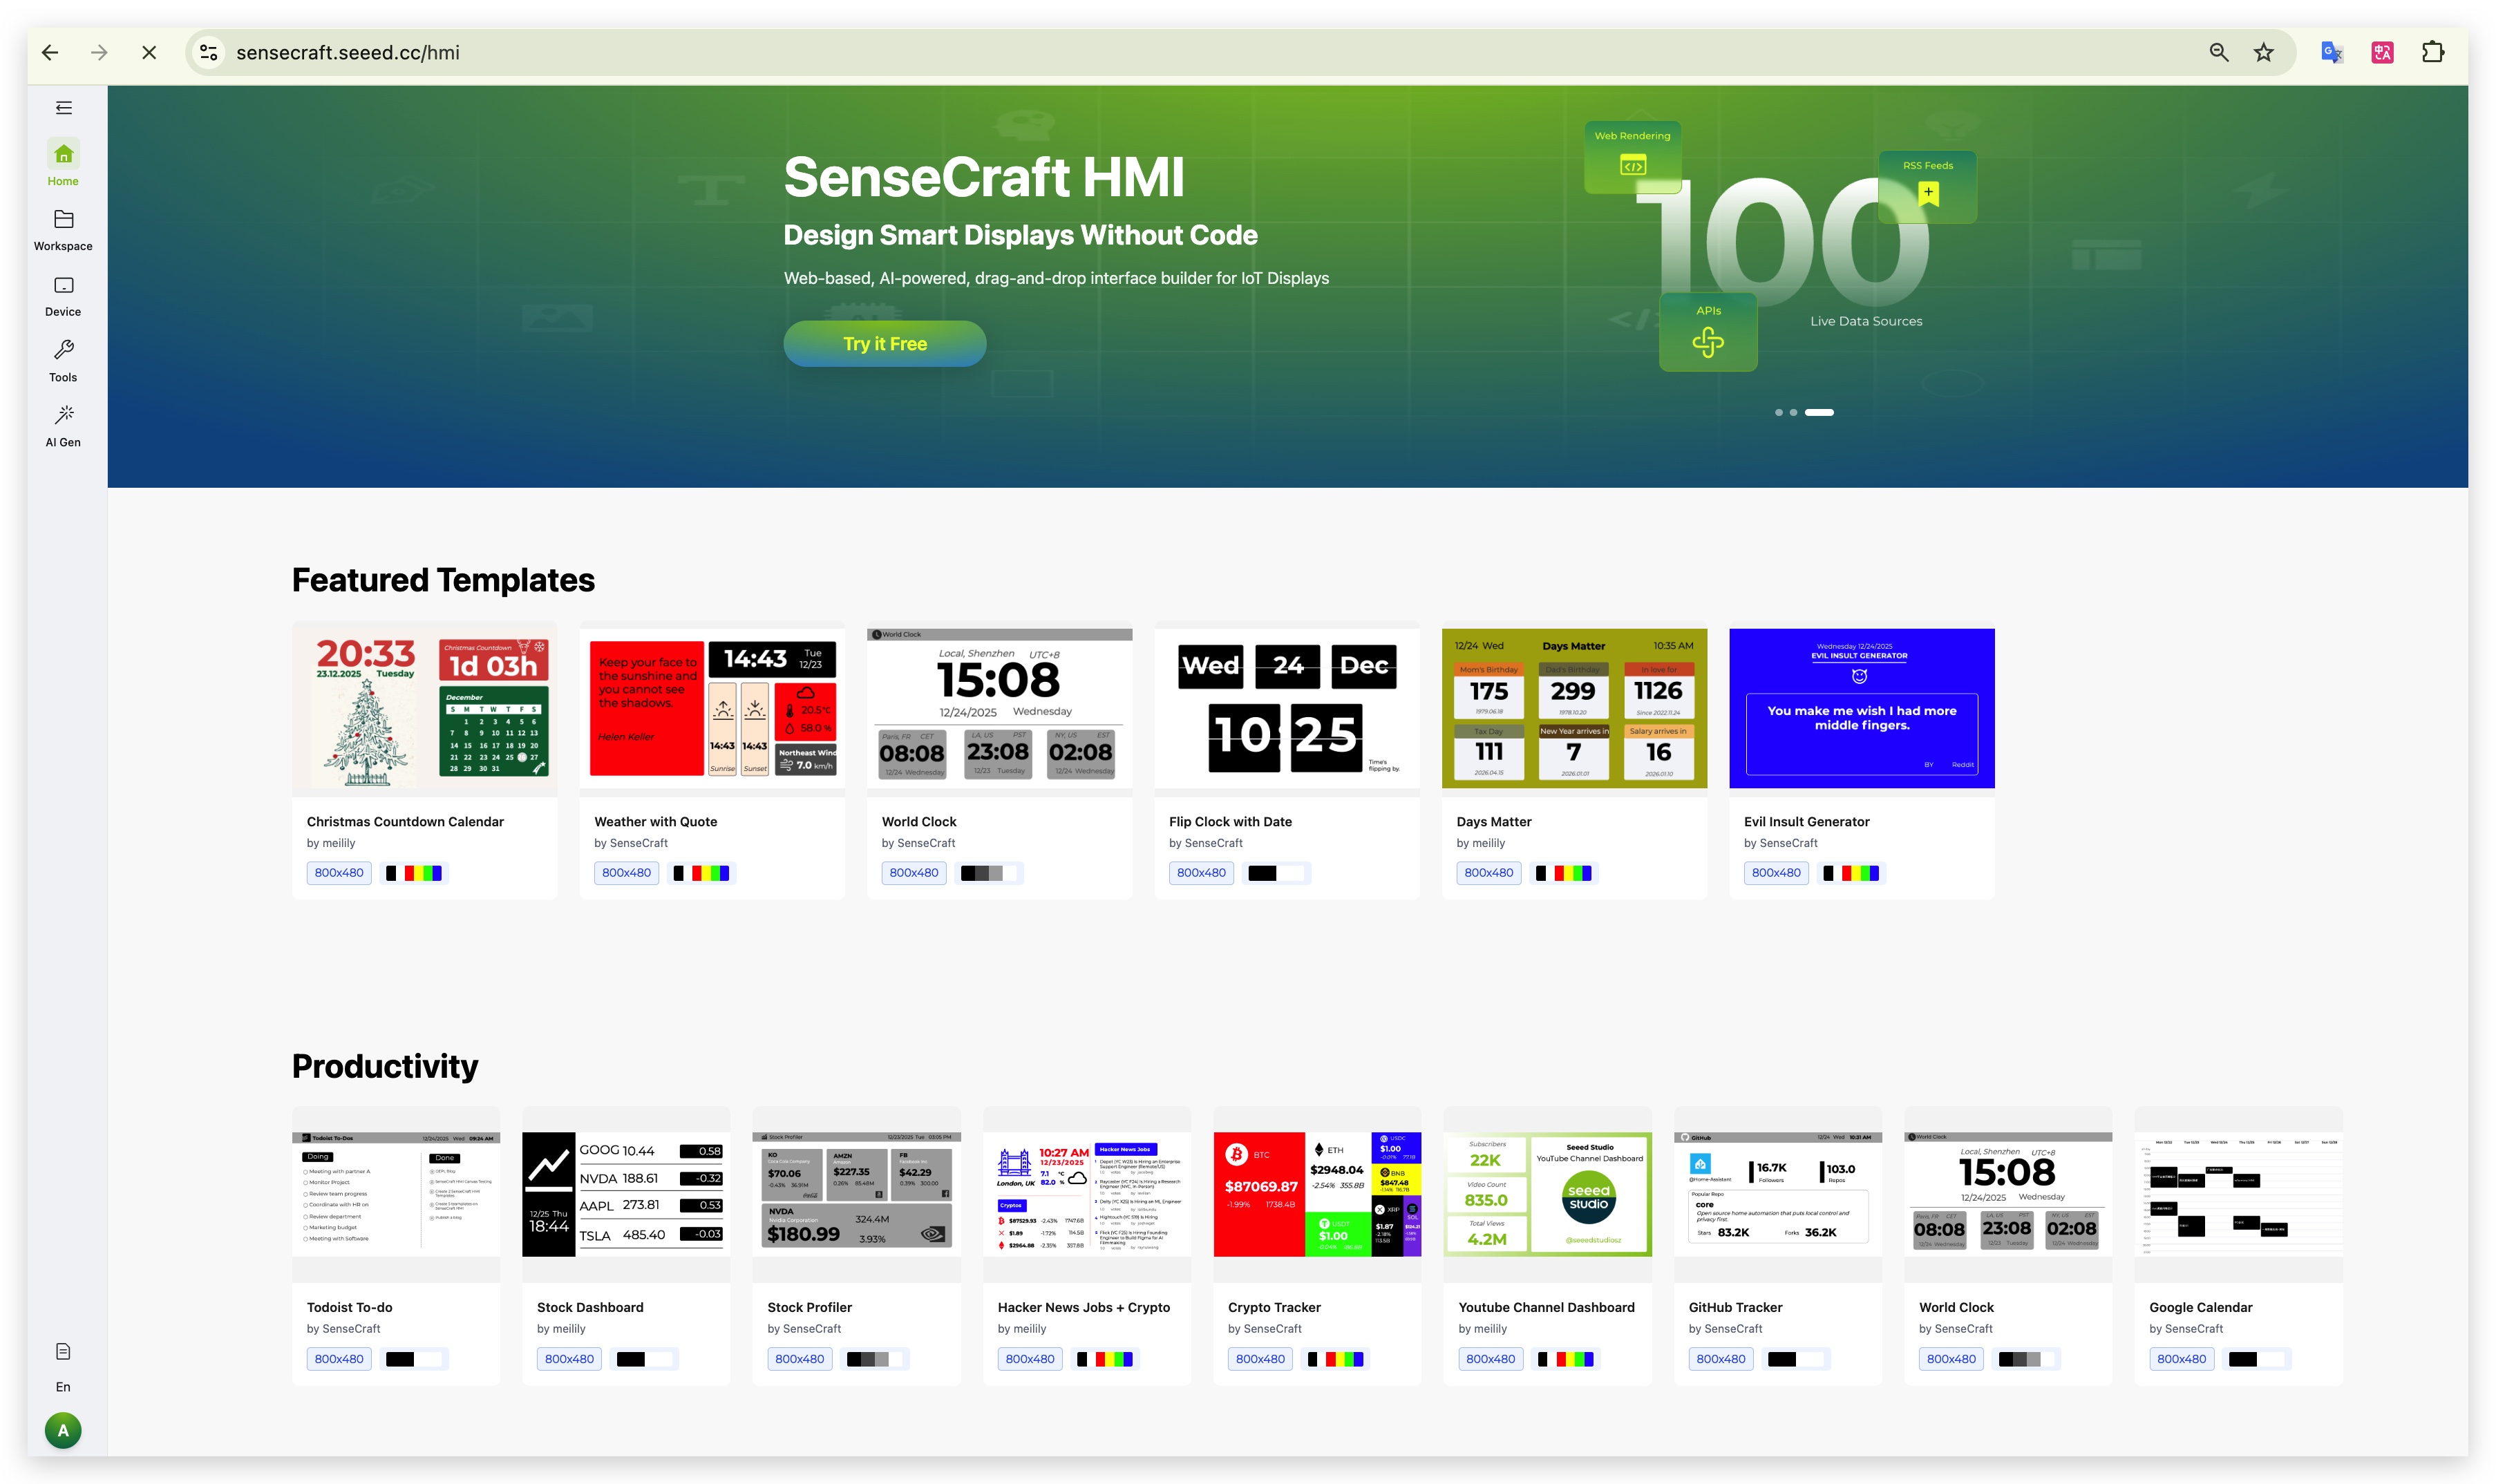
Step 1. Browse the template gallery. We currently offer more than 30+ templates covering various scenarios such as:
- Productivity: Google Calendar, Github Tracker
- Lifestyle: Weather Station, Days Matter
- Finance: Stock Dashboard
Step 2. Select a template that interests you. Once clicked, the template will automatically load into your personal Workspace.
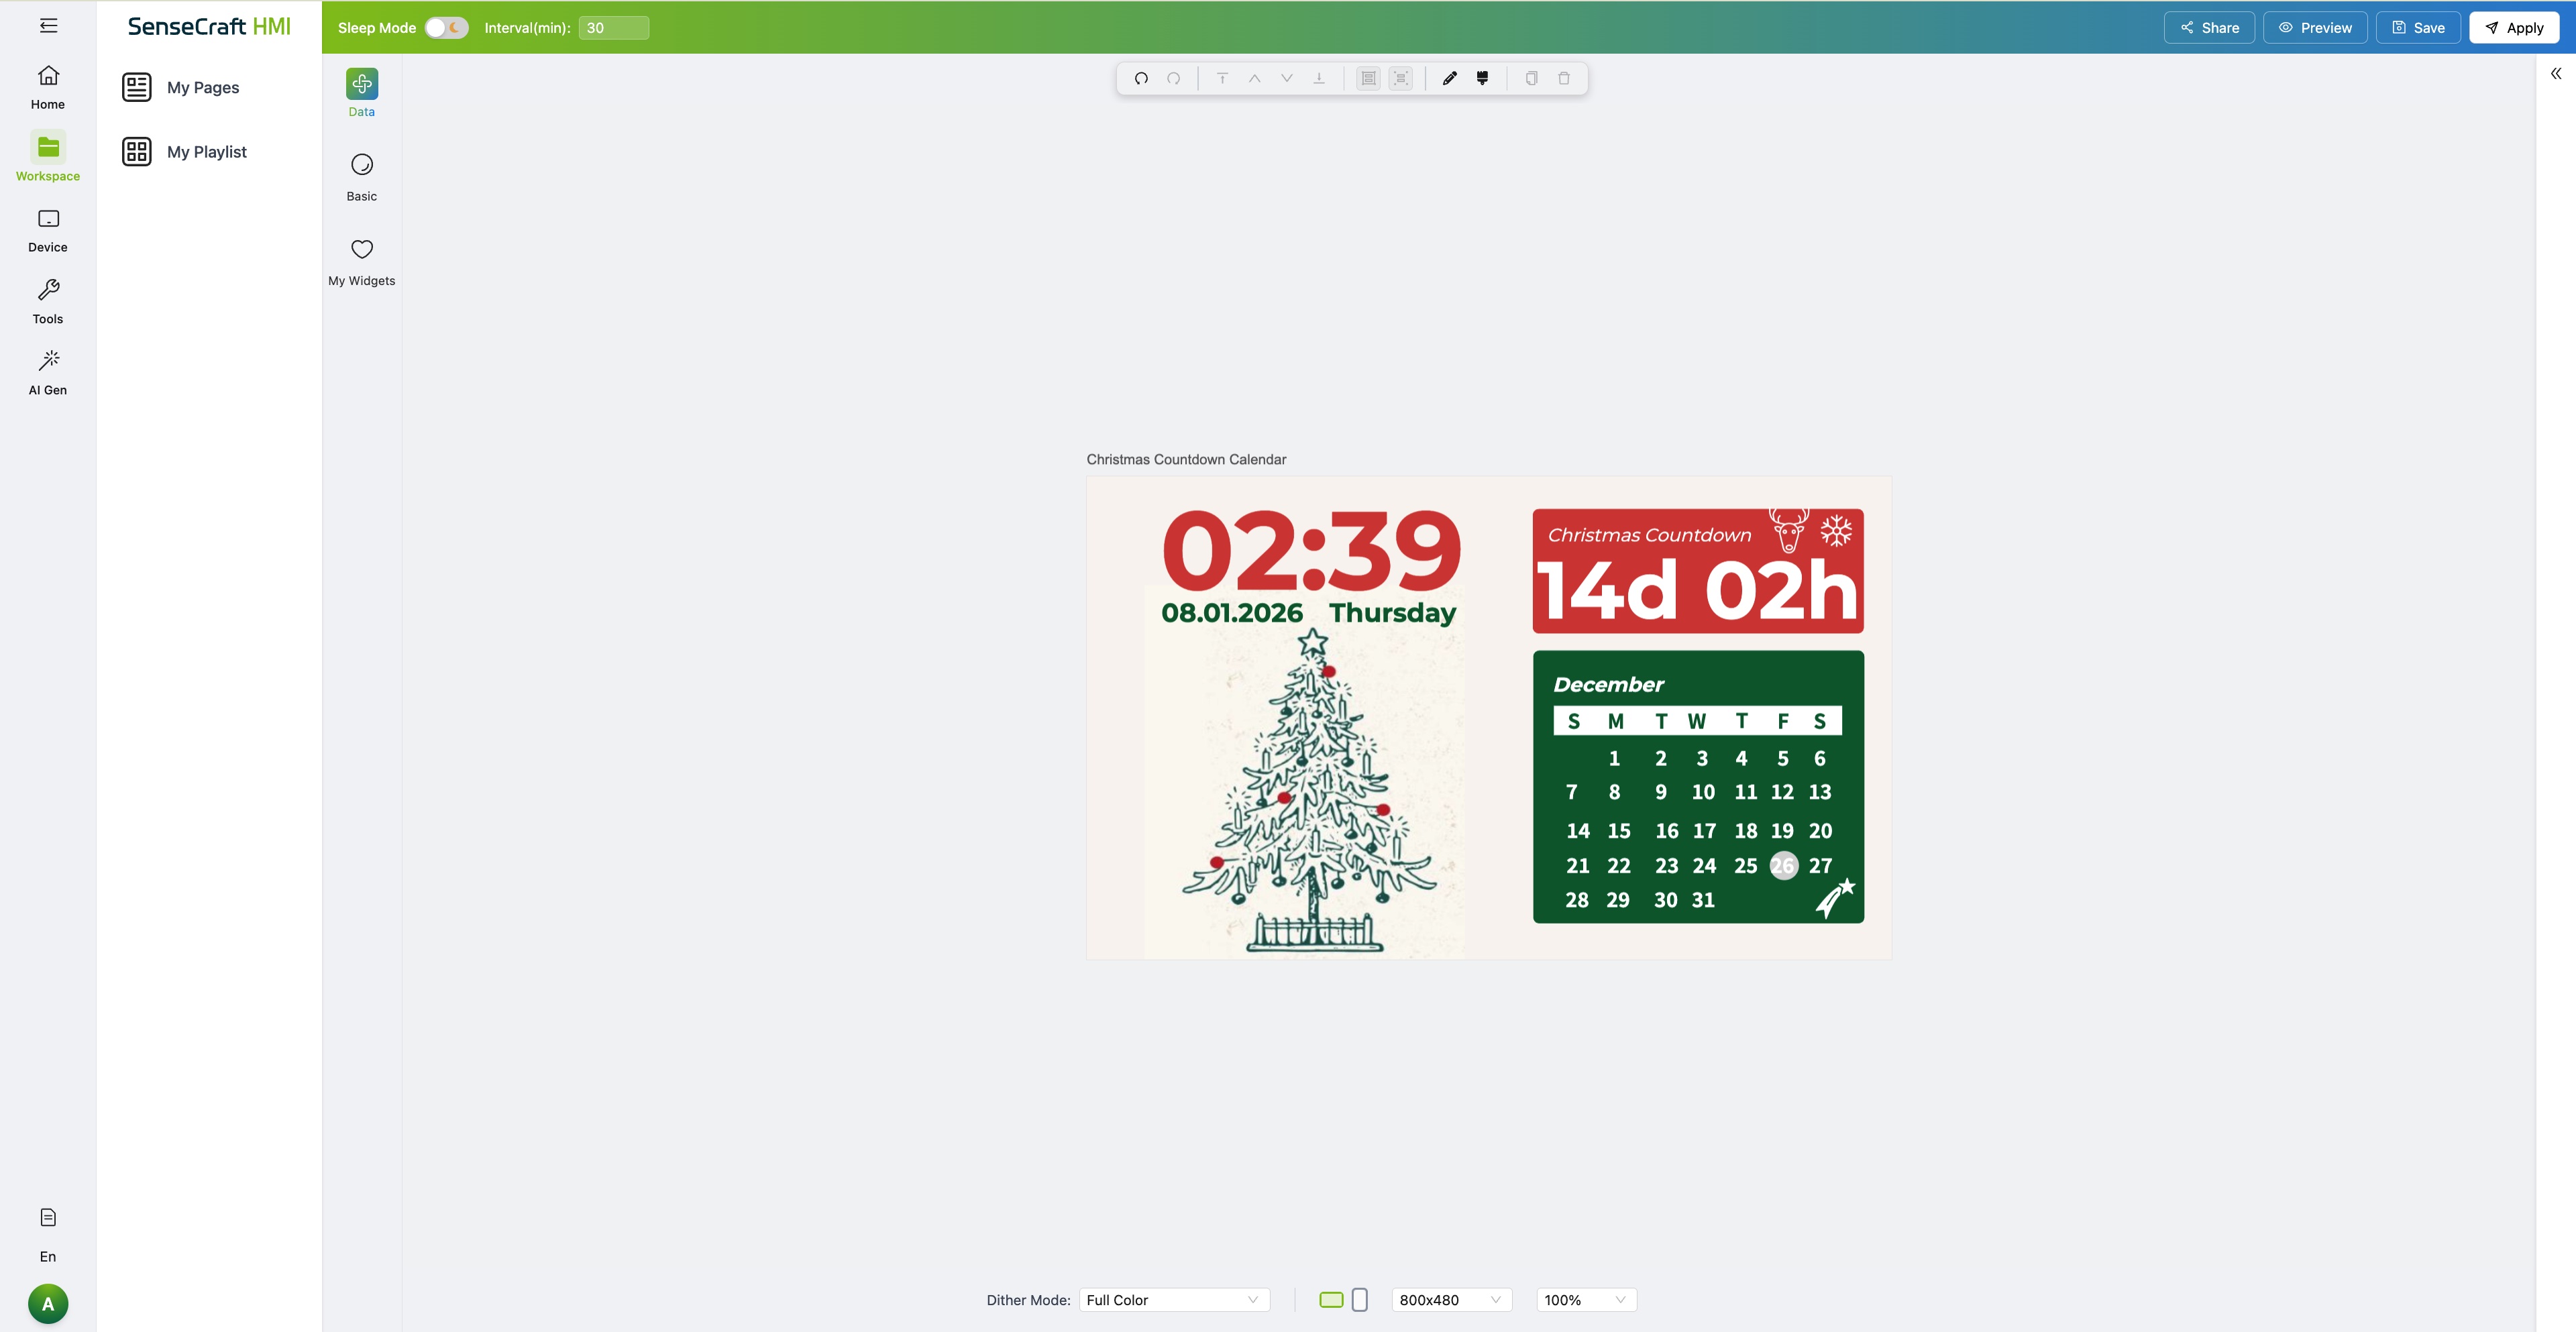
Step 3. In the Workspace, you can modify the template to suit your preferences (e.g., changing location for weather, adding personal events).
Step 4. Click the Save button in the top right corner to store the customized template in your personal library.
Step 5. Click the Apply button in the top right corner to apply this page into your device.
Workspace: Designing Your Content
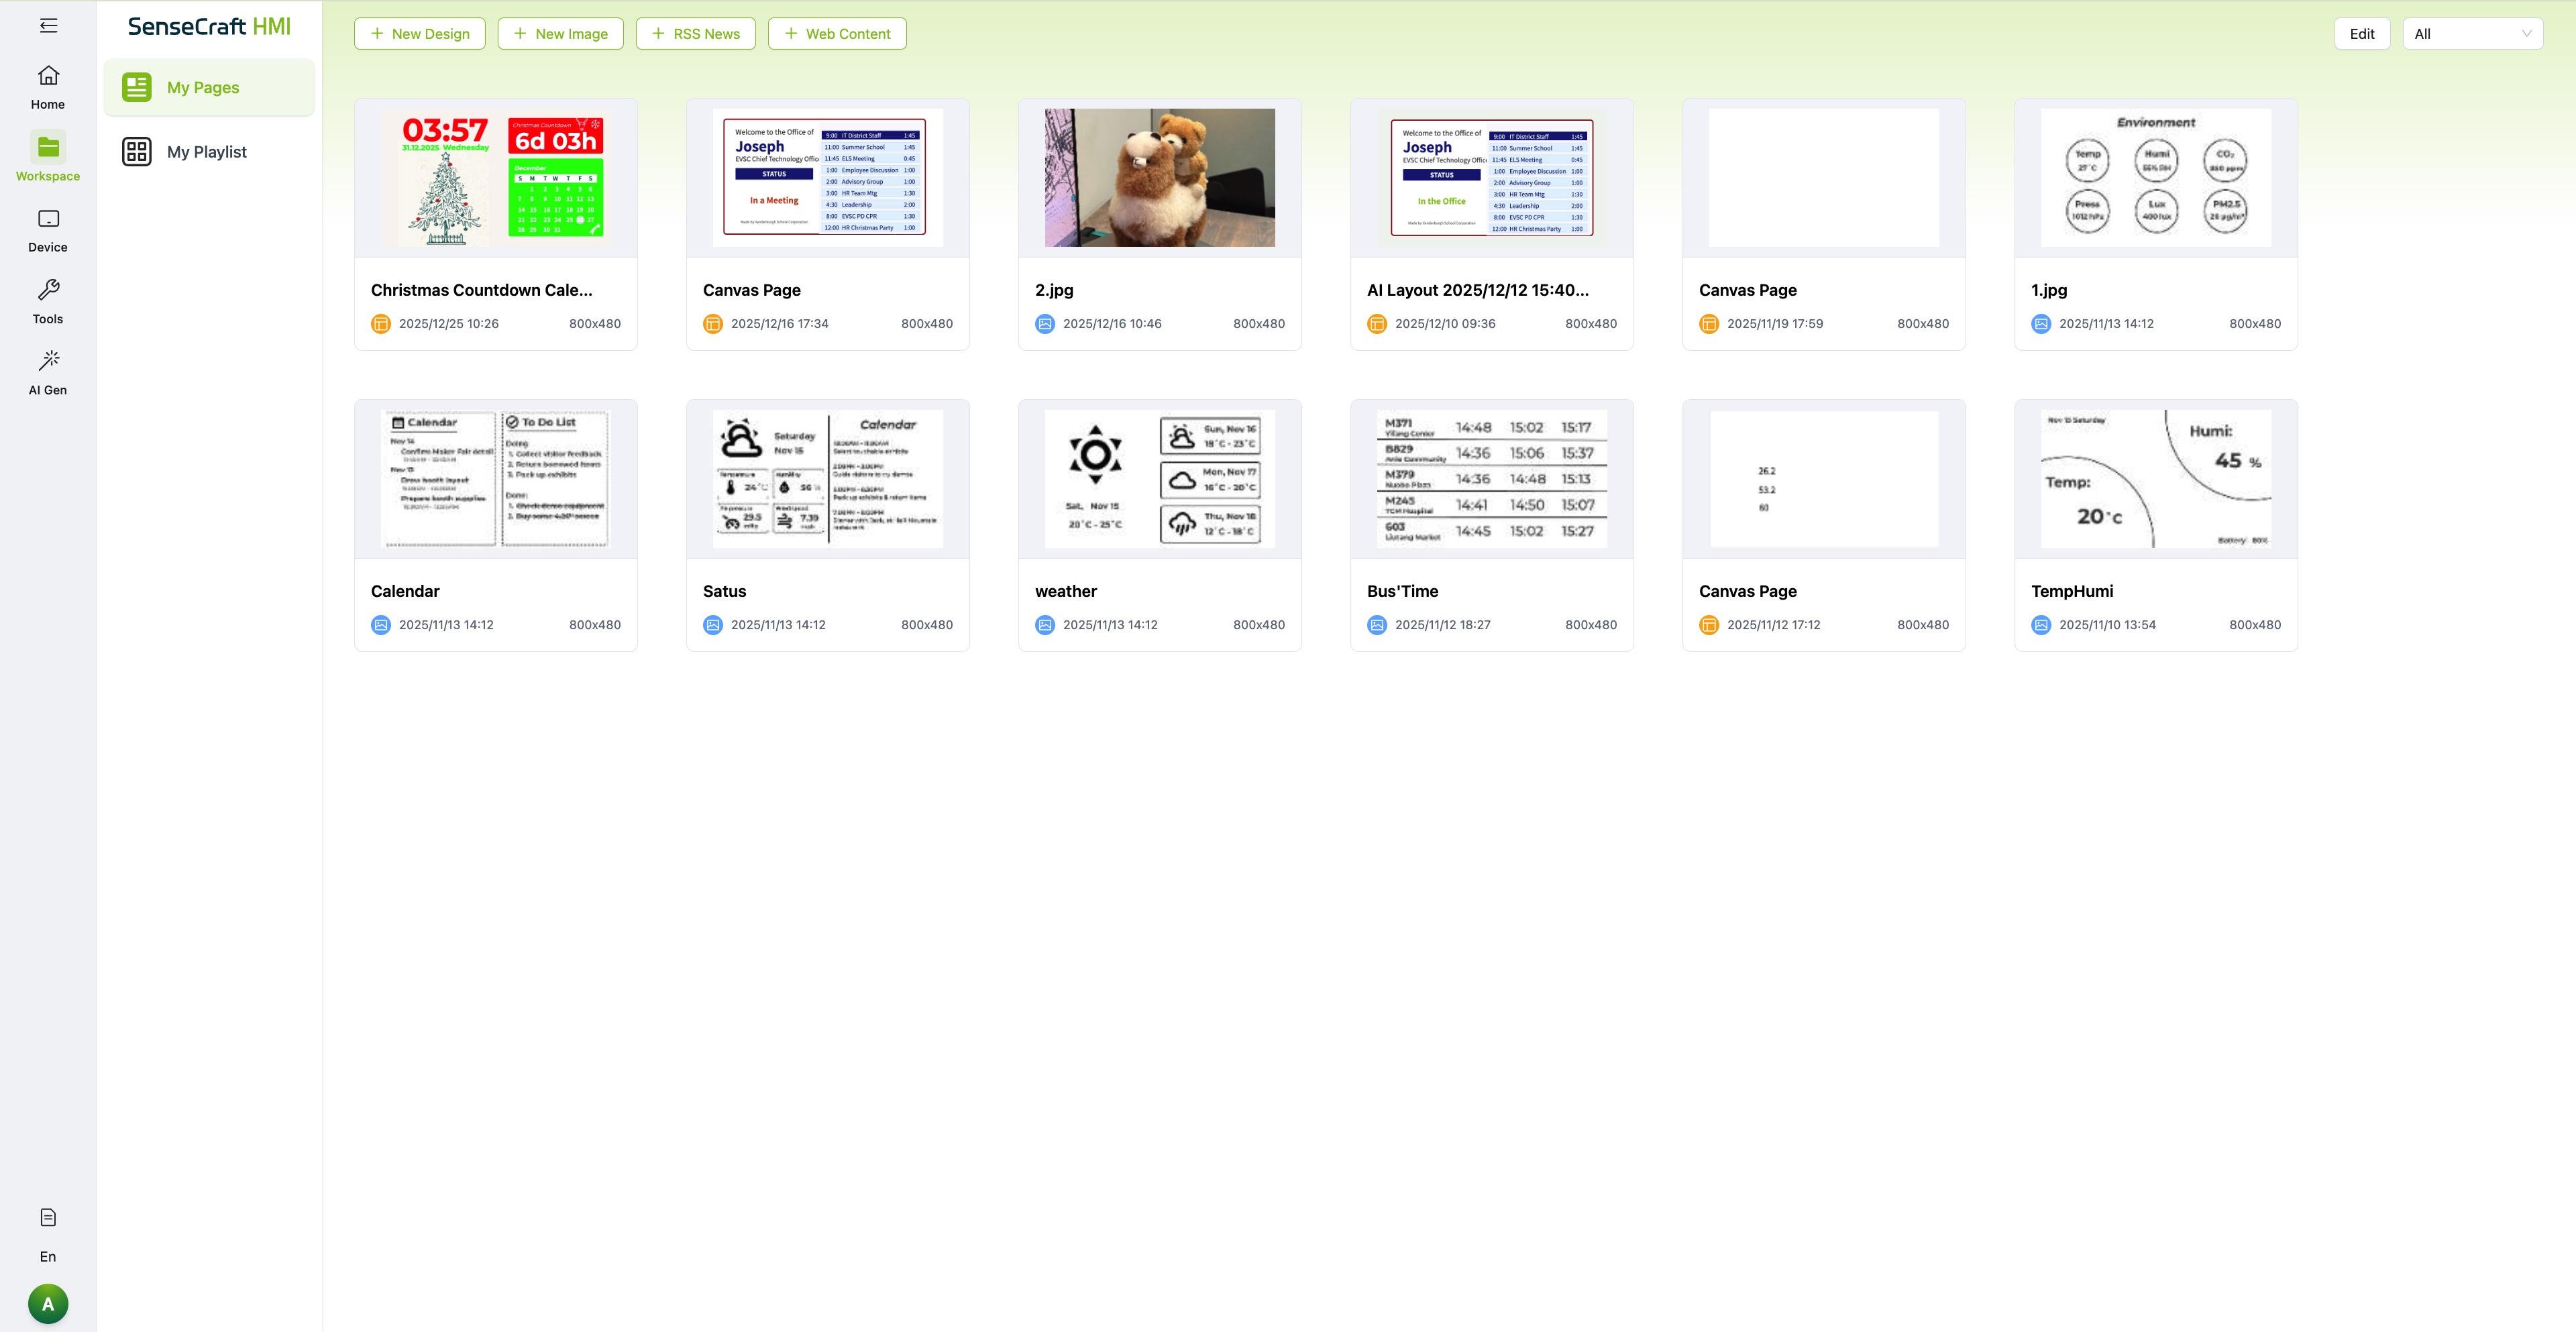
Section titled “Workspace: Designing Your Content”The Workspace is your personal design studio. Here, you manage all your creative assets and organize how they appear on your device.
Creating Content
Section titled “Creating Content”You can create a new page to design custom layouts including:
- Design Elements: Basic shapes and text.
- Images: Upload personal photos.
- RSS Feeds: Display news or blog updates.
- Web Content: Embed web-based information.
Organizing Playlists
Section titled “Organizing Playlists”You can combine multiple pages into a Playlist or Album. When synchronized to the device, these pages will rotate automatically based on the device’s interval settings.
Device: Management and Settings
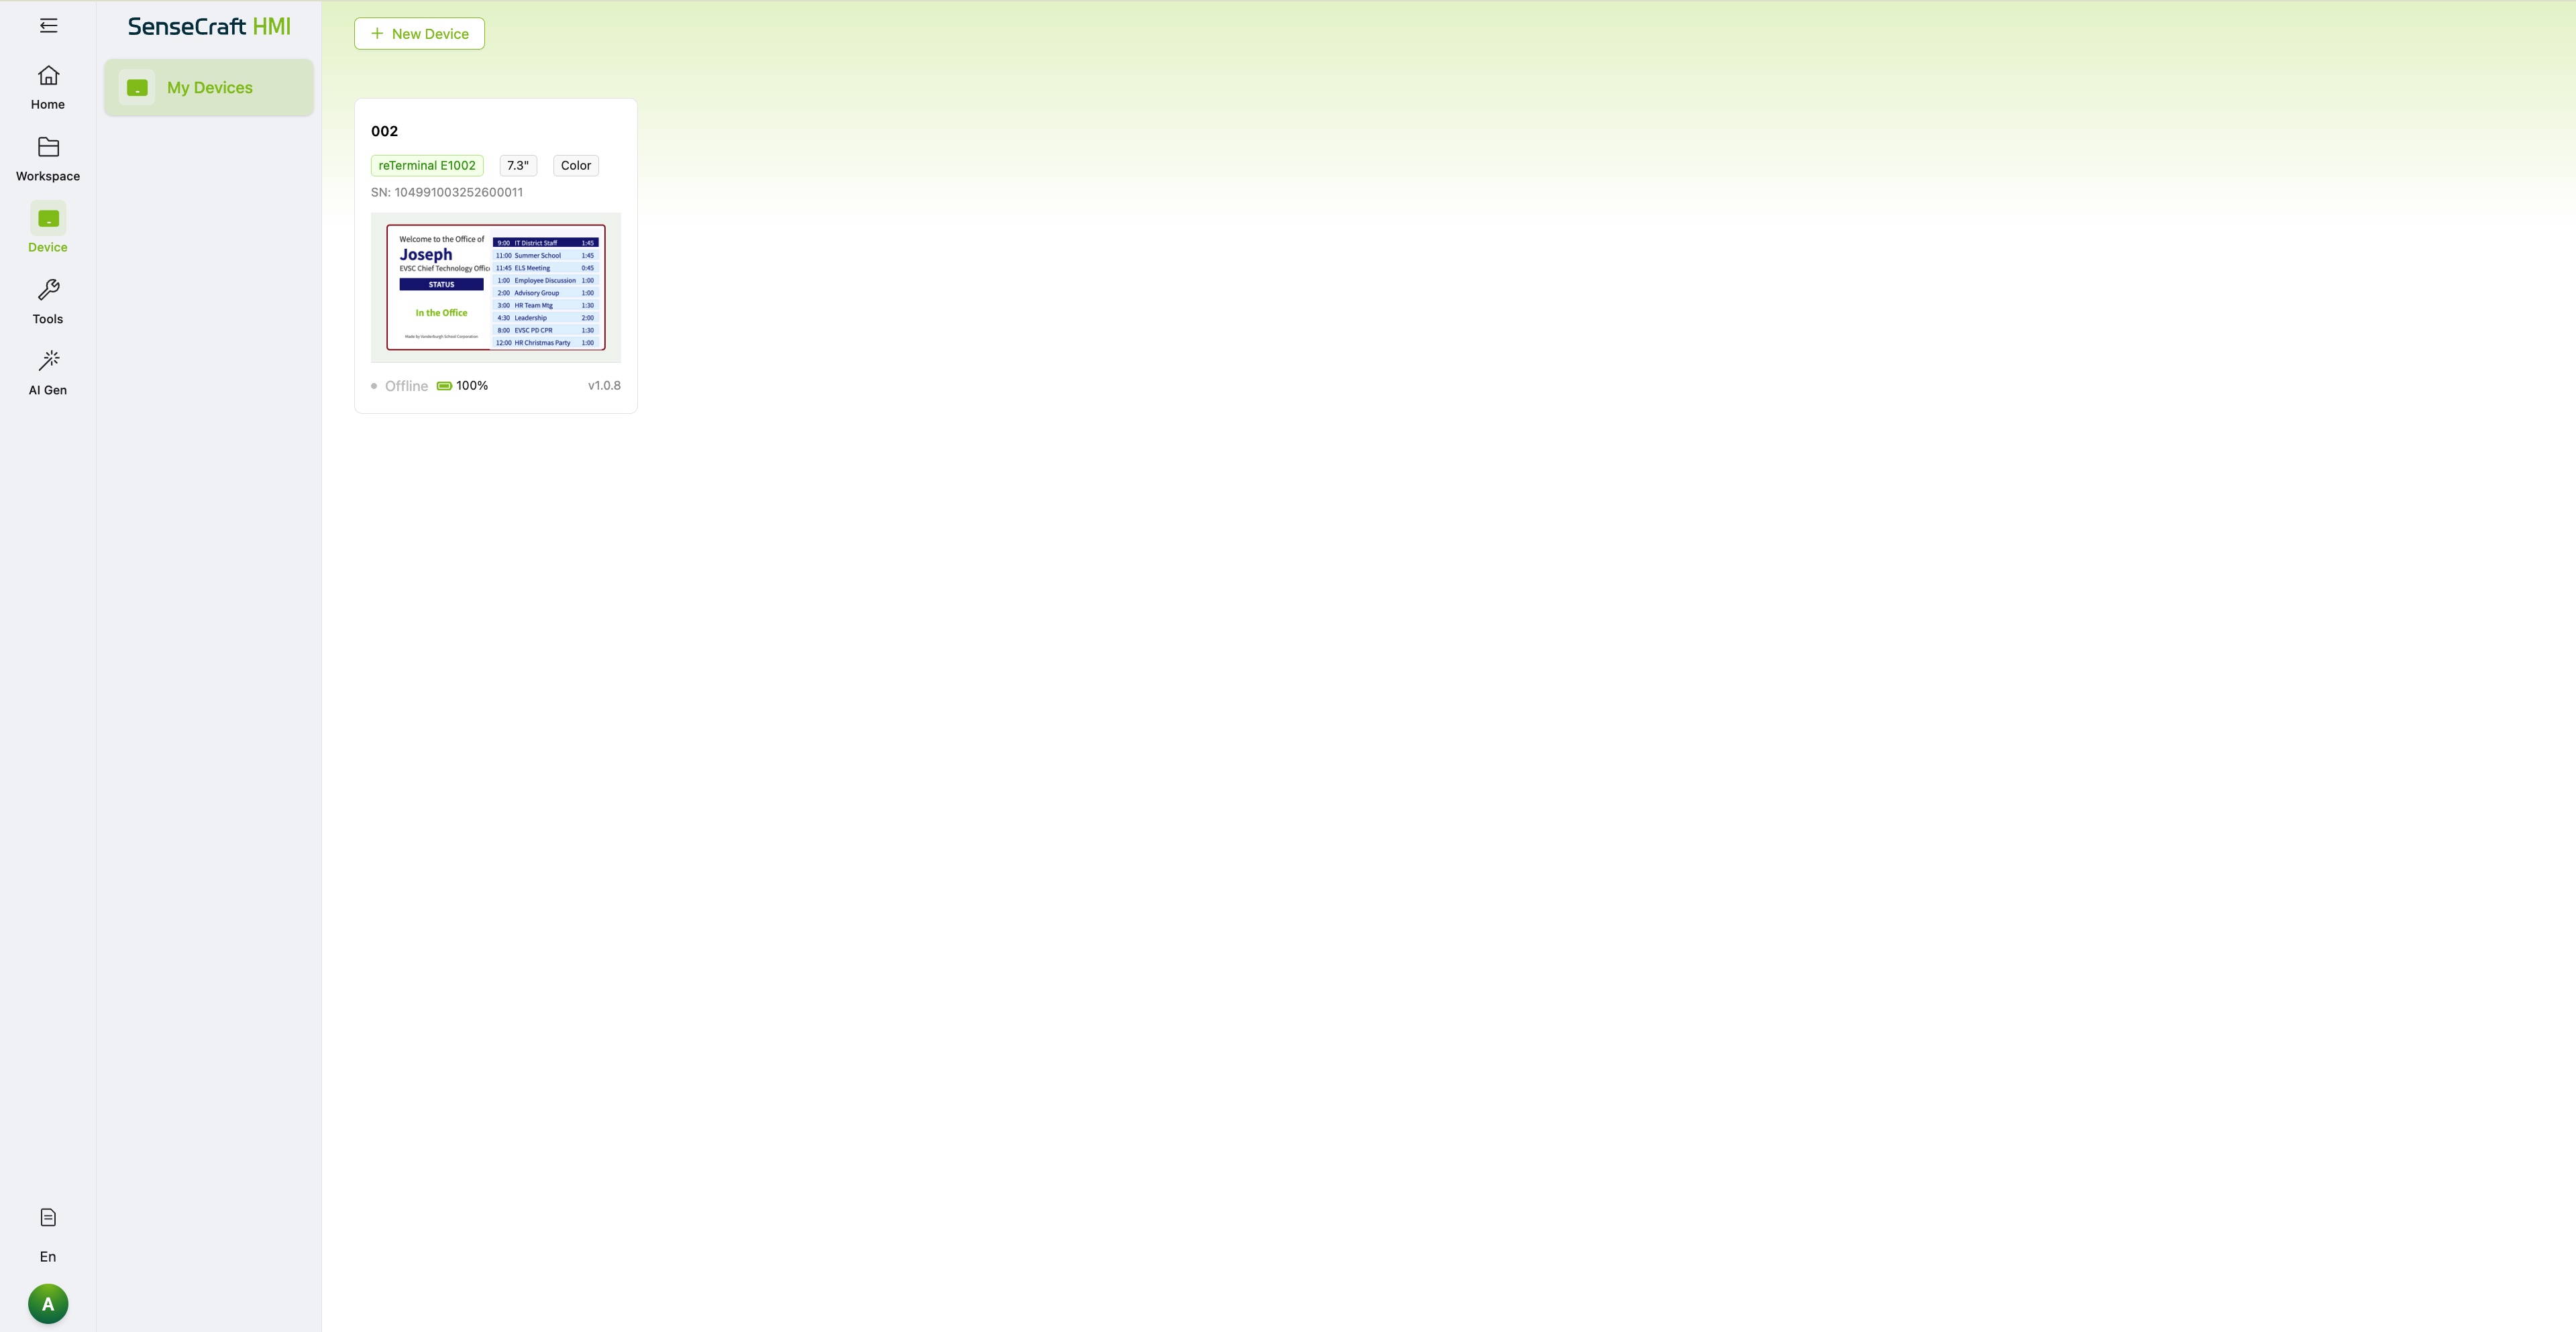
Section titled “Device: Management and Settings”The Device page is the command center for your hardware. It allows you to bind new devices and configure their behavior.
Pairing a New Device
Section titled “Pairing a New Device”Step 1. Click the New Device button.
Step 2. Enter the Pairing Code displayed on your E-ink device screen.
Step 3. Once verified, the device will be bound to your account and appear in the device list.
Device Configuration
Section titled “Device Configuration”Click on a specific device to access its detailed settings page. Here you can manage the content queue and view status indicators.
Top Bar Indicators
Section titled “Top Bar Indicators”- Battery Level: Shows the current power status of the device.
- Interval Time: Sets the duration a page is displayed before switching to the next one (or before the device goes back to sleep).
Operation Modes
Section titled “Operation Modes”The platform supports two primary modes, which can be toggled via the top bar:
-
Always On Mode:
- The device remains active and does not enter sleep mode.
- Best for: Debugging, real-time updates, or when testing new designs.
- Note: This mode consumes more power.
-
Sleep Mode:
- The device wakes up periodically based on the Interval Time, updates the display, and then returns to deep sleep.
- Best for: Daily use.
- Benefit: Extremely power-efficient. Depending on the interval settings, the device can last approximately 3 months on a single charge.
Tools: Advanced Utilities
Section titled “Tools: Advanced Utilities”The Tools section provides essential utilities for firmware management and image processing.
Firmware Flashing
Section titled “Firmware Flashing”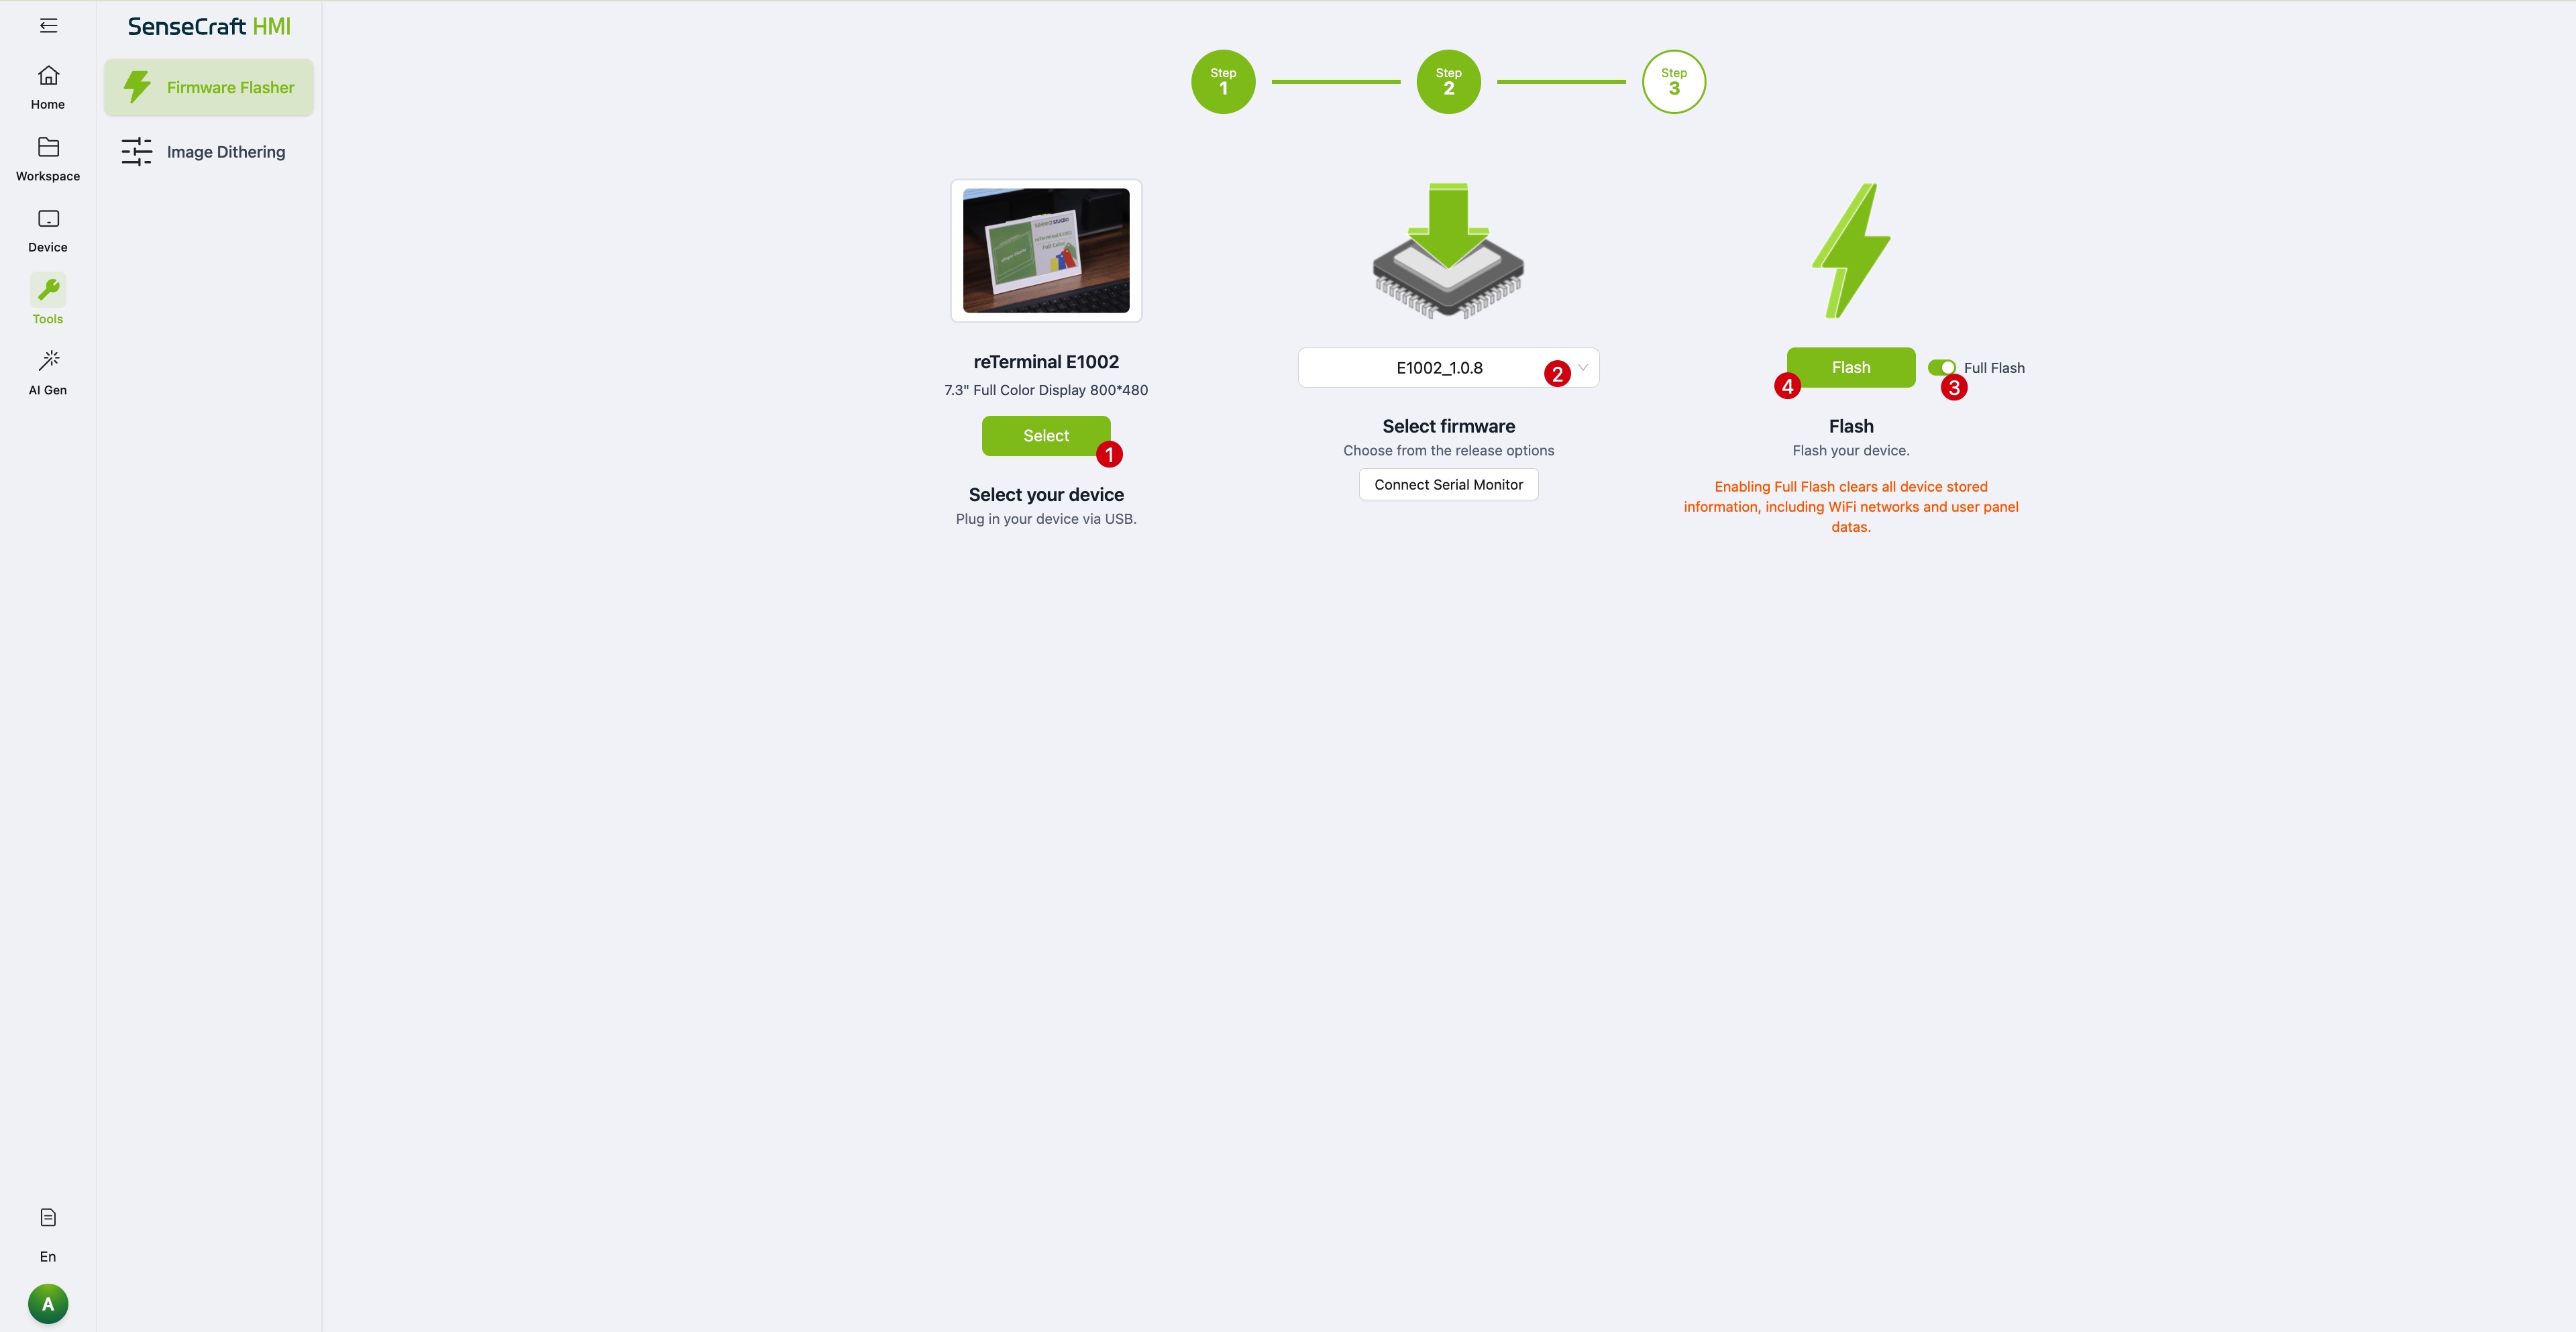
Our devices come pre-loaded with the standard HMI firmware. However, if you have experimented with third-party firmware (such as Home Assistant or Arduino) and wish to revert to the original factory state, use this tool.
- Full Flash: Use this when reverting from a different firmware (e.g., Arduino/ESPHome) back to the HMI firmware. This performs a complete wipe and rewrite.
- Standard Update: If you are simply upgrading the HMI firmware version (e.g., from v1.0.7 to v1.0.8), a Full Flash is not required. The standard update is faster.
Image Dithering
Section titled “Image Dithering”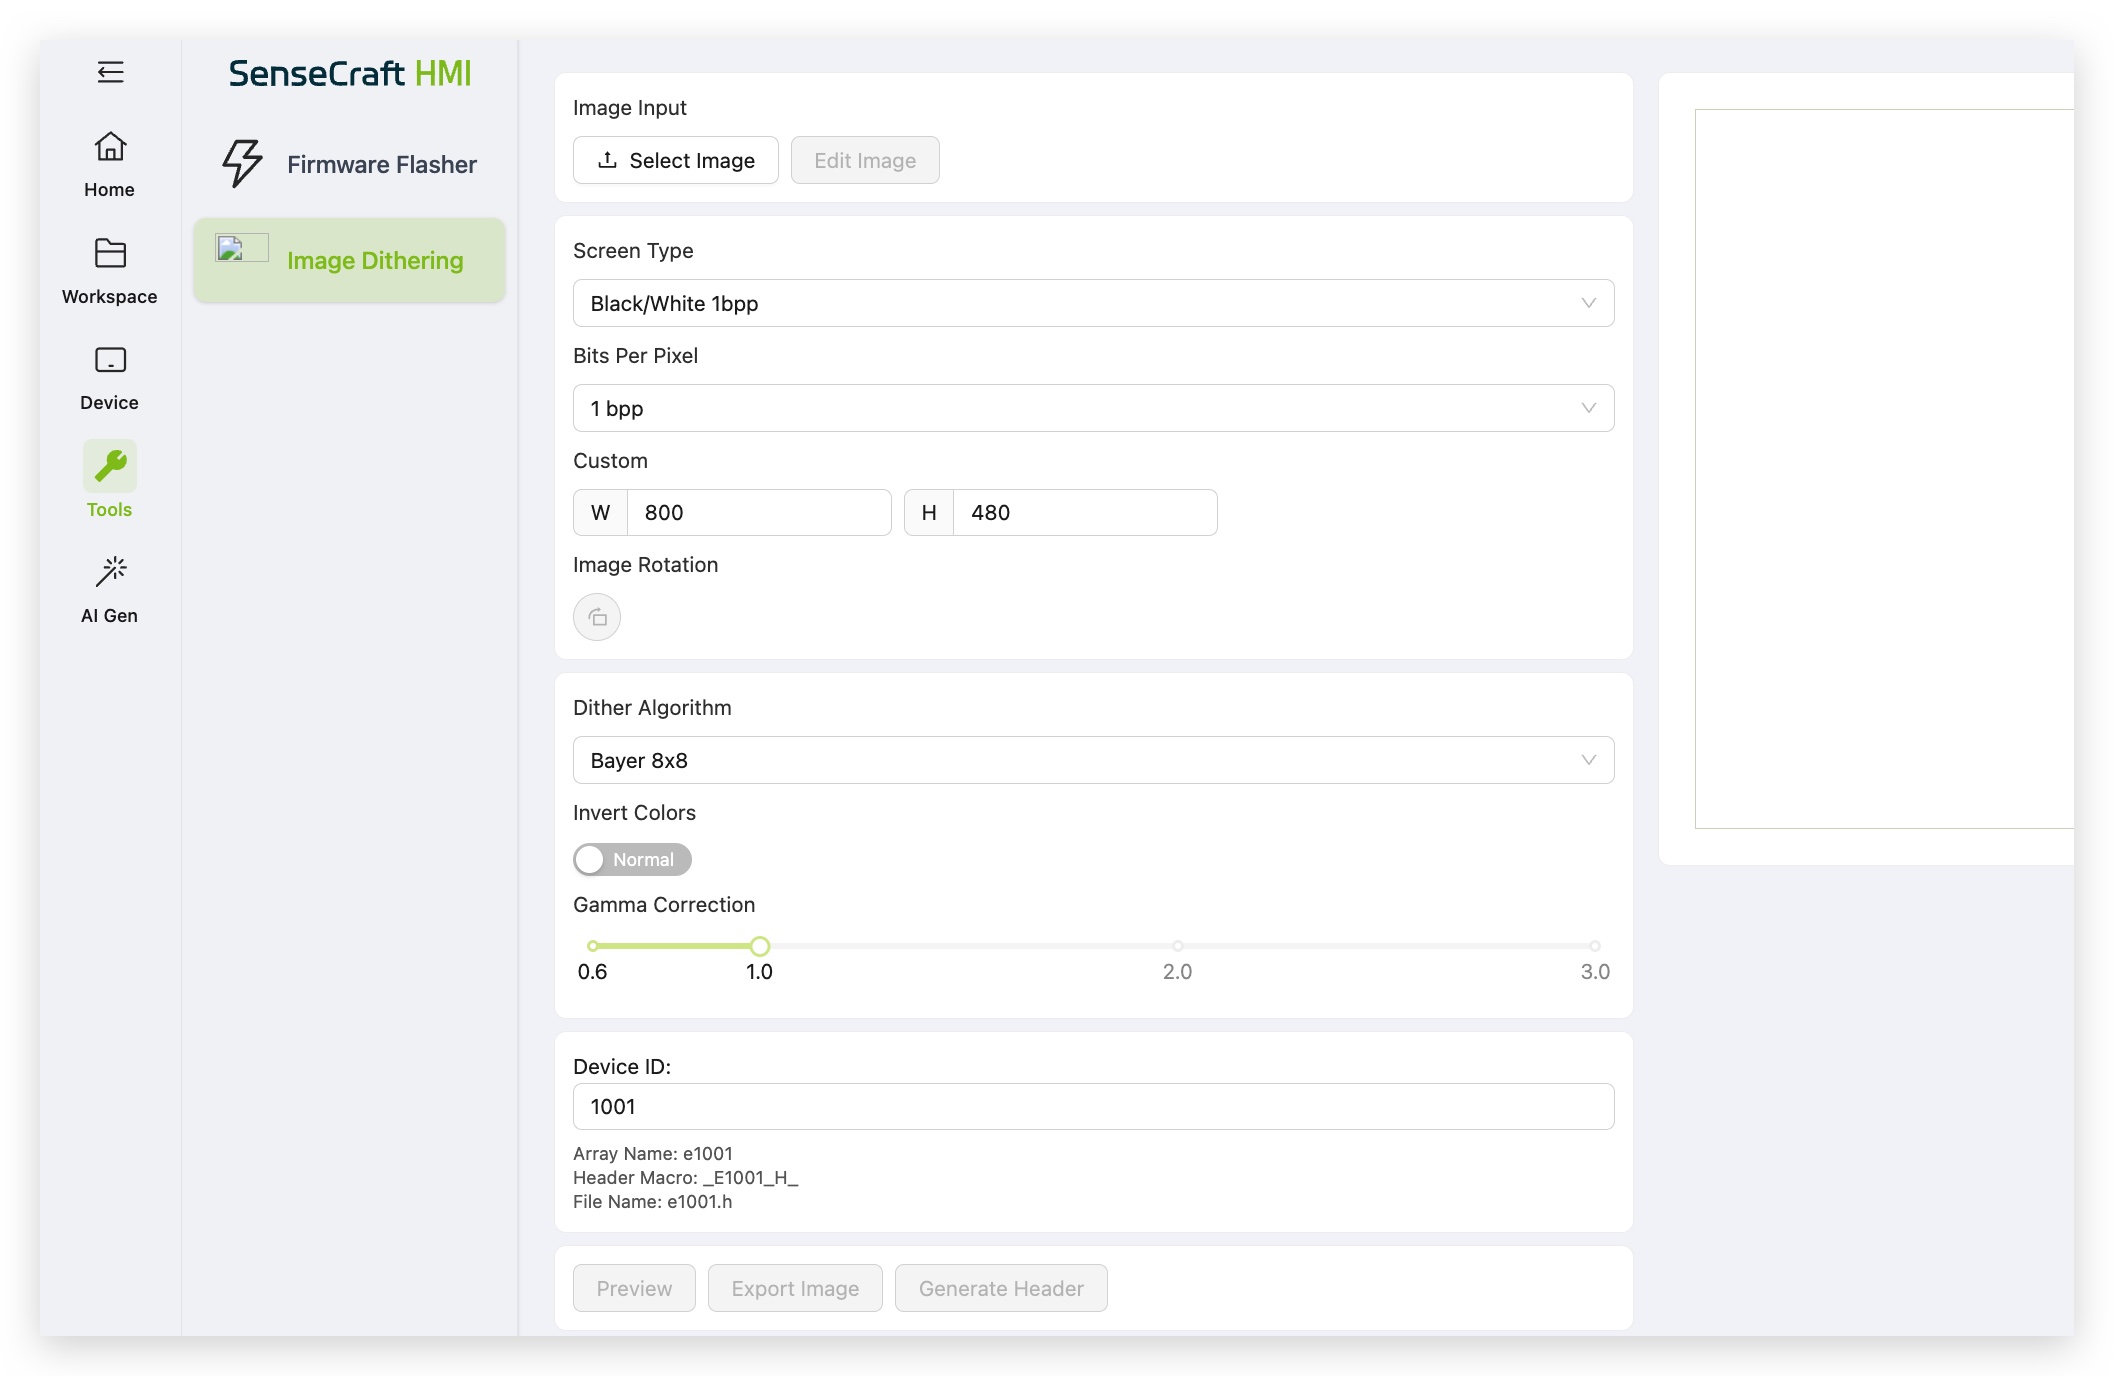
E-ink screens typically have limited color palettes (often just black and white, or limited grayscale). Displaying a standard photograph directly can result in “posterization,” where large areas become solid black or white, losing detail and shading.
Dithering solves this by arranging black and white pixels in patterns (similar to a chessboard) to simulate shades of gray.
- Automatic Processing: Images sent from the HMI Platform to the device are automatically dithered, requiring no user action.
- Manual Tool: We provide this standalone tool for developers. If you are developing for Arduino or ESPHome and want to display high-quality images on an E-ink screen, you can upload your image here, process it, and use the dithered result in your code.
Tech Support & Product Discussion
Section titled “Tech Support & Product Discussion”Thank you for choosing our products! We are here to provide you with different support to ensure that your experience with our products is as smooth as possible. We offer several communication channels to cater to different preferences and needs.