Workspace Interface & Templates
Introduction
Section titled “Introduction”Welcome to SenseCraft HMI! This tutorial will be your guide to the central nervous system of the platform: the main toolbars. Mastering these features is the key to efficiently managing your projects, understanding your device’s status, and bringing your designs to life.
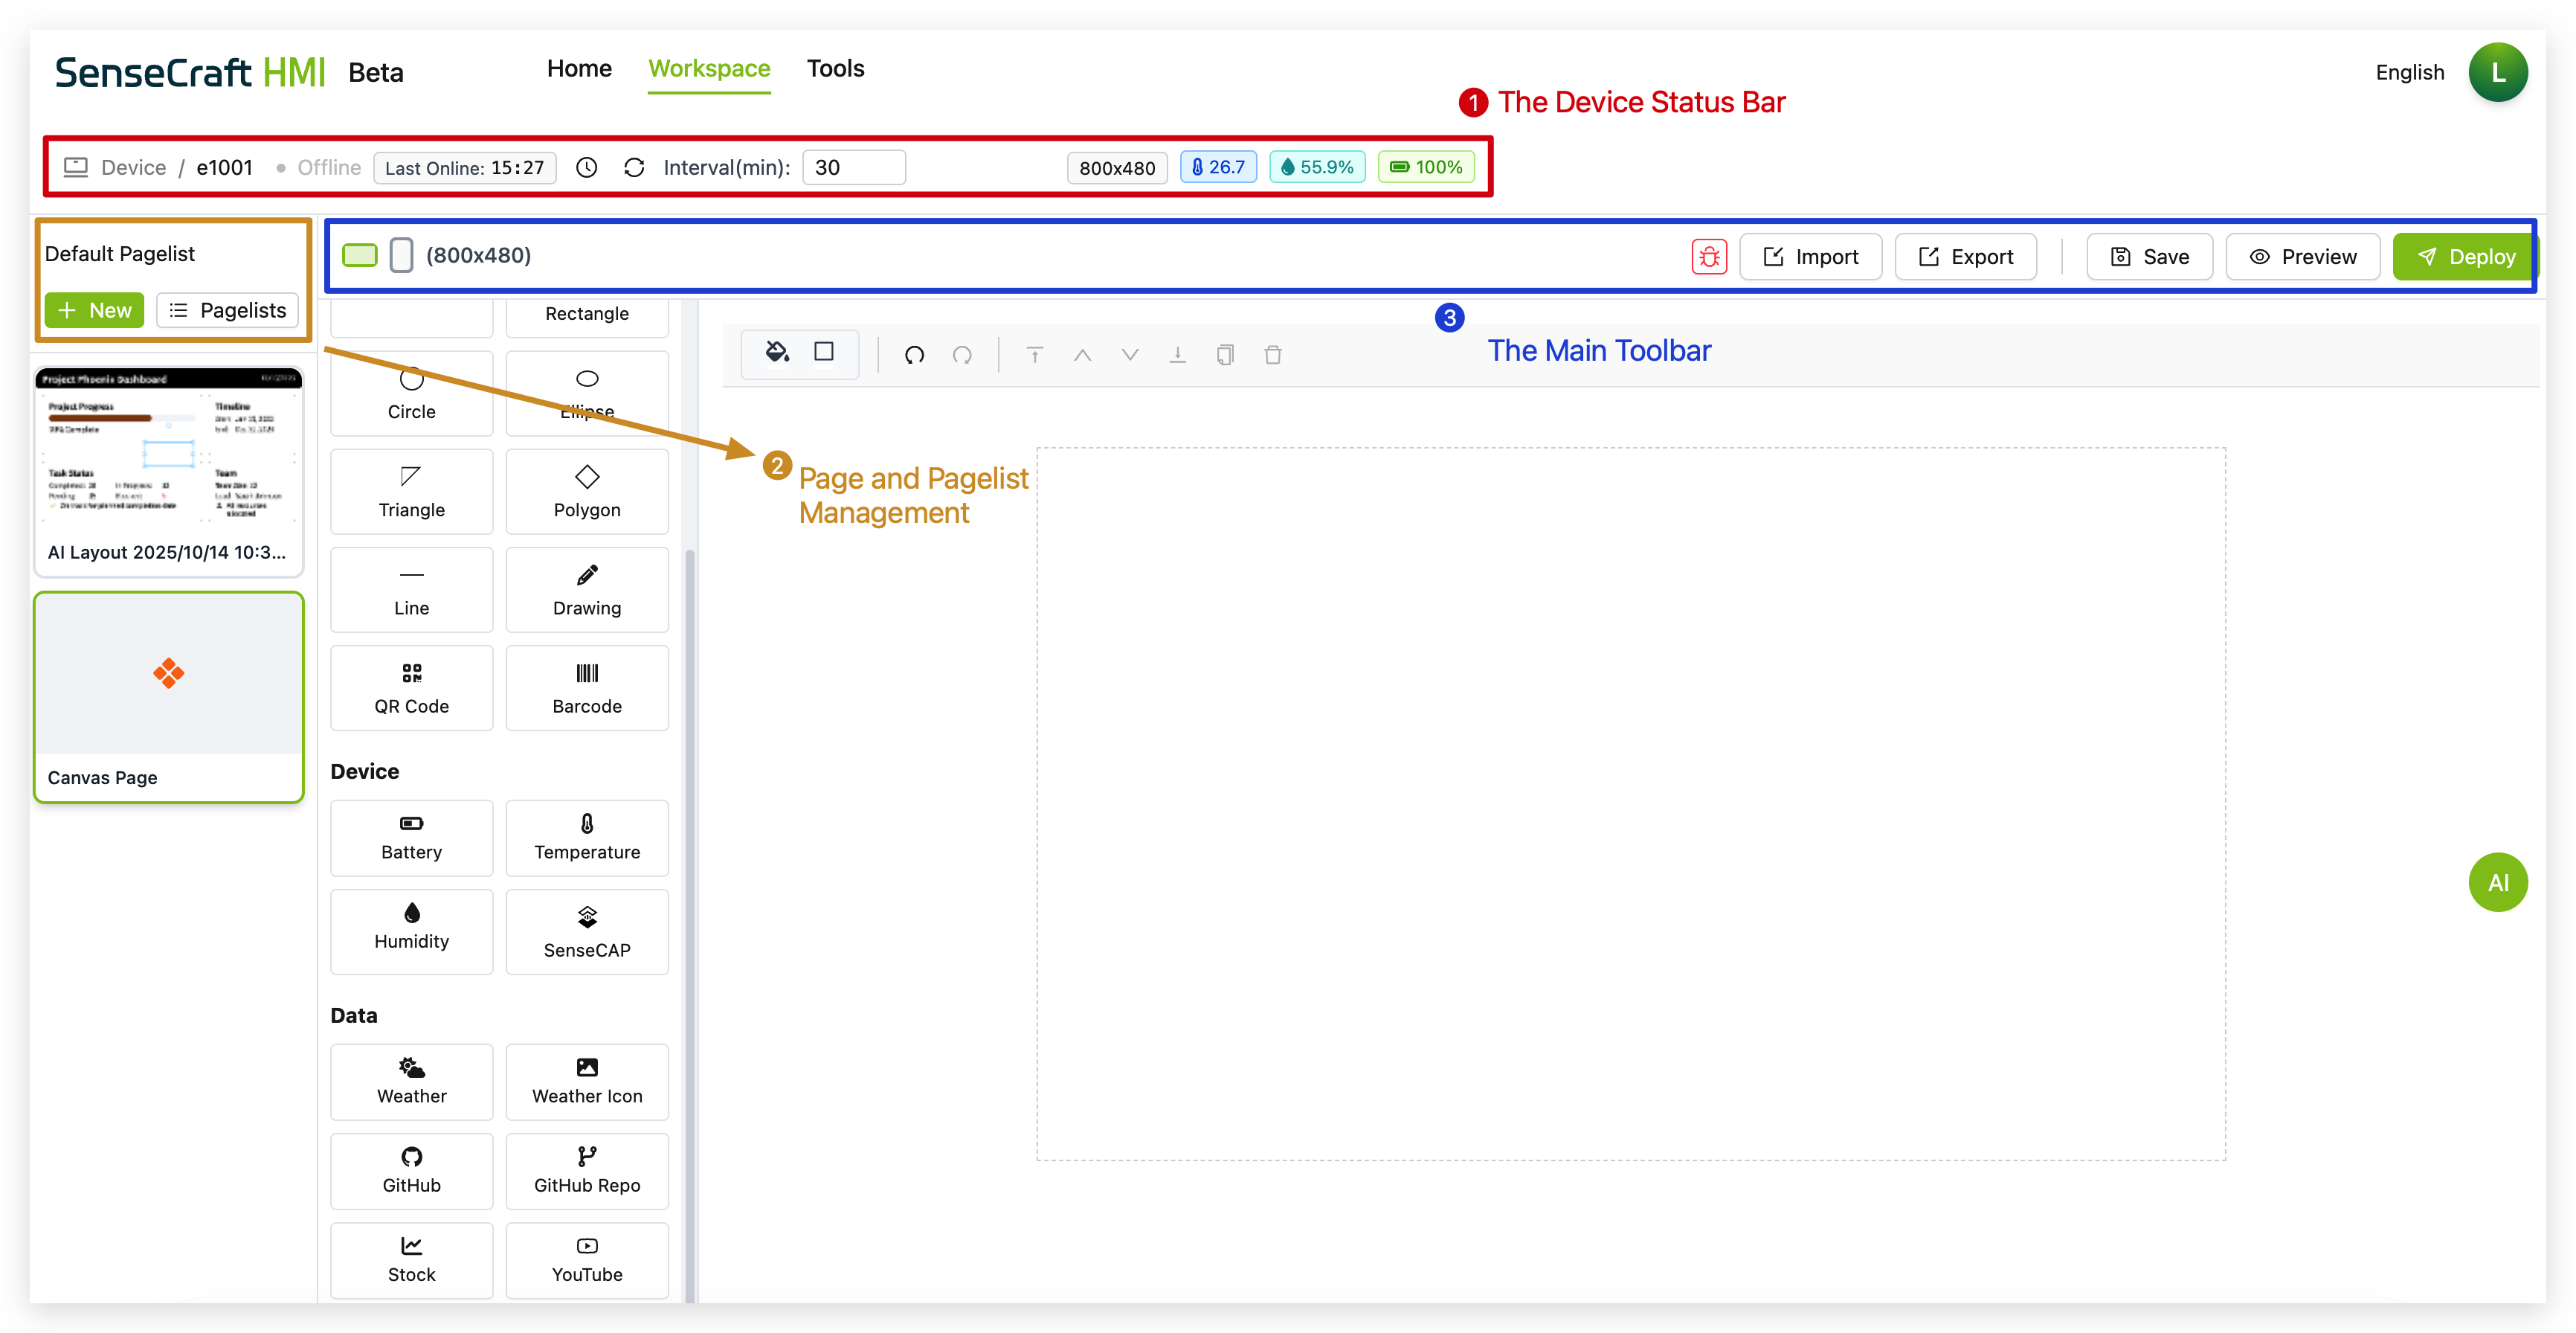
We will cover three main areas:
- The Device Status Bar: Your at-a-glance source for all device-related information.
- Page and Pagelist Management: The system for organizing and creating your display content.
- The Main Toolbar: The essential set of controls for designing, saving, and deploying your work.
By the end of this guide, you’ll have a deep understanding of how to navigate and control the SenseCraft HMI workspace like a pro.
The Device Status Bar
Section titled “The Device Status Bar”
Located at the very top of the workspace, the Device Status Bar provides real-time information about your connected device.
Let’s break down what each piece of information means:
- Device / e1001: This shows the name and model of your currently selected device.
- Sleep: This indicates the current status of the device. It can be “Sleep” or “Awake”.
- Last Online: 15:27: This timestamp tells you the last time the device successfully communicated with the SenseCraft HMI cloud platform.
- Interval(min): 30: This is a crucial setting. It defines how often (in minutes) the device will wake up to refresh its display and pull new data or designs.
- Next Online: 15:57: Based on the “Last Online” time and the “Interval”, this predicts when the device will next wake up and connect.
- 800x480: This is the screen resolution of your connected device. All your designs in the canvas will be based on this dimension.
- Device Sensor Data: For compatible devices like the reTerminal E Series, this area displays live readings from the built-in sensors:
- 🌡️ 26.7: Temperature.
- 💧 55.9%: Humidity.
- 🔋 100%: Current battery level.
Managing Pages and Pagelists
Section titled “Managing Pages and Pagelists”This section is where you organize all the content you want to display on your device. Before diving in, it’s crucial to understand two key concepts: Pages and Pagelists.
- Page: A single screen design. This could be a UI Design from Canvas, an image from the Gallery, an RSS feed, or a Web page. Think of it as a single “slide” in a presentation.
- Pagelist: A collection or “playlist” of Pages. A Pagelist can contain one or more Pages. Your device is always set to display one active Pagelist. If the Pagelist contains multiple Pages, the device will cycle through them at the defined interval.
Creating a New Page
Section titled “Creating a New Page”The + New button is your starting point for adding new content.
Step 1. Click the + New button.
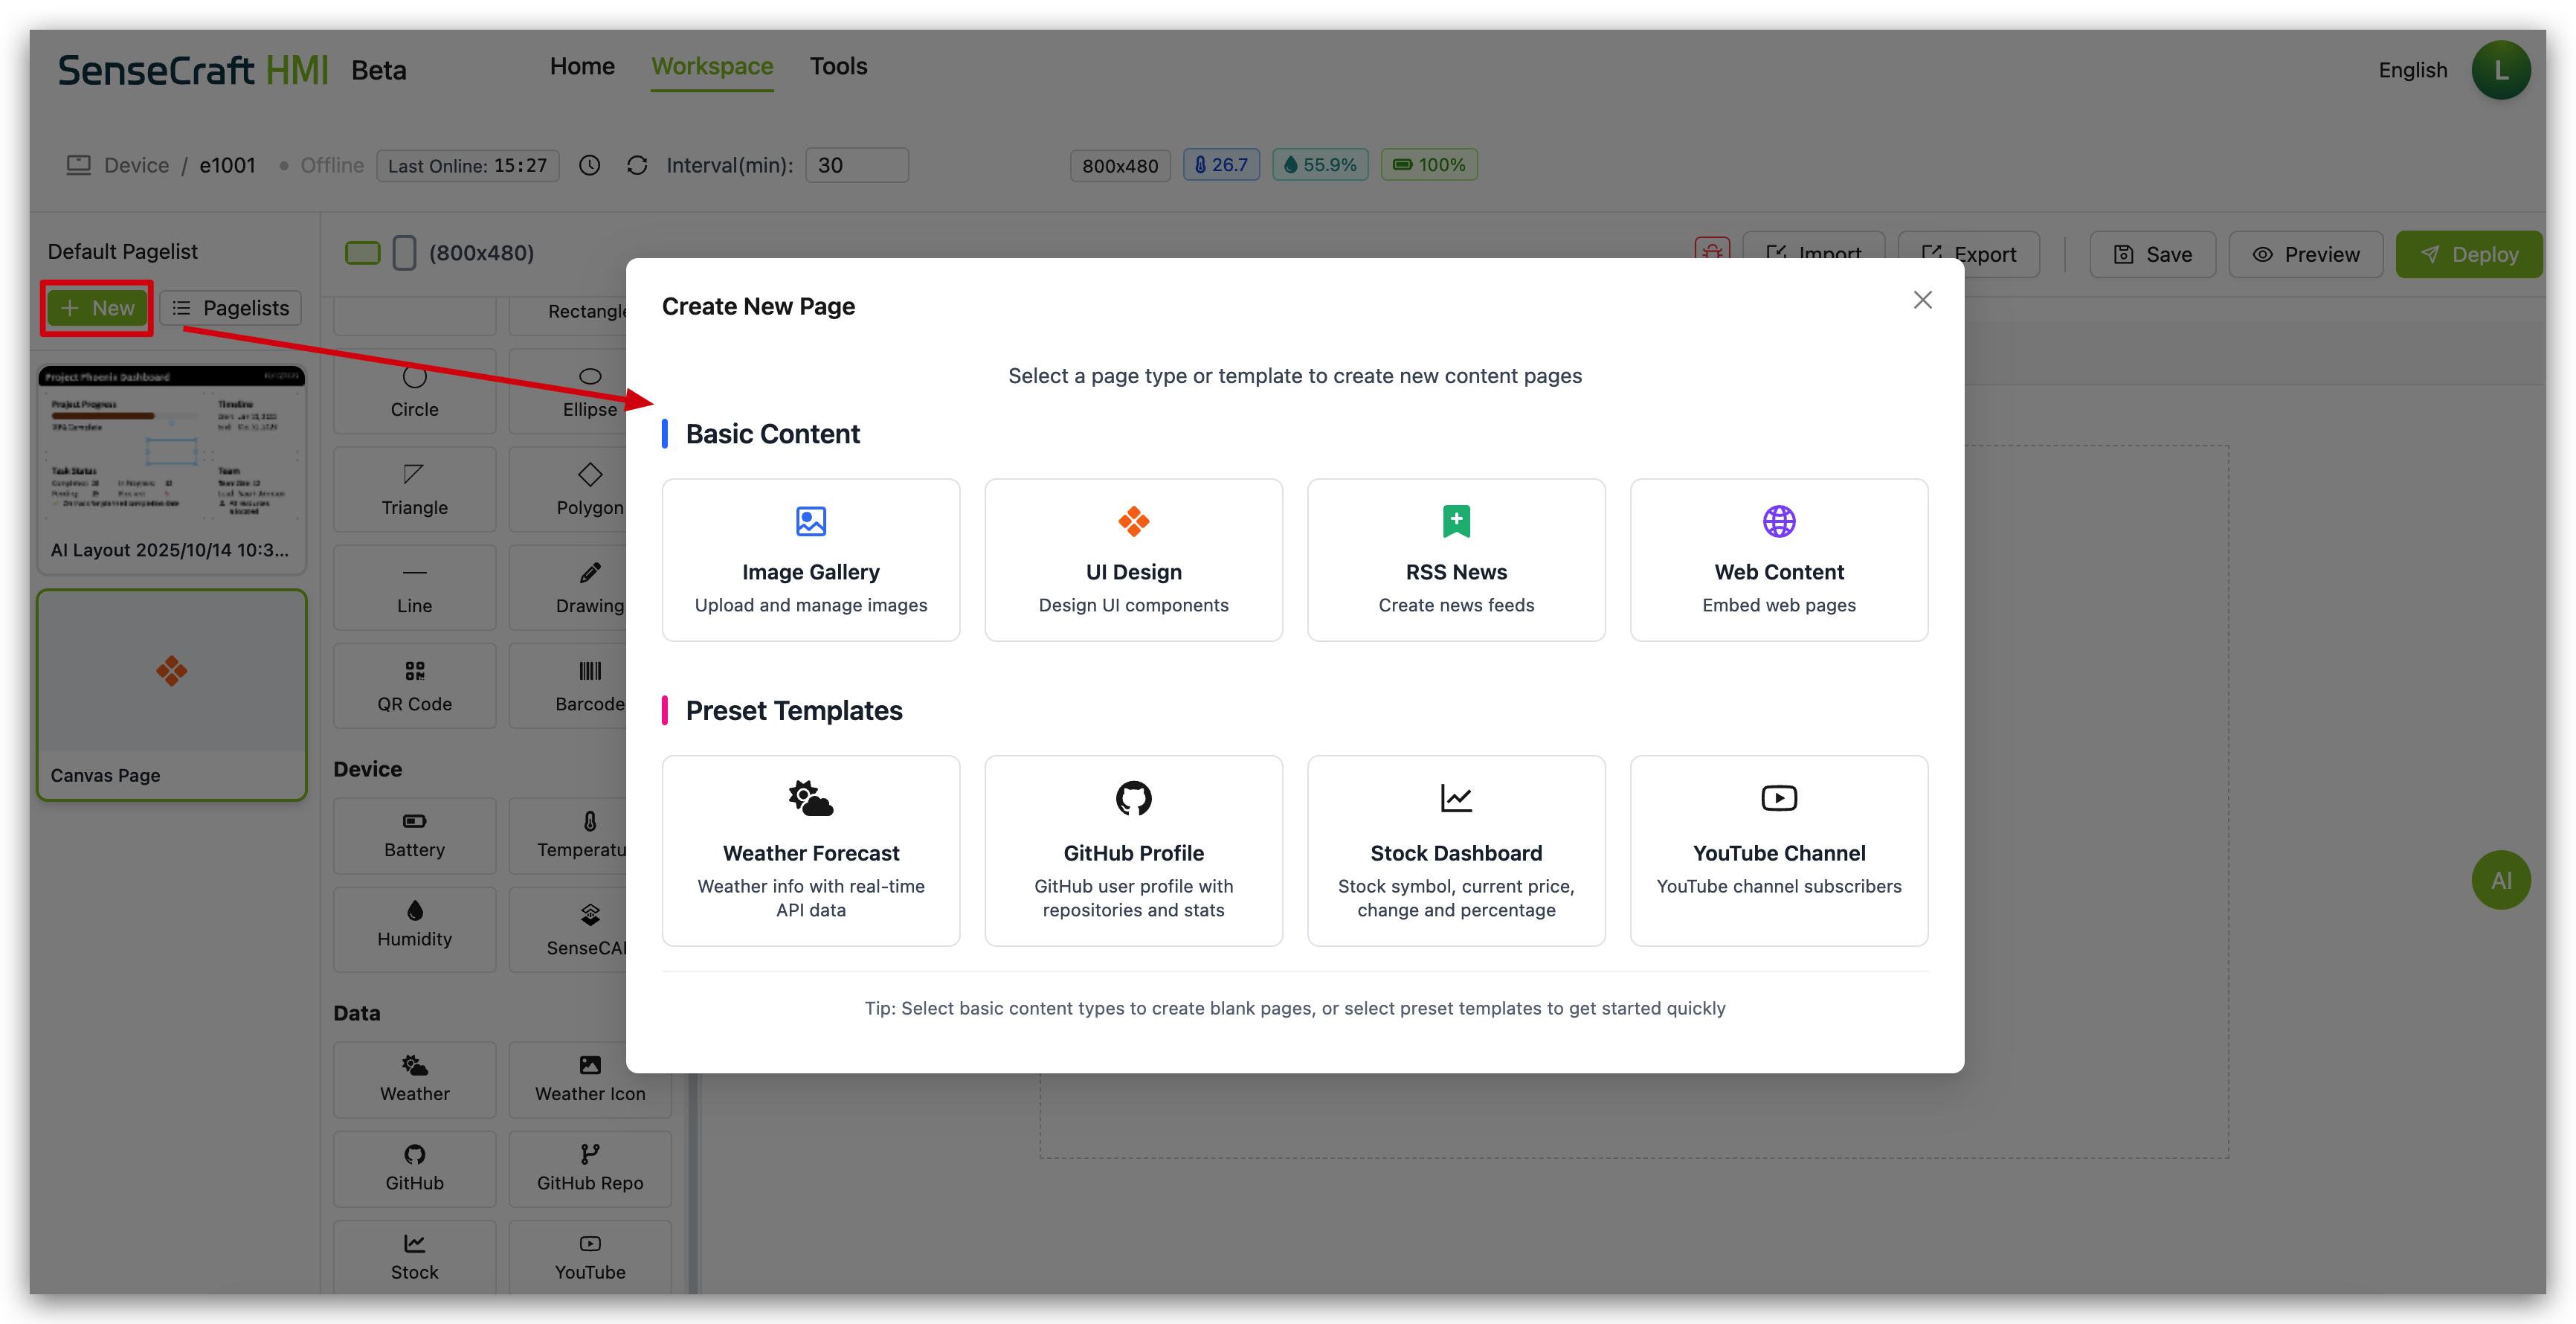
Step 2. A dialog will appear, giving you several options to create a new page:
- UI Design (Canvas): Create a custom layout from scratch with various components.
- Gallery: Create a page to display an image.
- RSS: Create a page to display an RSS feed.
- Web: Create a page to display a webpage.
- Templates: You can also choose from a variety of pre-designed templates to get a head start.
Templates
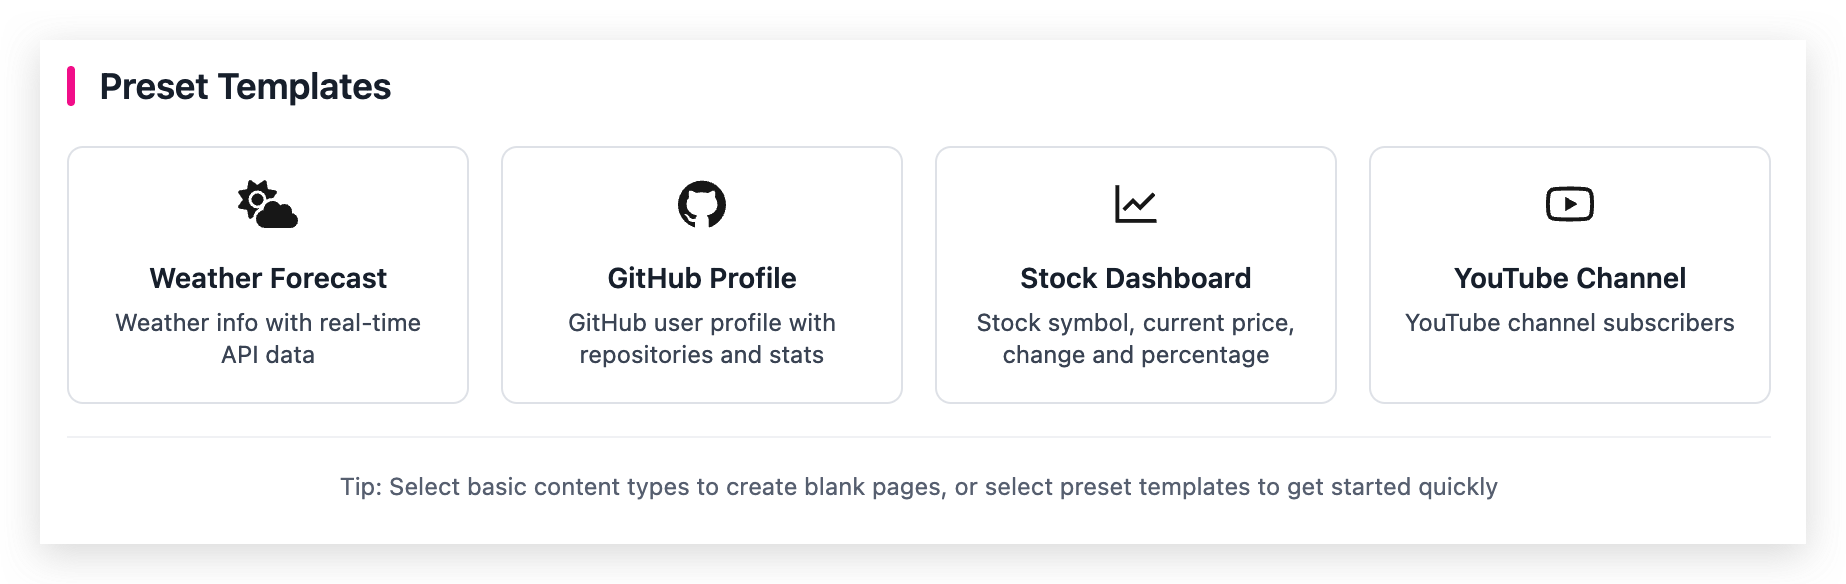
Section titled “Templates”Templates provide pre-designed layouts that combine multiple components into a cohesive, ready-to-use display. They save time and ensure professional results without having to design layouts from scratch.
Weather Display Template
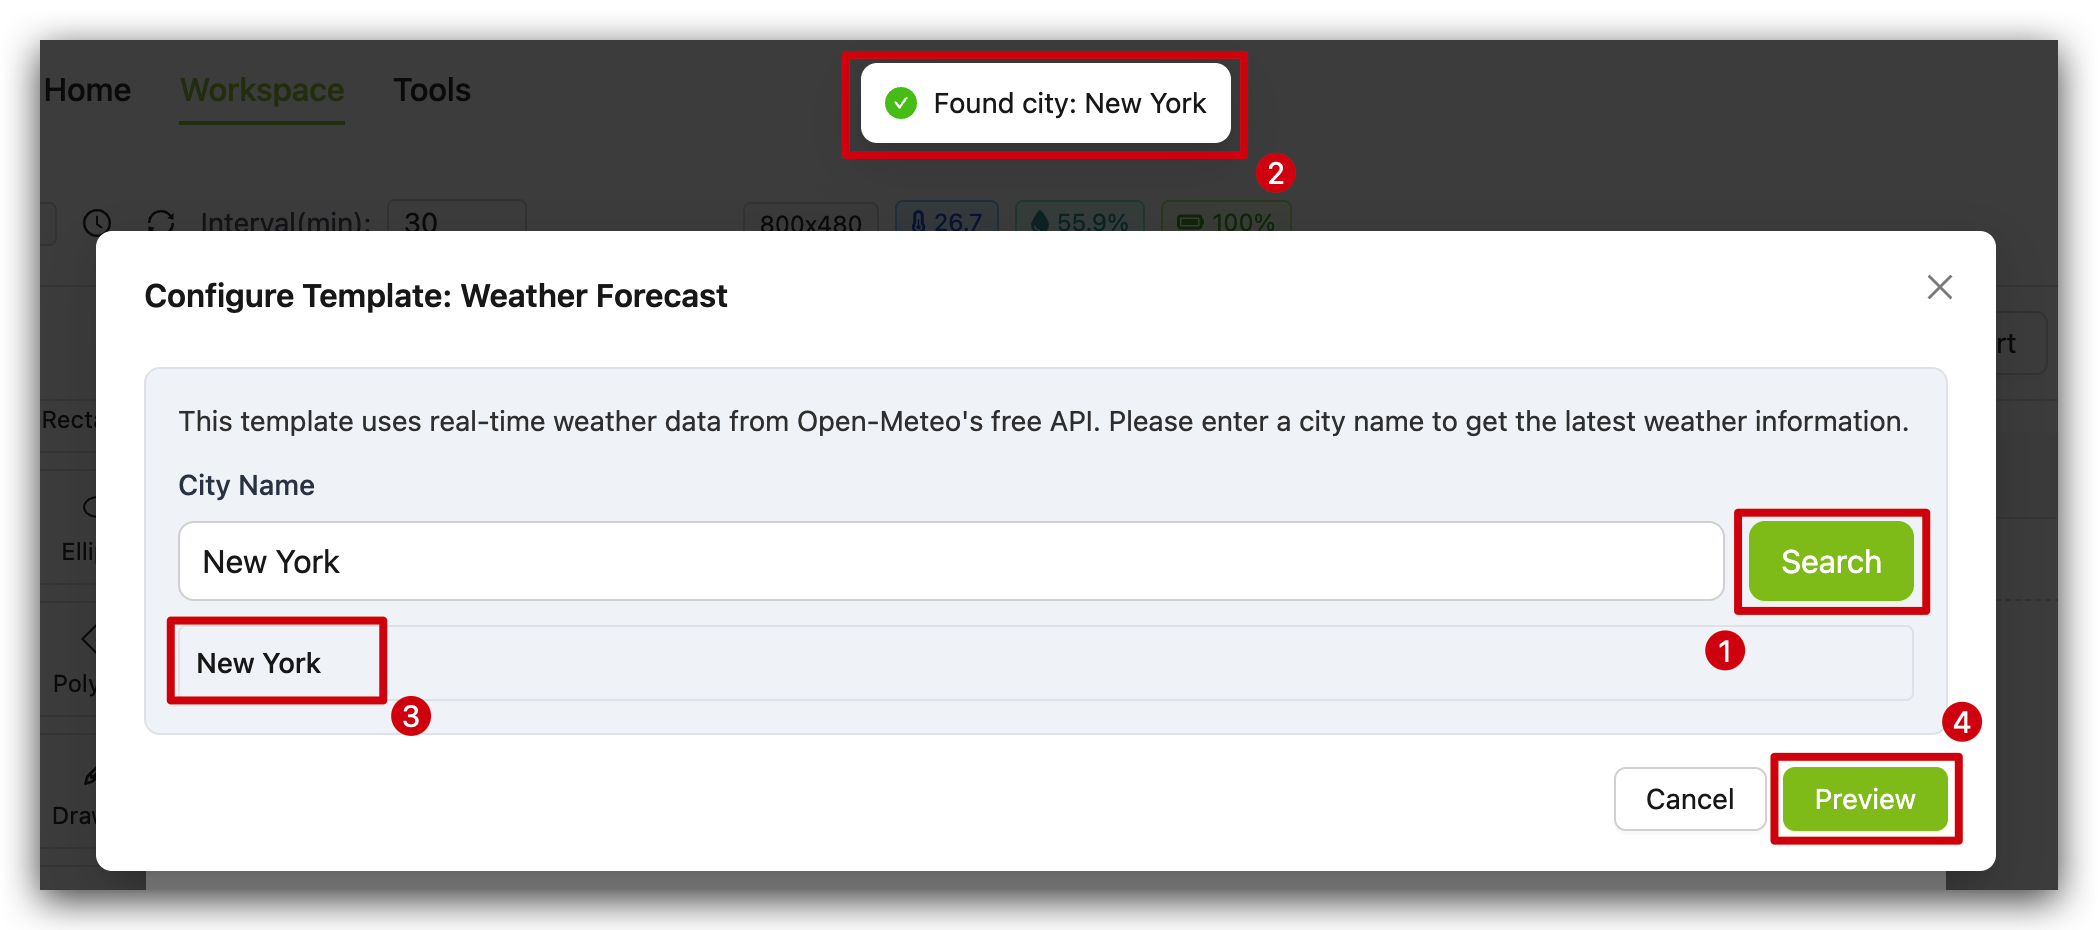
Section titled “Weather Display Template”The Weather Display Template offers a complete weather dashboard showing current conditions and a 7-day forecast for any city.
Step 1. Click on the “Weather Display” template in the Templates section
Step 2. In the “Configure Template: Weather Display” dialog that appears:
-
Enter a city name in the “City Name” field
-
Click “Search” to verify the city exists in the weather database
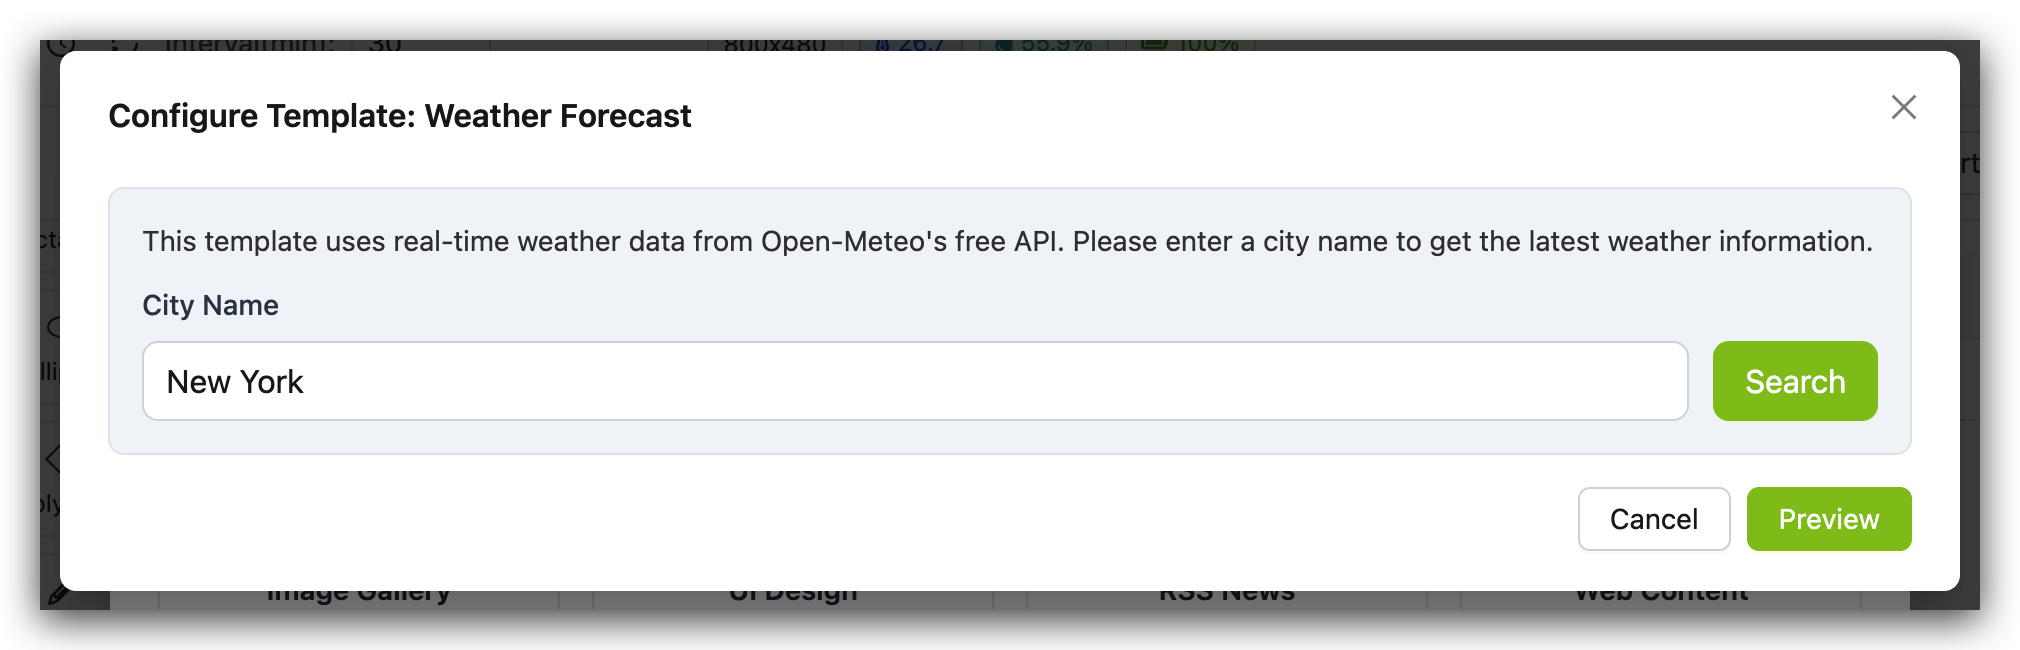
Step 3. After a successful search, click “OK” to proceed
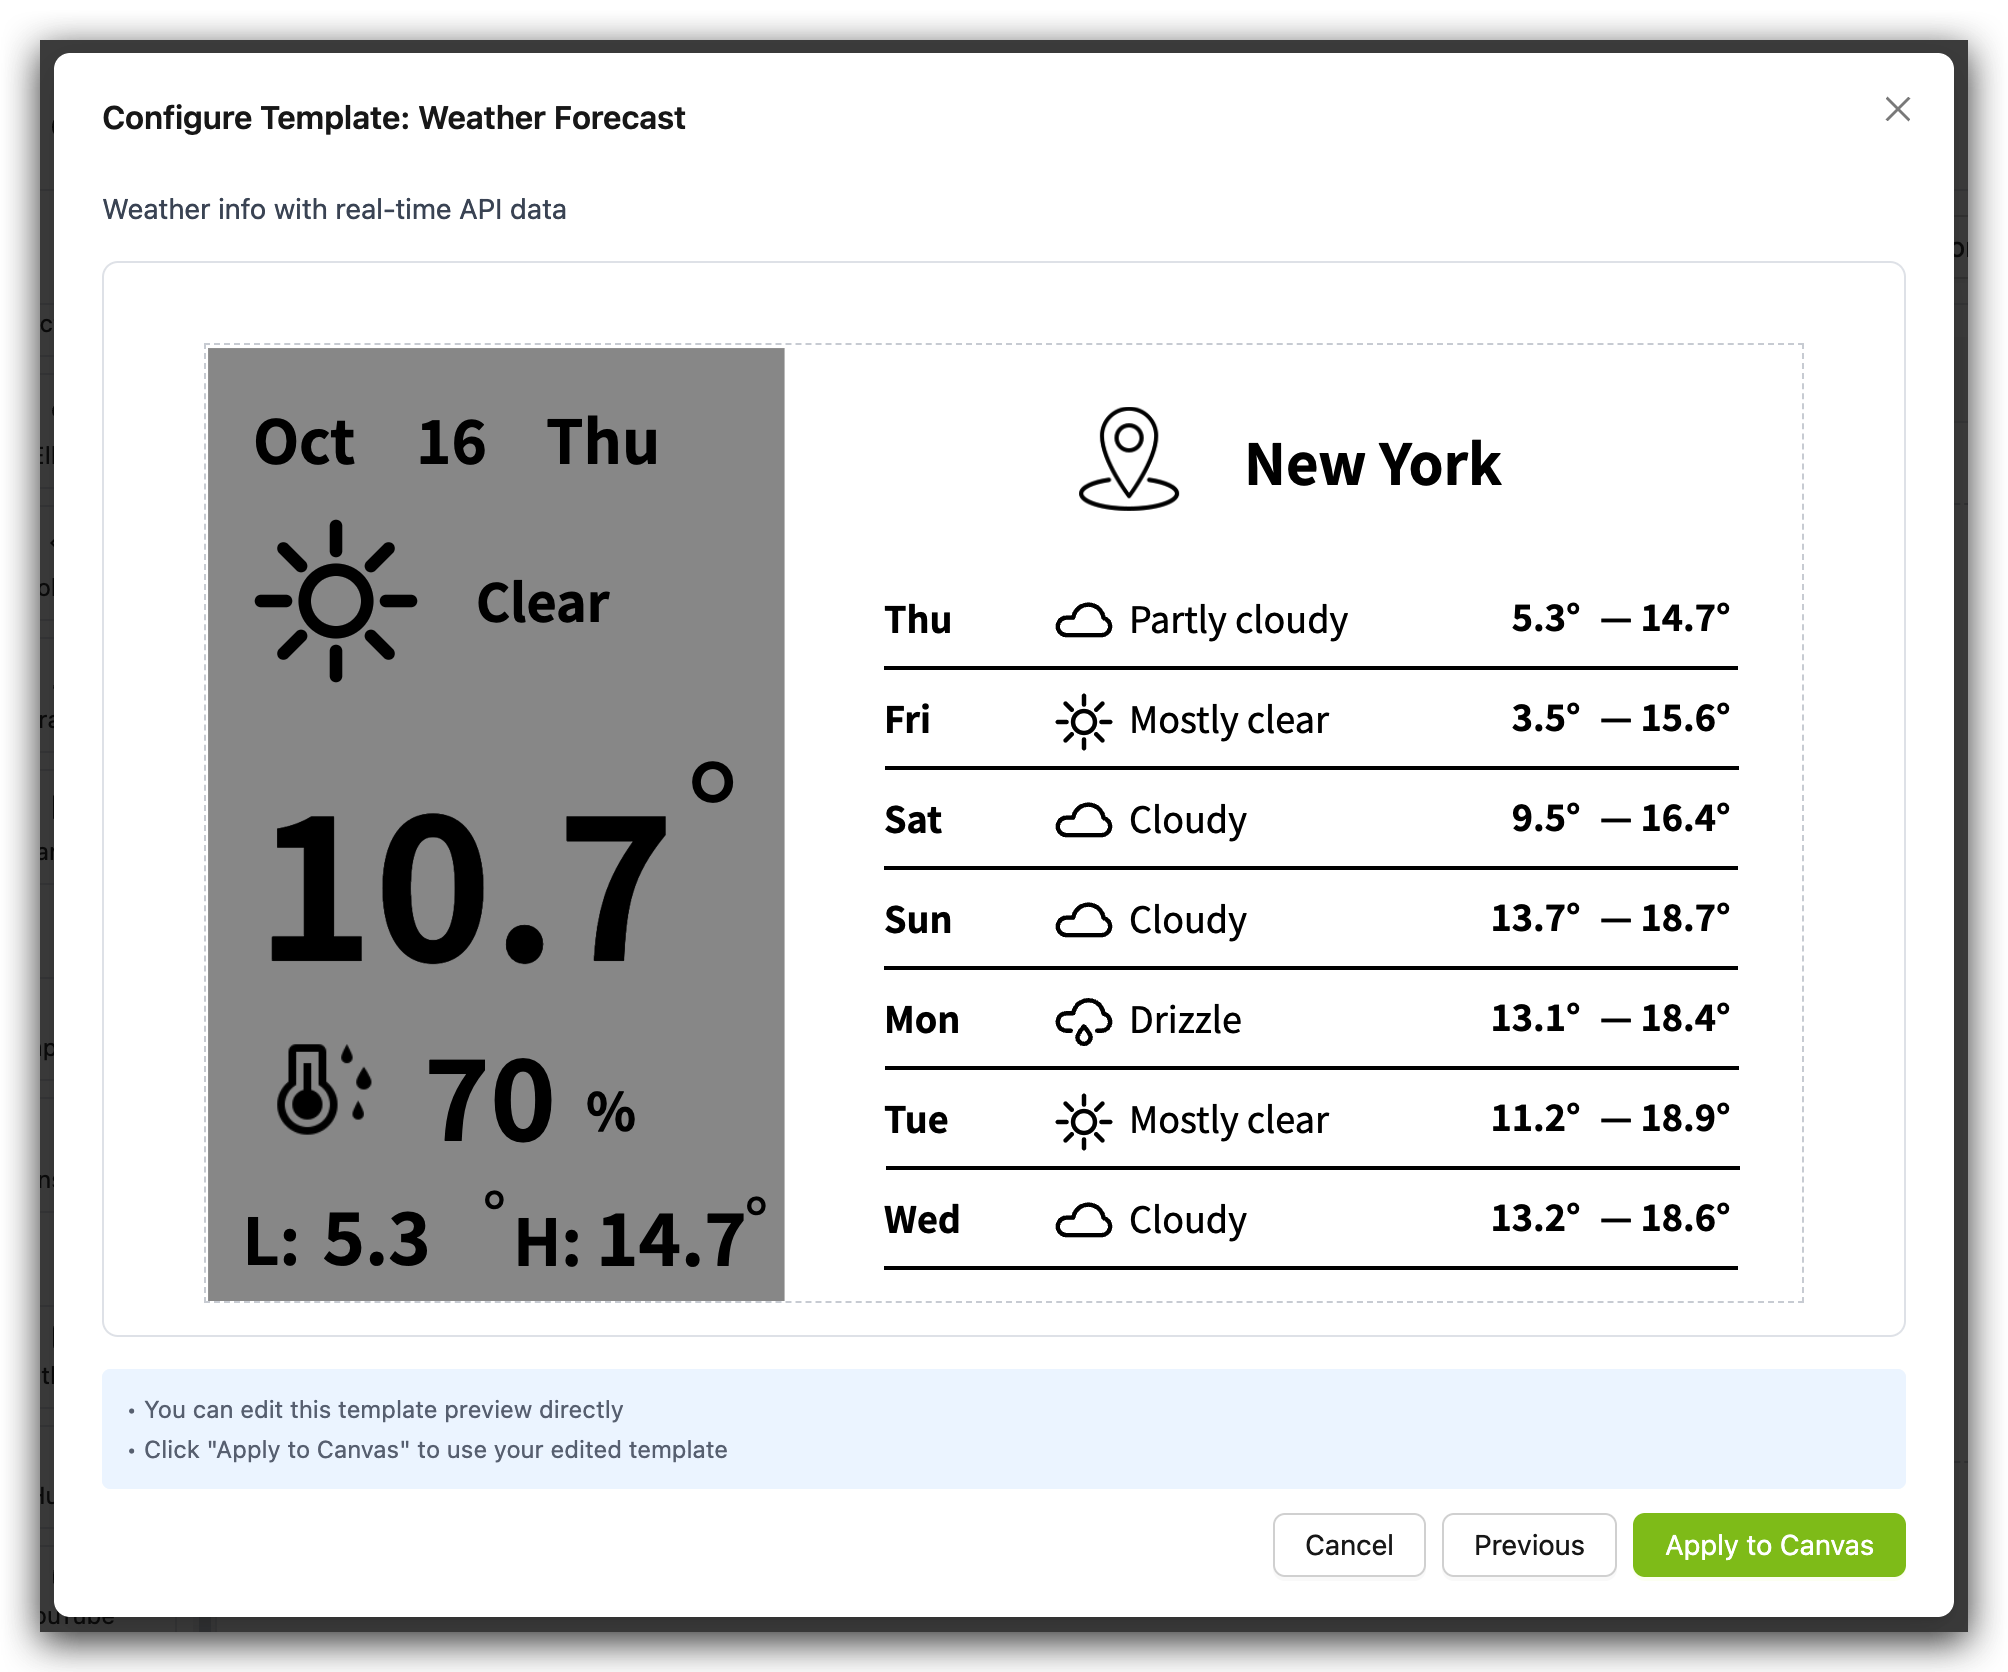
Step 4. A “Template Preview” window will appear showing:
-
Left panel with current date, weather condition, temperature, high/low, and humidity
-
Right panel with city name and 7-day forecast including condition icons and temperature ranges
Step 5. Review the preview and note:
-
All template elements will be given unique IDs to avoid conflicts
-
You can modify the template after applying it to the canvas
Step 6. Click “Apply to Canvas” to add the template to your workspace
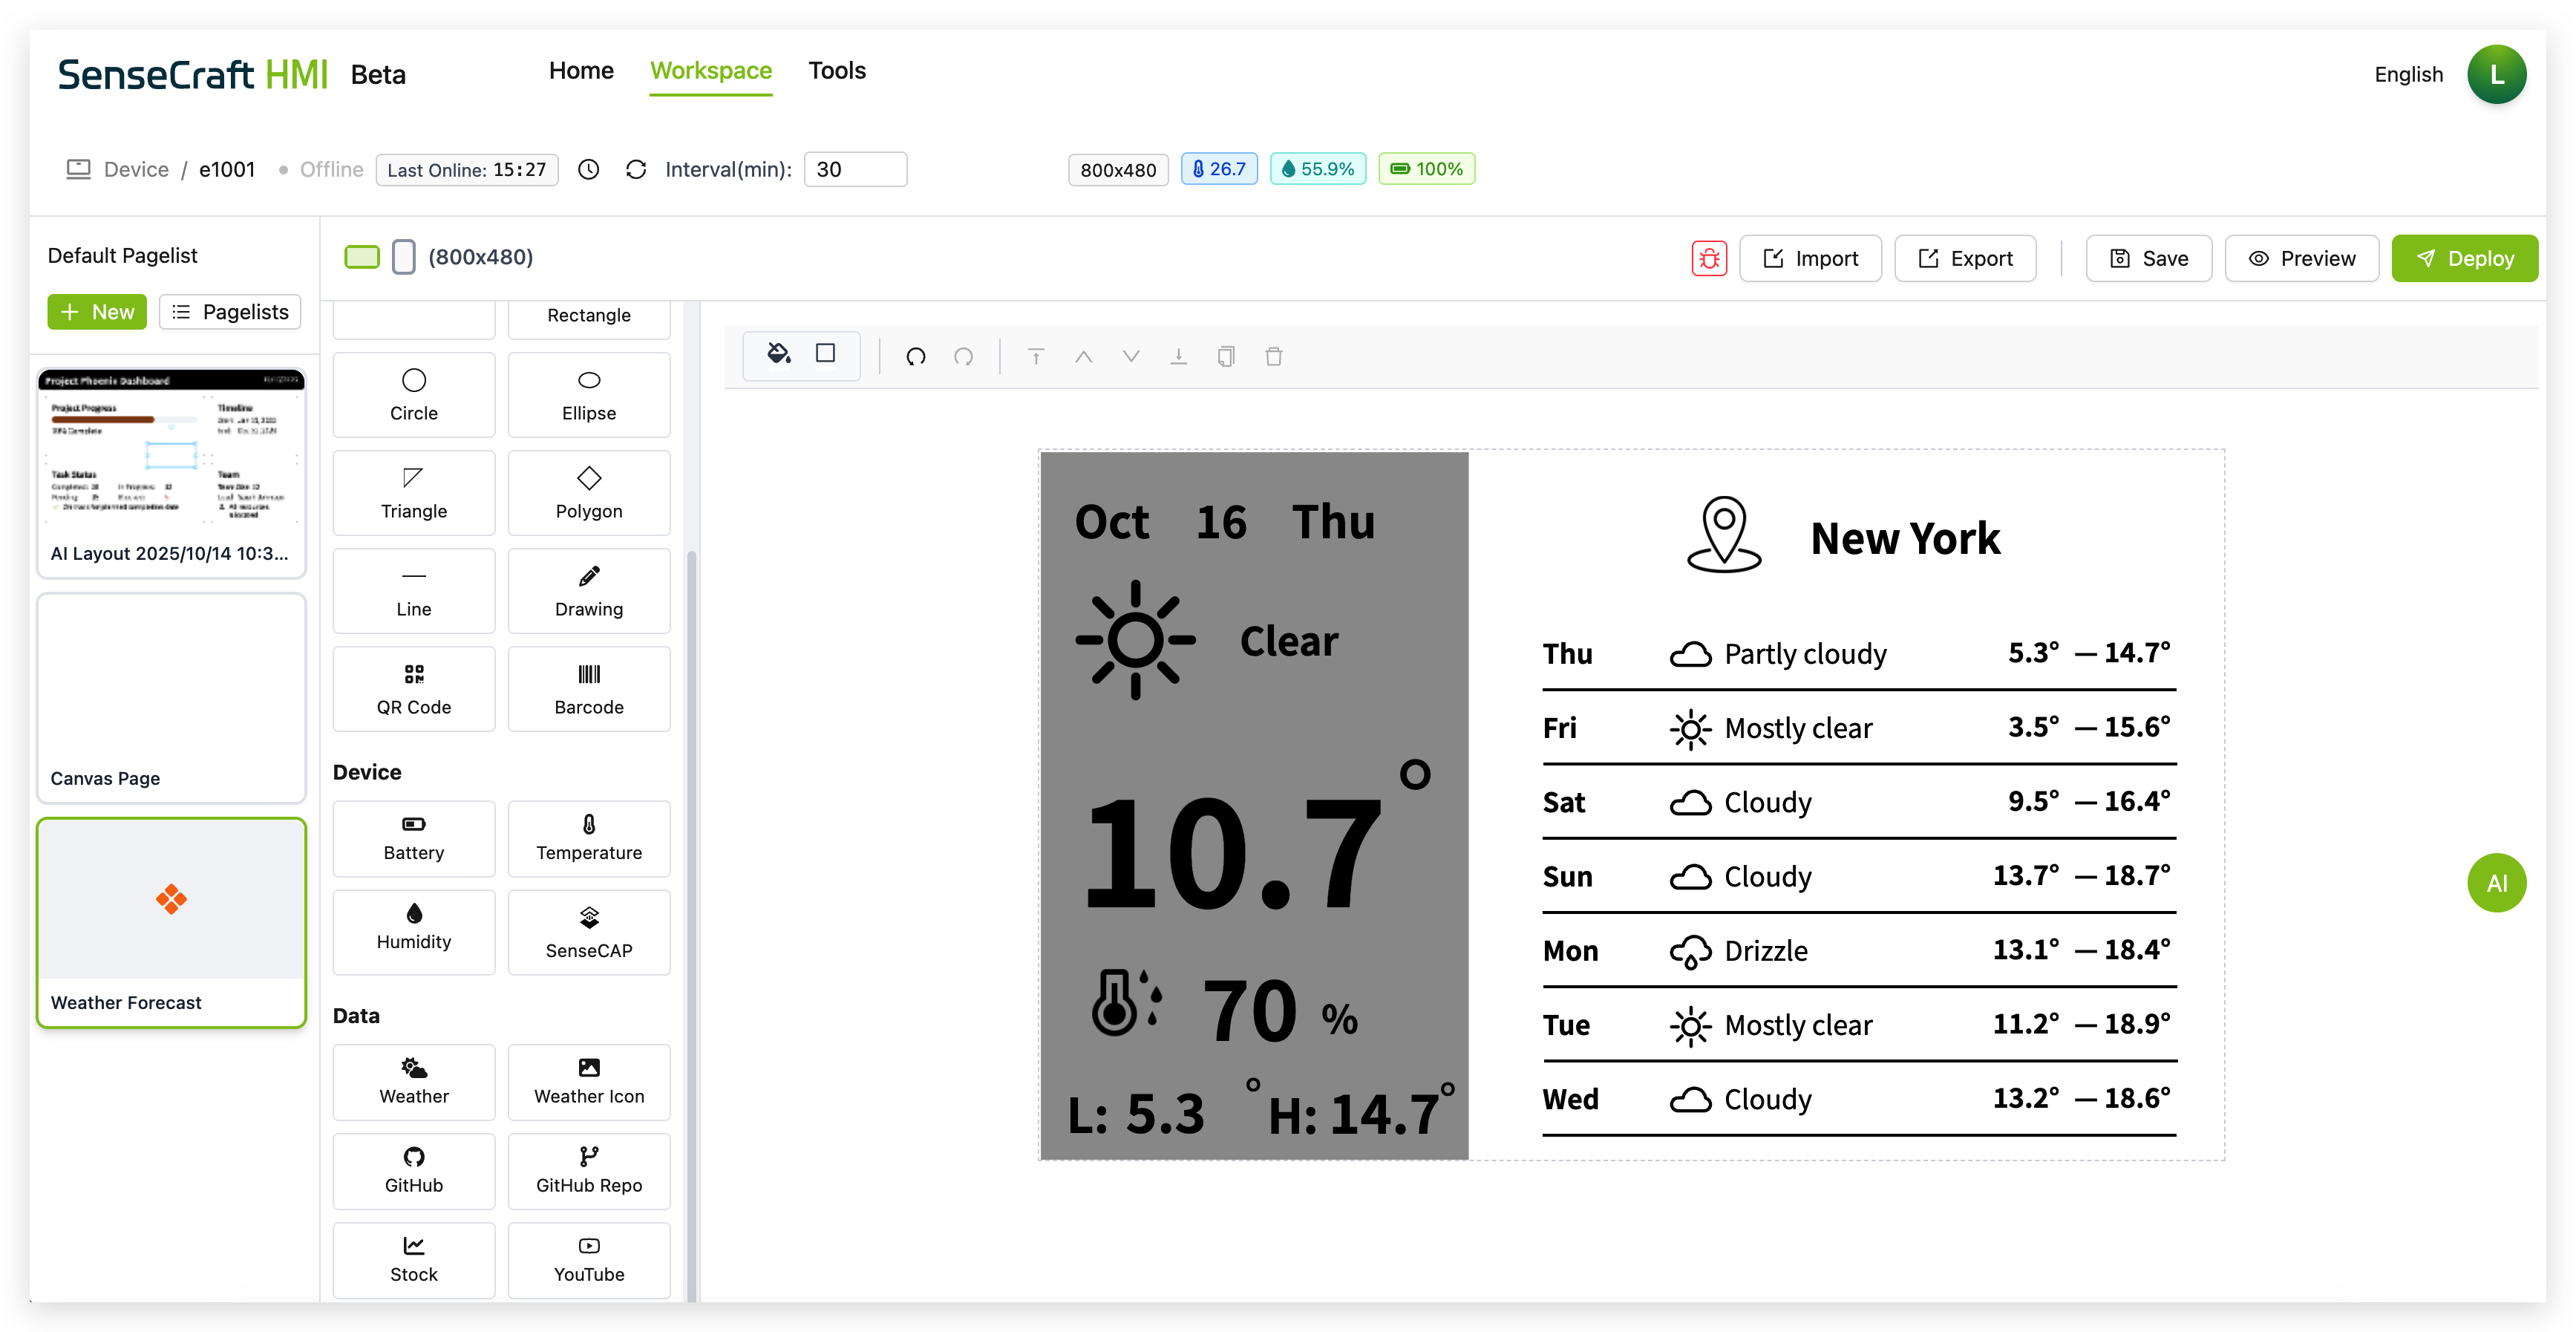
Step 7. The Weather Display template is now on your canvas, ready for deployment or further customization
GitHub Profile Template
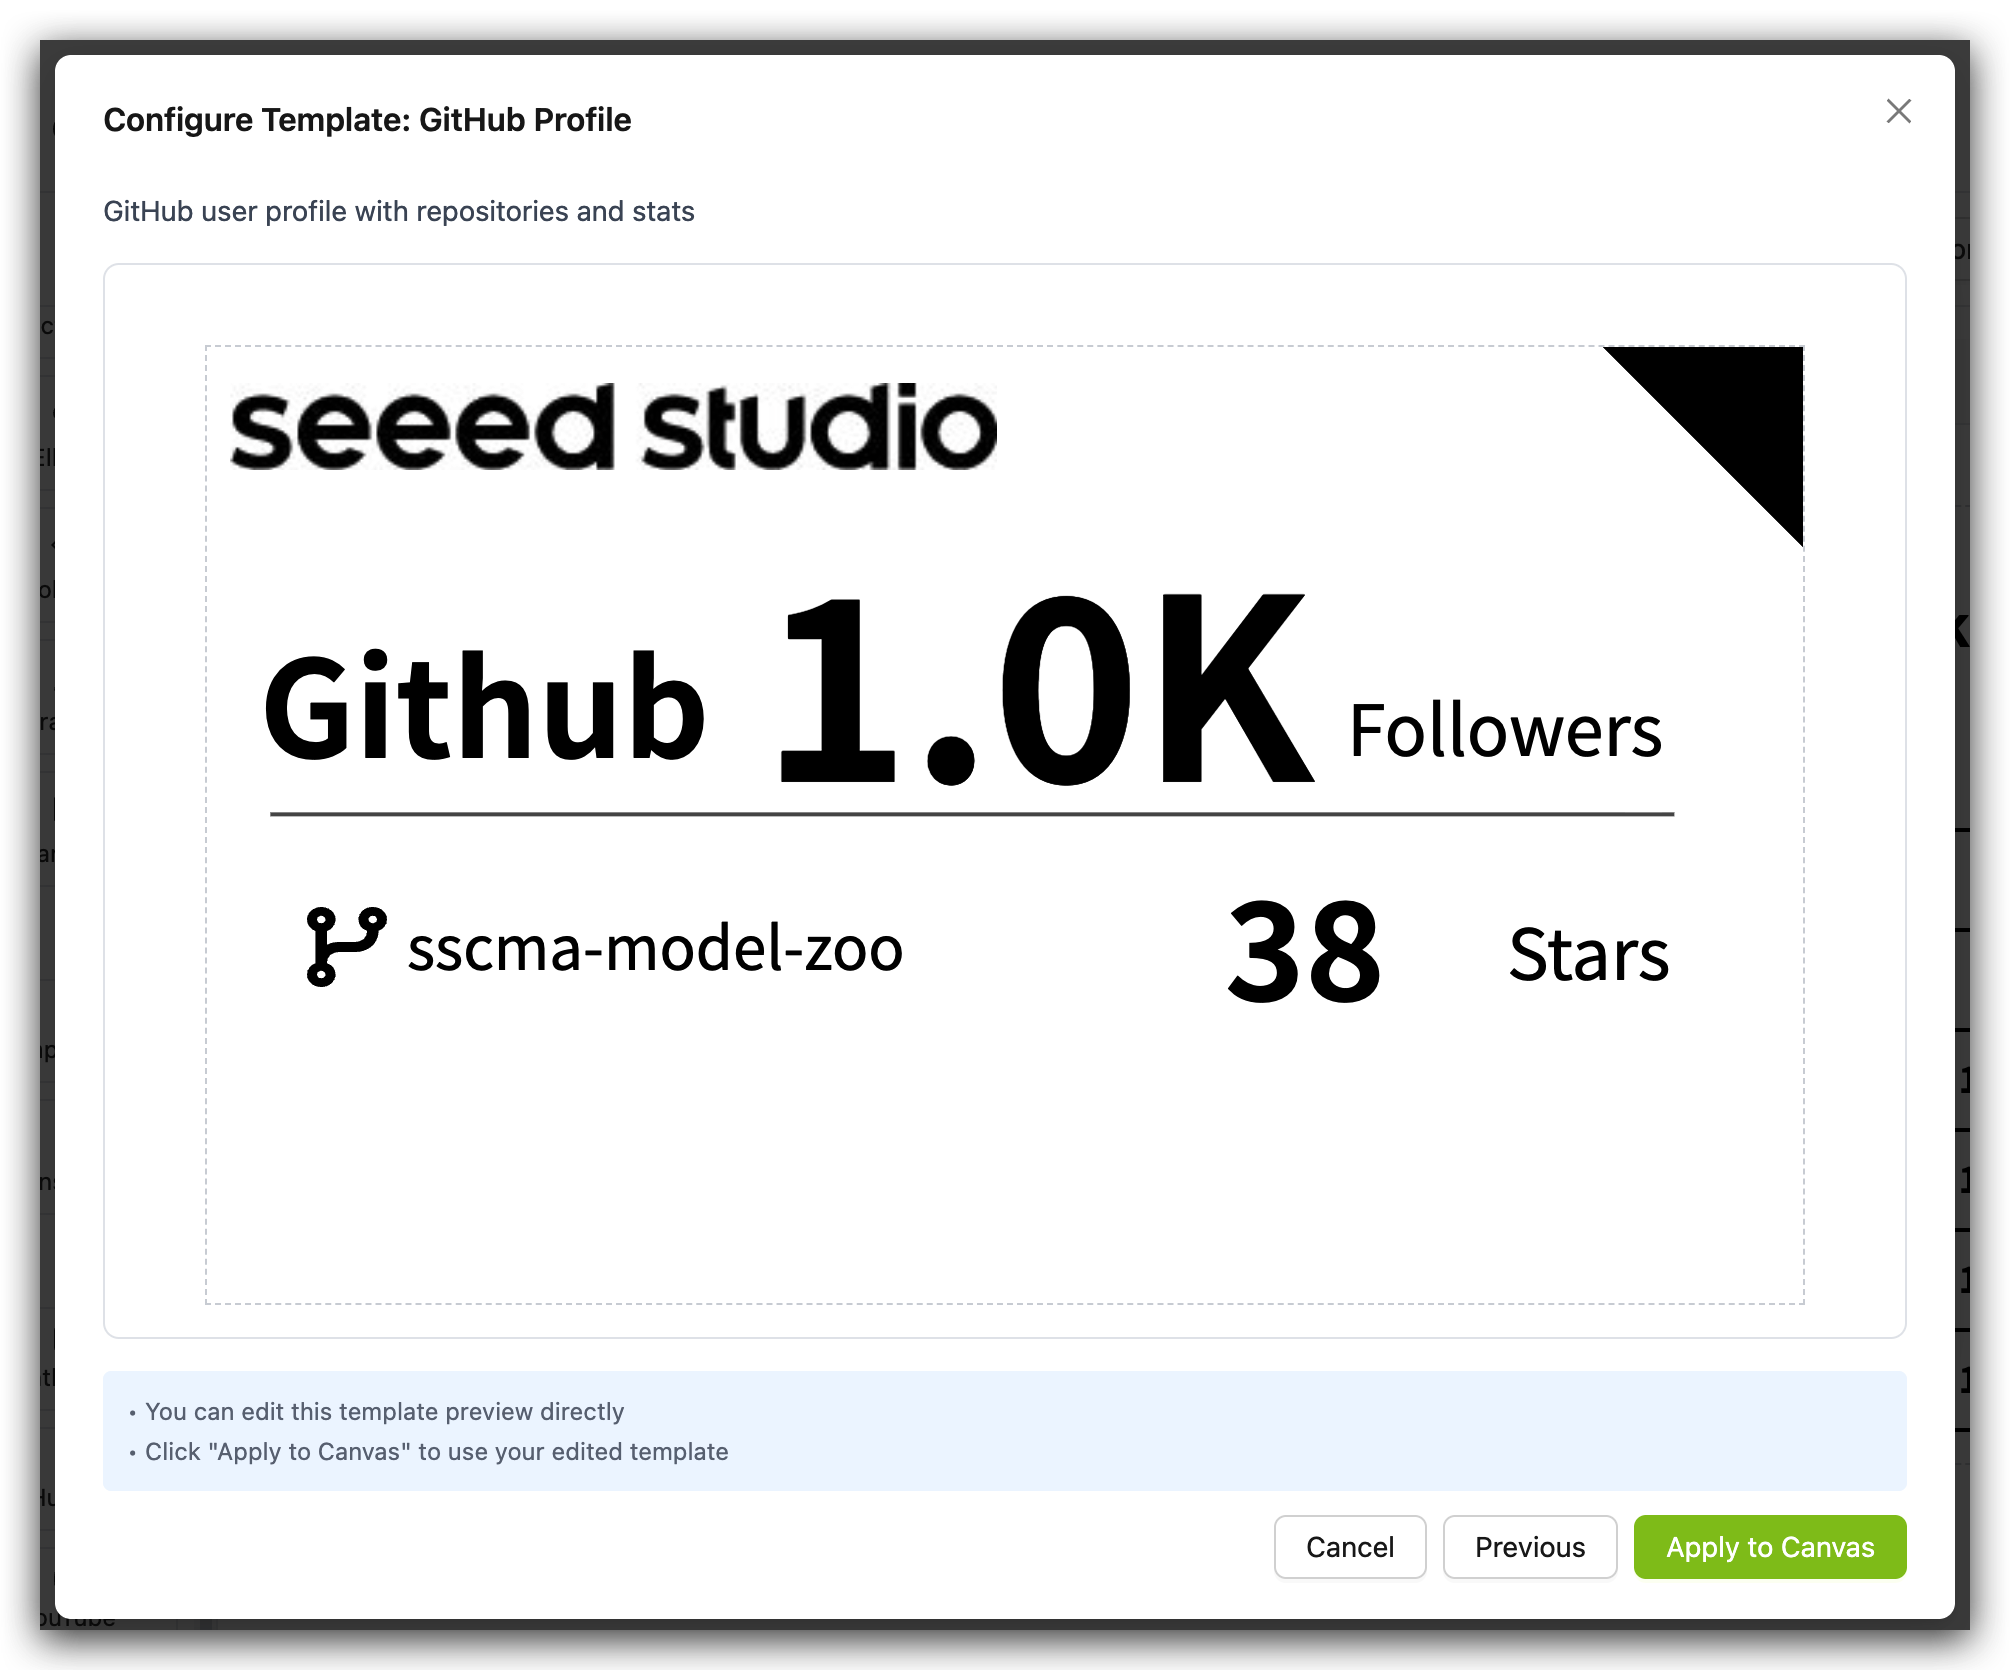
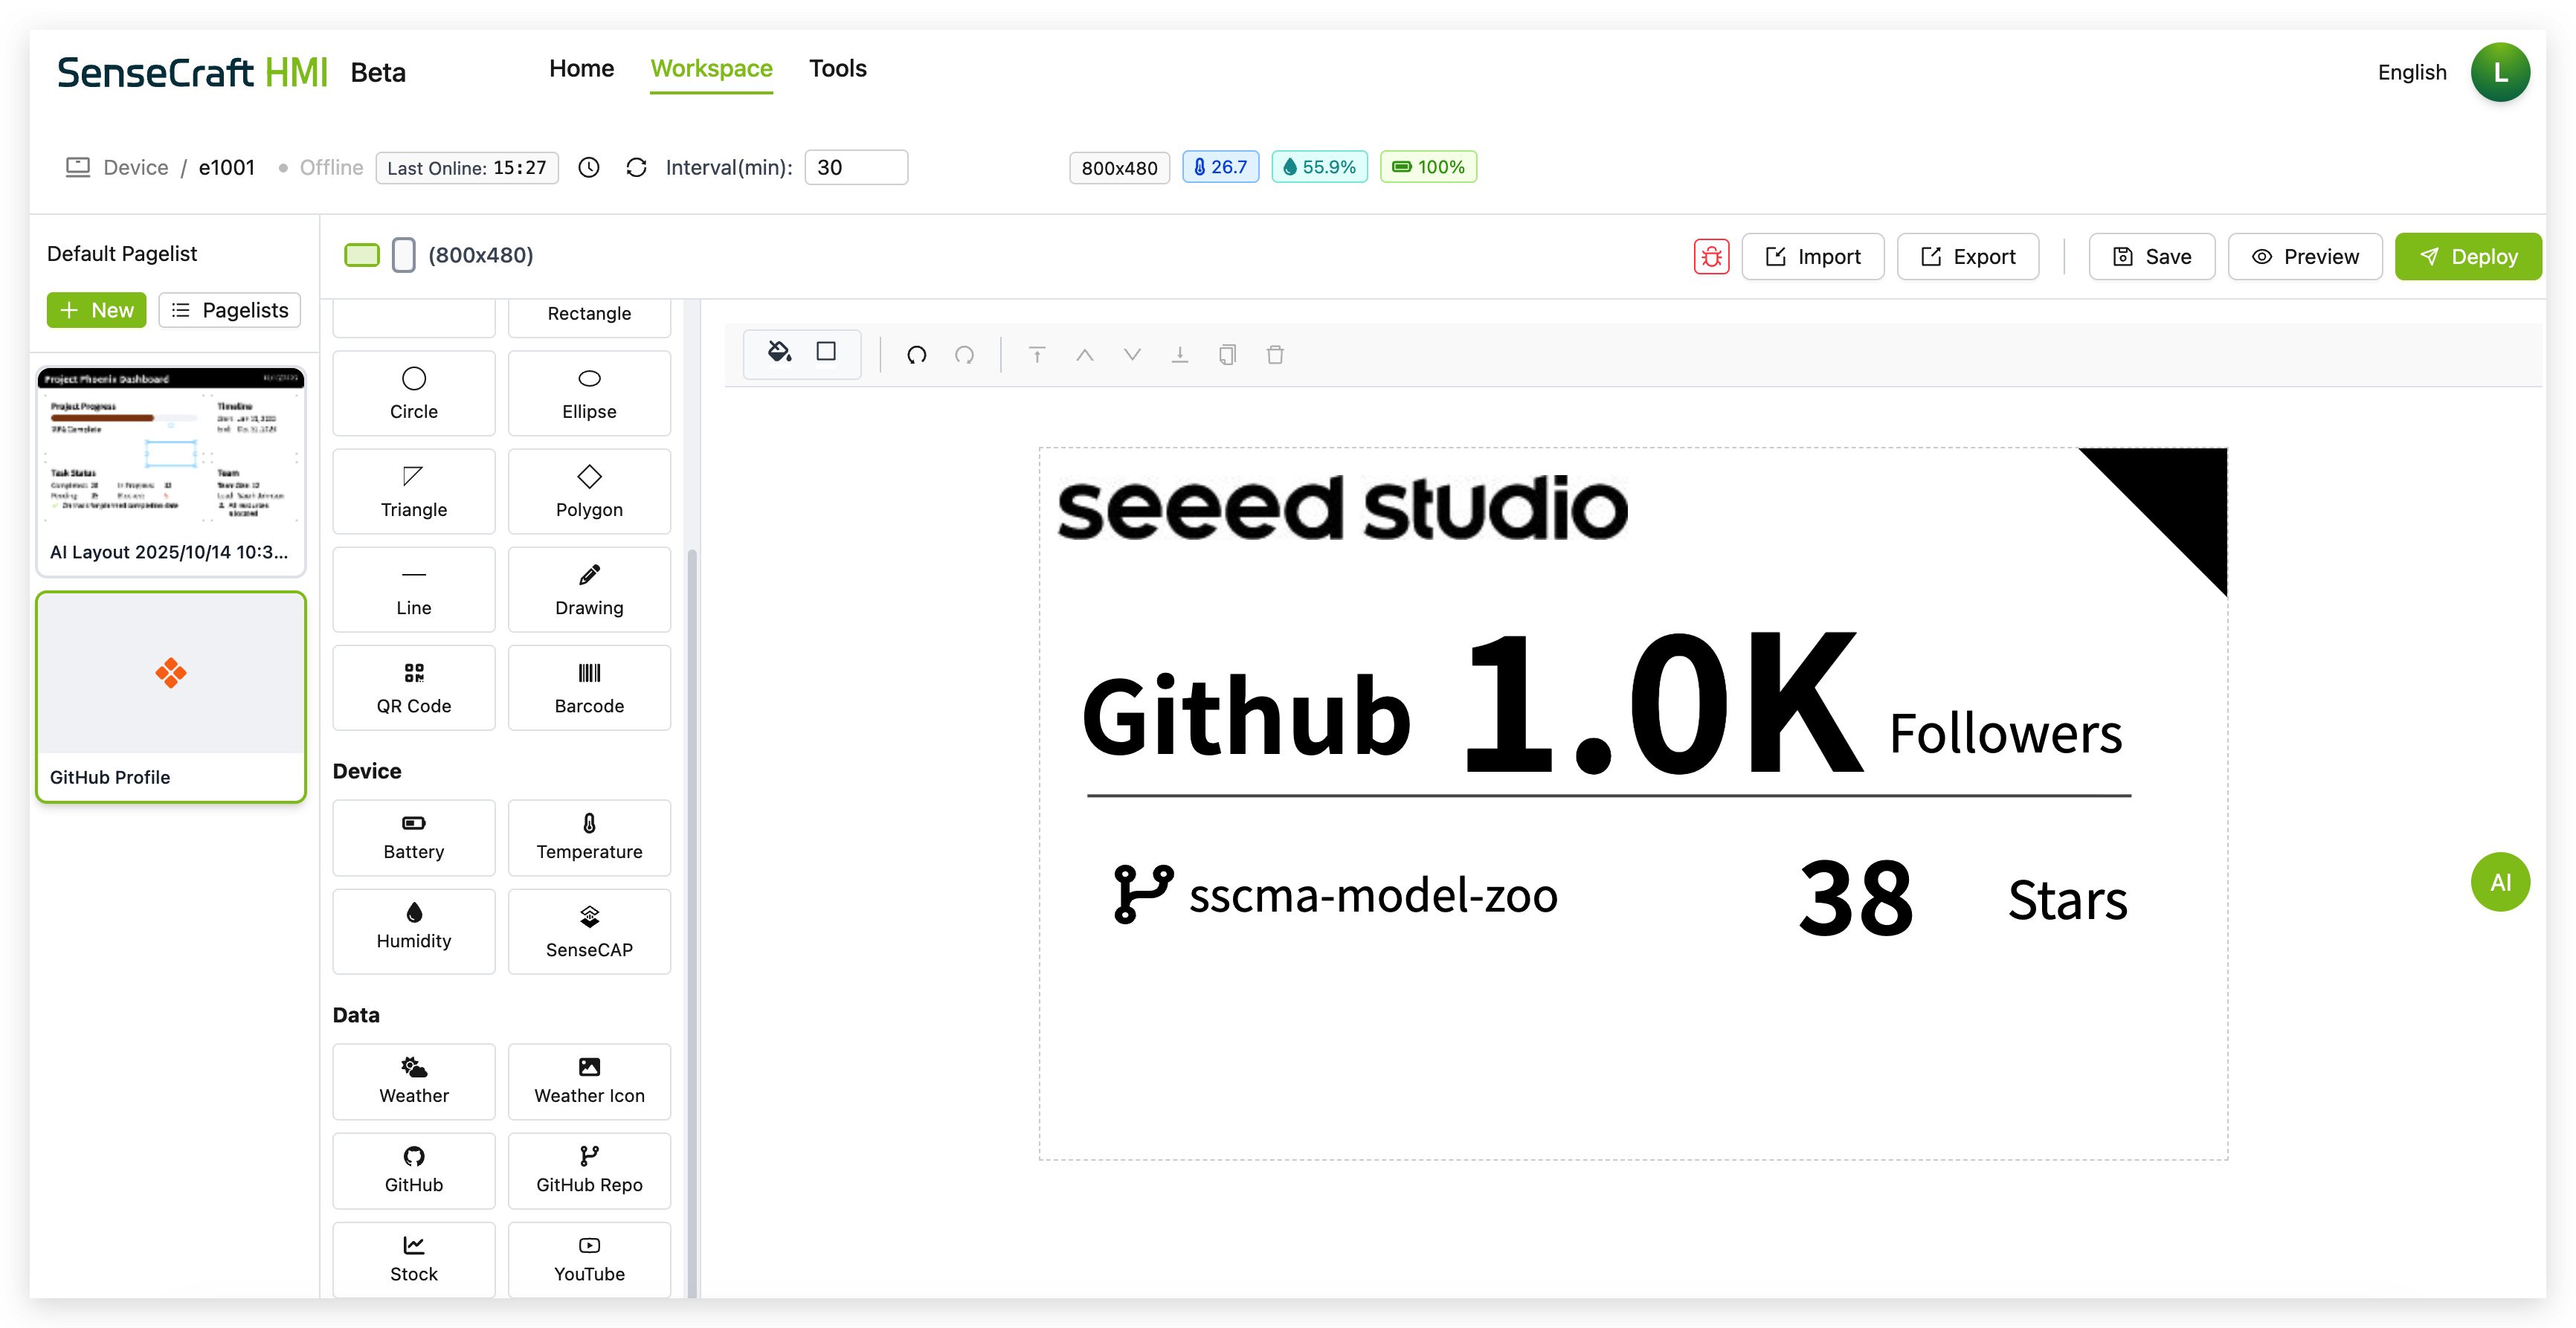
Section titled “GitHub Profile Template”The GitHub Profile Template creates a comprehensive dashboard displaying a GitHub user’s profile information and selected repositories with their statistics.
Step 1. Click on the “GitHub Profile” template in the Templates section
Step 2. In the “Configure Template: GitHub Profile” dialog that appears:
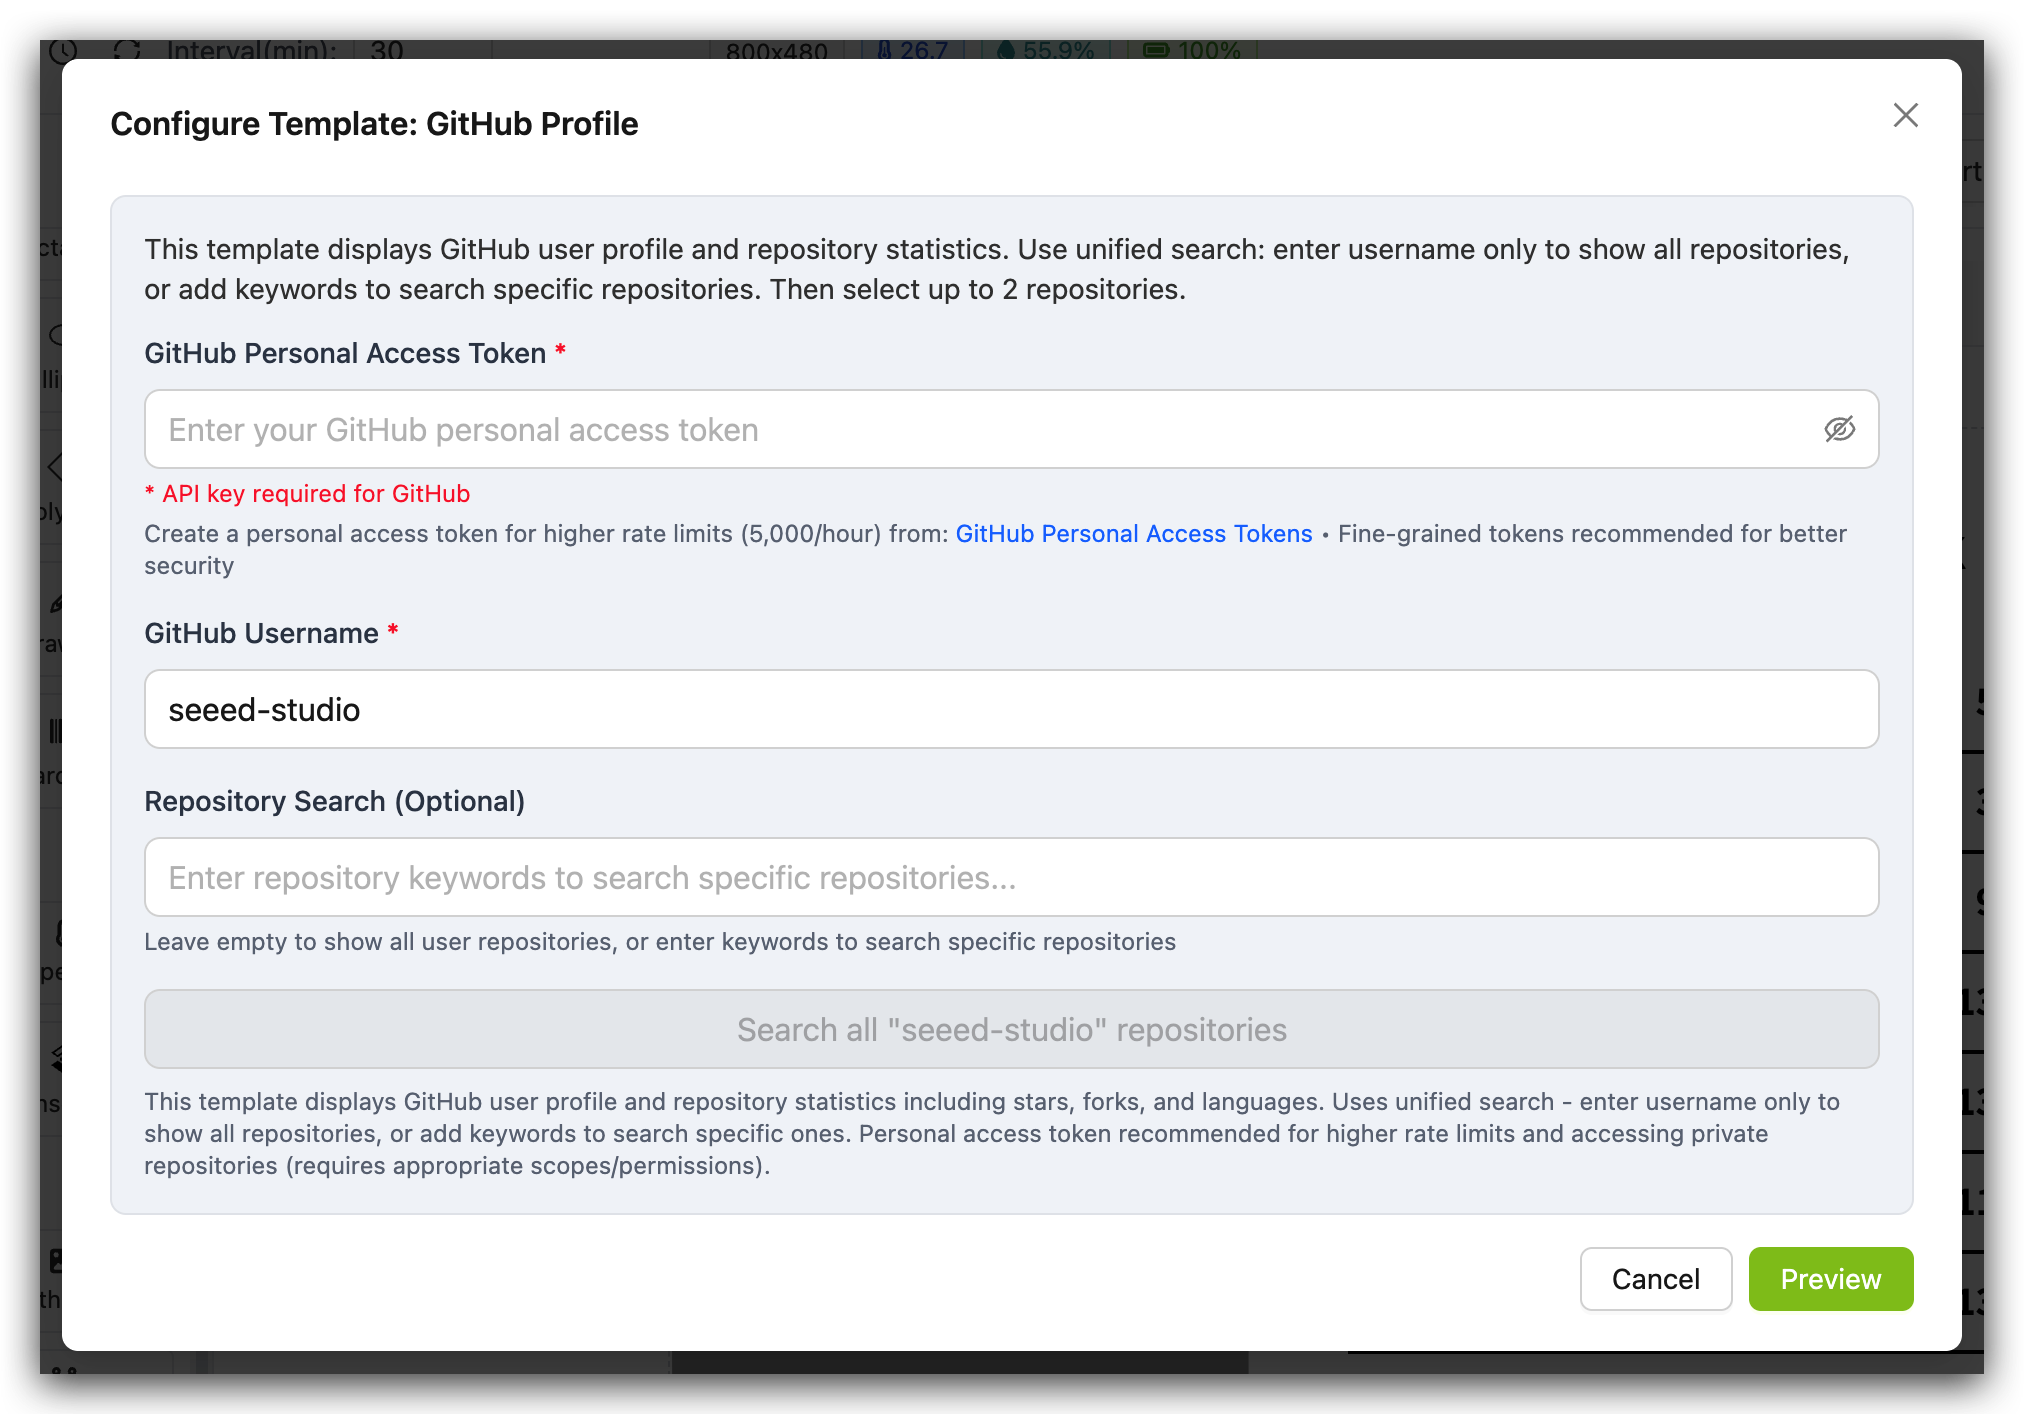
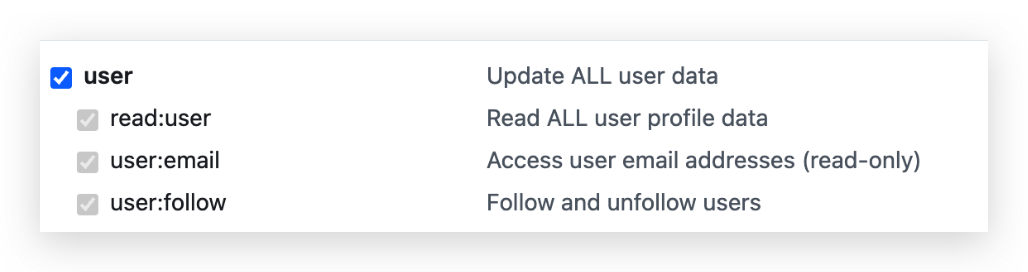
- Enter your GitHub Personal Access Token. You may need to enable all user permissions to ensure the SenseCraft HMI backend has permission to read data from the open-source repository.
-
Enter a GitHub username in the required field (e.g., “seeed-studio”)
-
Optionally enter keywords in the Repository Search field to filter repositories
-
Leave the search field empty to show all repositories from the user
Step 3. Click the “Search all ‘[username]’ repositories” button to retrieve the user’s repositories
Step 4. From the list of repositories displayed, select up to 3 repositories you want to showcase
-
Each repository shows its name, description, primary programming language, and star count
-
You can use the filter field to narrow down the repository list

Step 5. Click “OK” to confirm your selections
Step 6. A “Template Preview” window will appear showing:
-
The GitHub user’s display name at the top
-
“Github” label with follower count
-
A horizontal divider line
-
Selected repositories with their names and star counts
Step 7. Review the preview and note:
-
The template will replace all current elements on your canvas
-
All template elements will be given unique IDs to avoid conflicts
-
You can modify the template after applying it to the canvas
Step 8. Click “Apply to Canvas” to add the template to your workspace
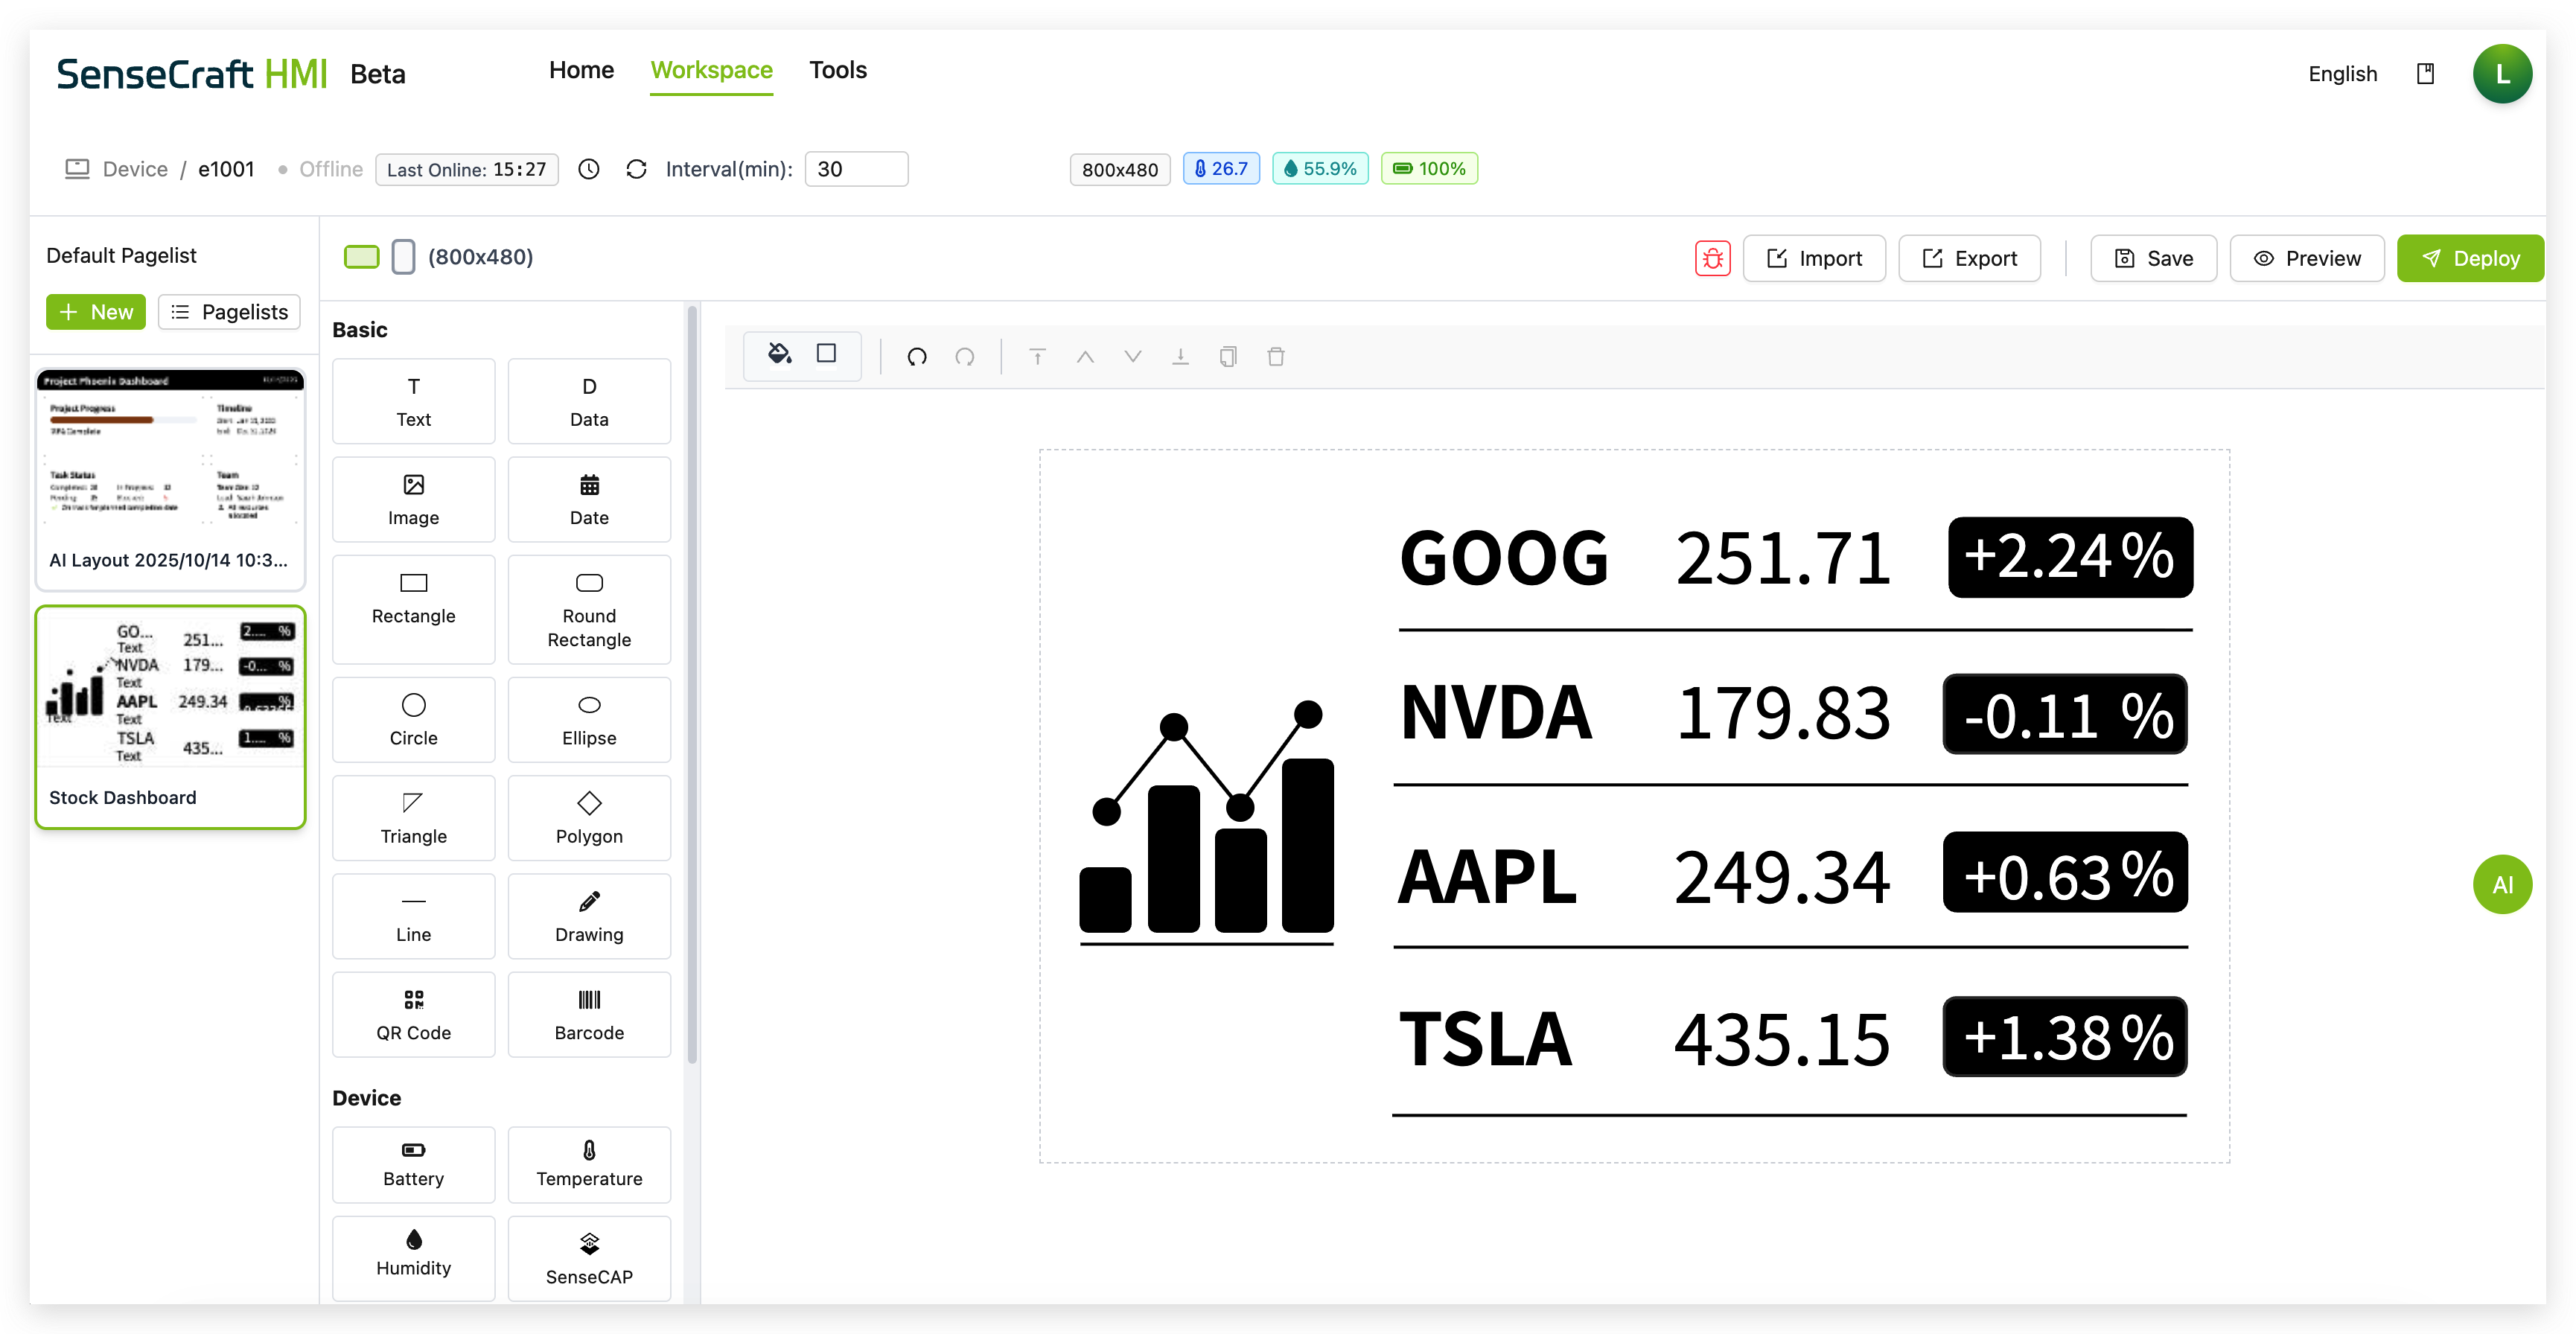
Stock Dashboard Template
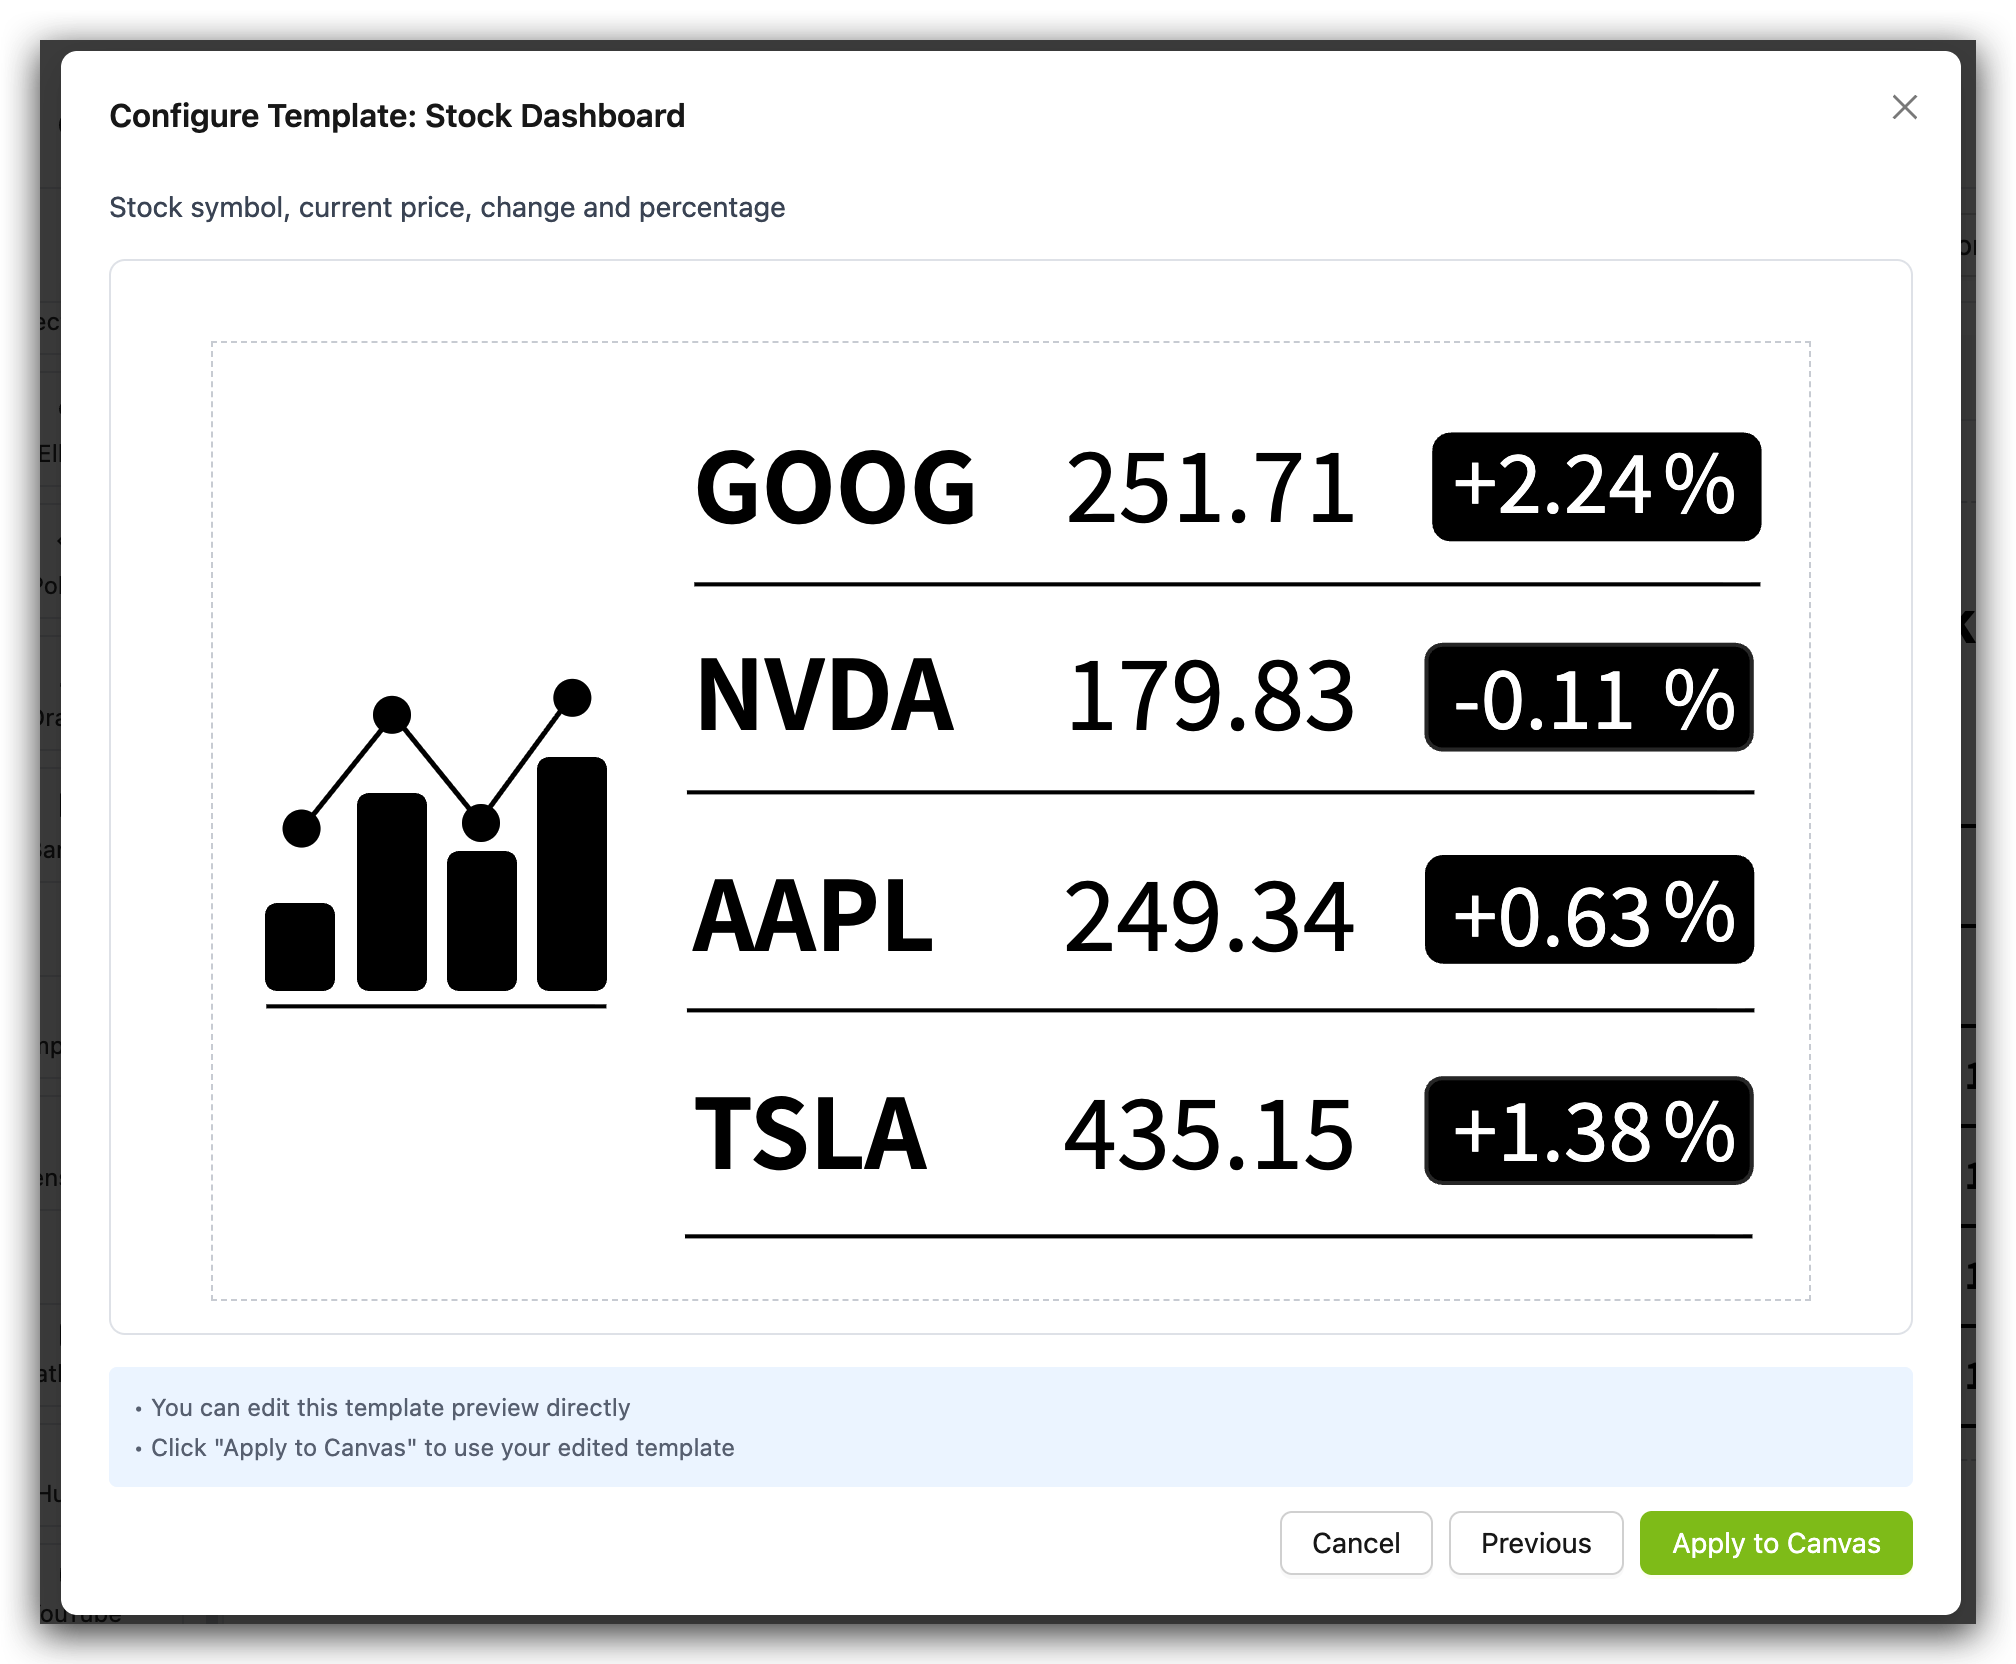
Section titled “Stock Dashboard Template”The Stock Dashboard Template provides a clean, professional display of real-time stock market data including price and percentage change.
Step 1. Click on the “Stock Dashboard” template in the Templates section
Step 2. In the “Configure Template: Stock Dashboard” dialog that appears:
- Enter your Twelve Data API Key in the field provided (masked for security)
Step 3. The template provides four default company stocks. If you wish to use stocks from other companies for display, you can modify them yourself after applying the template.
Step 4. Click “Preview” to confirm

Step 5. A “Template Preview” window will appear showing:
-
Left panel with the stock symbol in large text
-
Right panel displaying the current stock price and percentage change
Step 6. Review the preview and note:
-
All template elements will be given unique IDs to avoid conflicts
-
You can modify the template after applying it to the canvas
Step 7. Click “Apply to Canvas” to add the template to your workspace
YouTube Channel Stats Template
Section titled “YouTube Channel Stats Template”The YouTube Channel Stats Template showcases a YouTube channel’s branding, slogan, and subscriber count in a clean, modern design.
Step 1. Click on the “YouTube Channel Stats” template in the Templates section
Step 2. In the “Configure Template: YouTube Channel Stats” dialog that appears:
-
Enter your YouTube Data API Key (masked for security)
-
Enter a YouTube Channel Identifier in one of the supported formats:
- Channel ID: 24-character string starting with “UC” (e.g., UC_x5XG1OV2P6uZZ5FSM9Ttw)
- @Handle: Channel handle starting with @ (e.g., @seeedstudiosz)
- Channel URL: Full YouTube URL (e.g., youtube.com/@seeedstudiosz)
Step 3. Click “Validate Channel” to verify the channel exists and retrieve its data
Step 4. If validation is successful, you’ll see a confirmation message (e.g., “Found channel: Seeed Studio • 20.4K”)
Step 5. Click “OK” to proceed

Step 6. A “Template Preview” window will appear showing:
-
Left panel with the channel name and slogan/description in a stylish black background
-
Right panel with “YouTube” label, subscriber count, and “Subscribers” text

Step 7. Review the preview and note:
-
The template will replace all current elements on your canvas
-
All template elements will be given unique IDs to avoid conflicts
-
You can modify the template after applying it to the canvas
Step 8. Click “Apply to Canvas” to add the template to your workspace

Managing Pagelists
Section titled “Managing Pagelists”The Pagelists button opens a powerful management interface that gives you full control over your content organization.
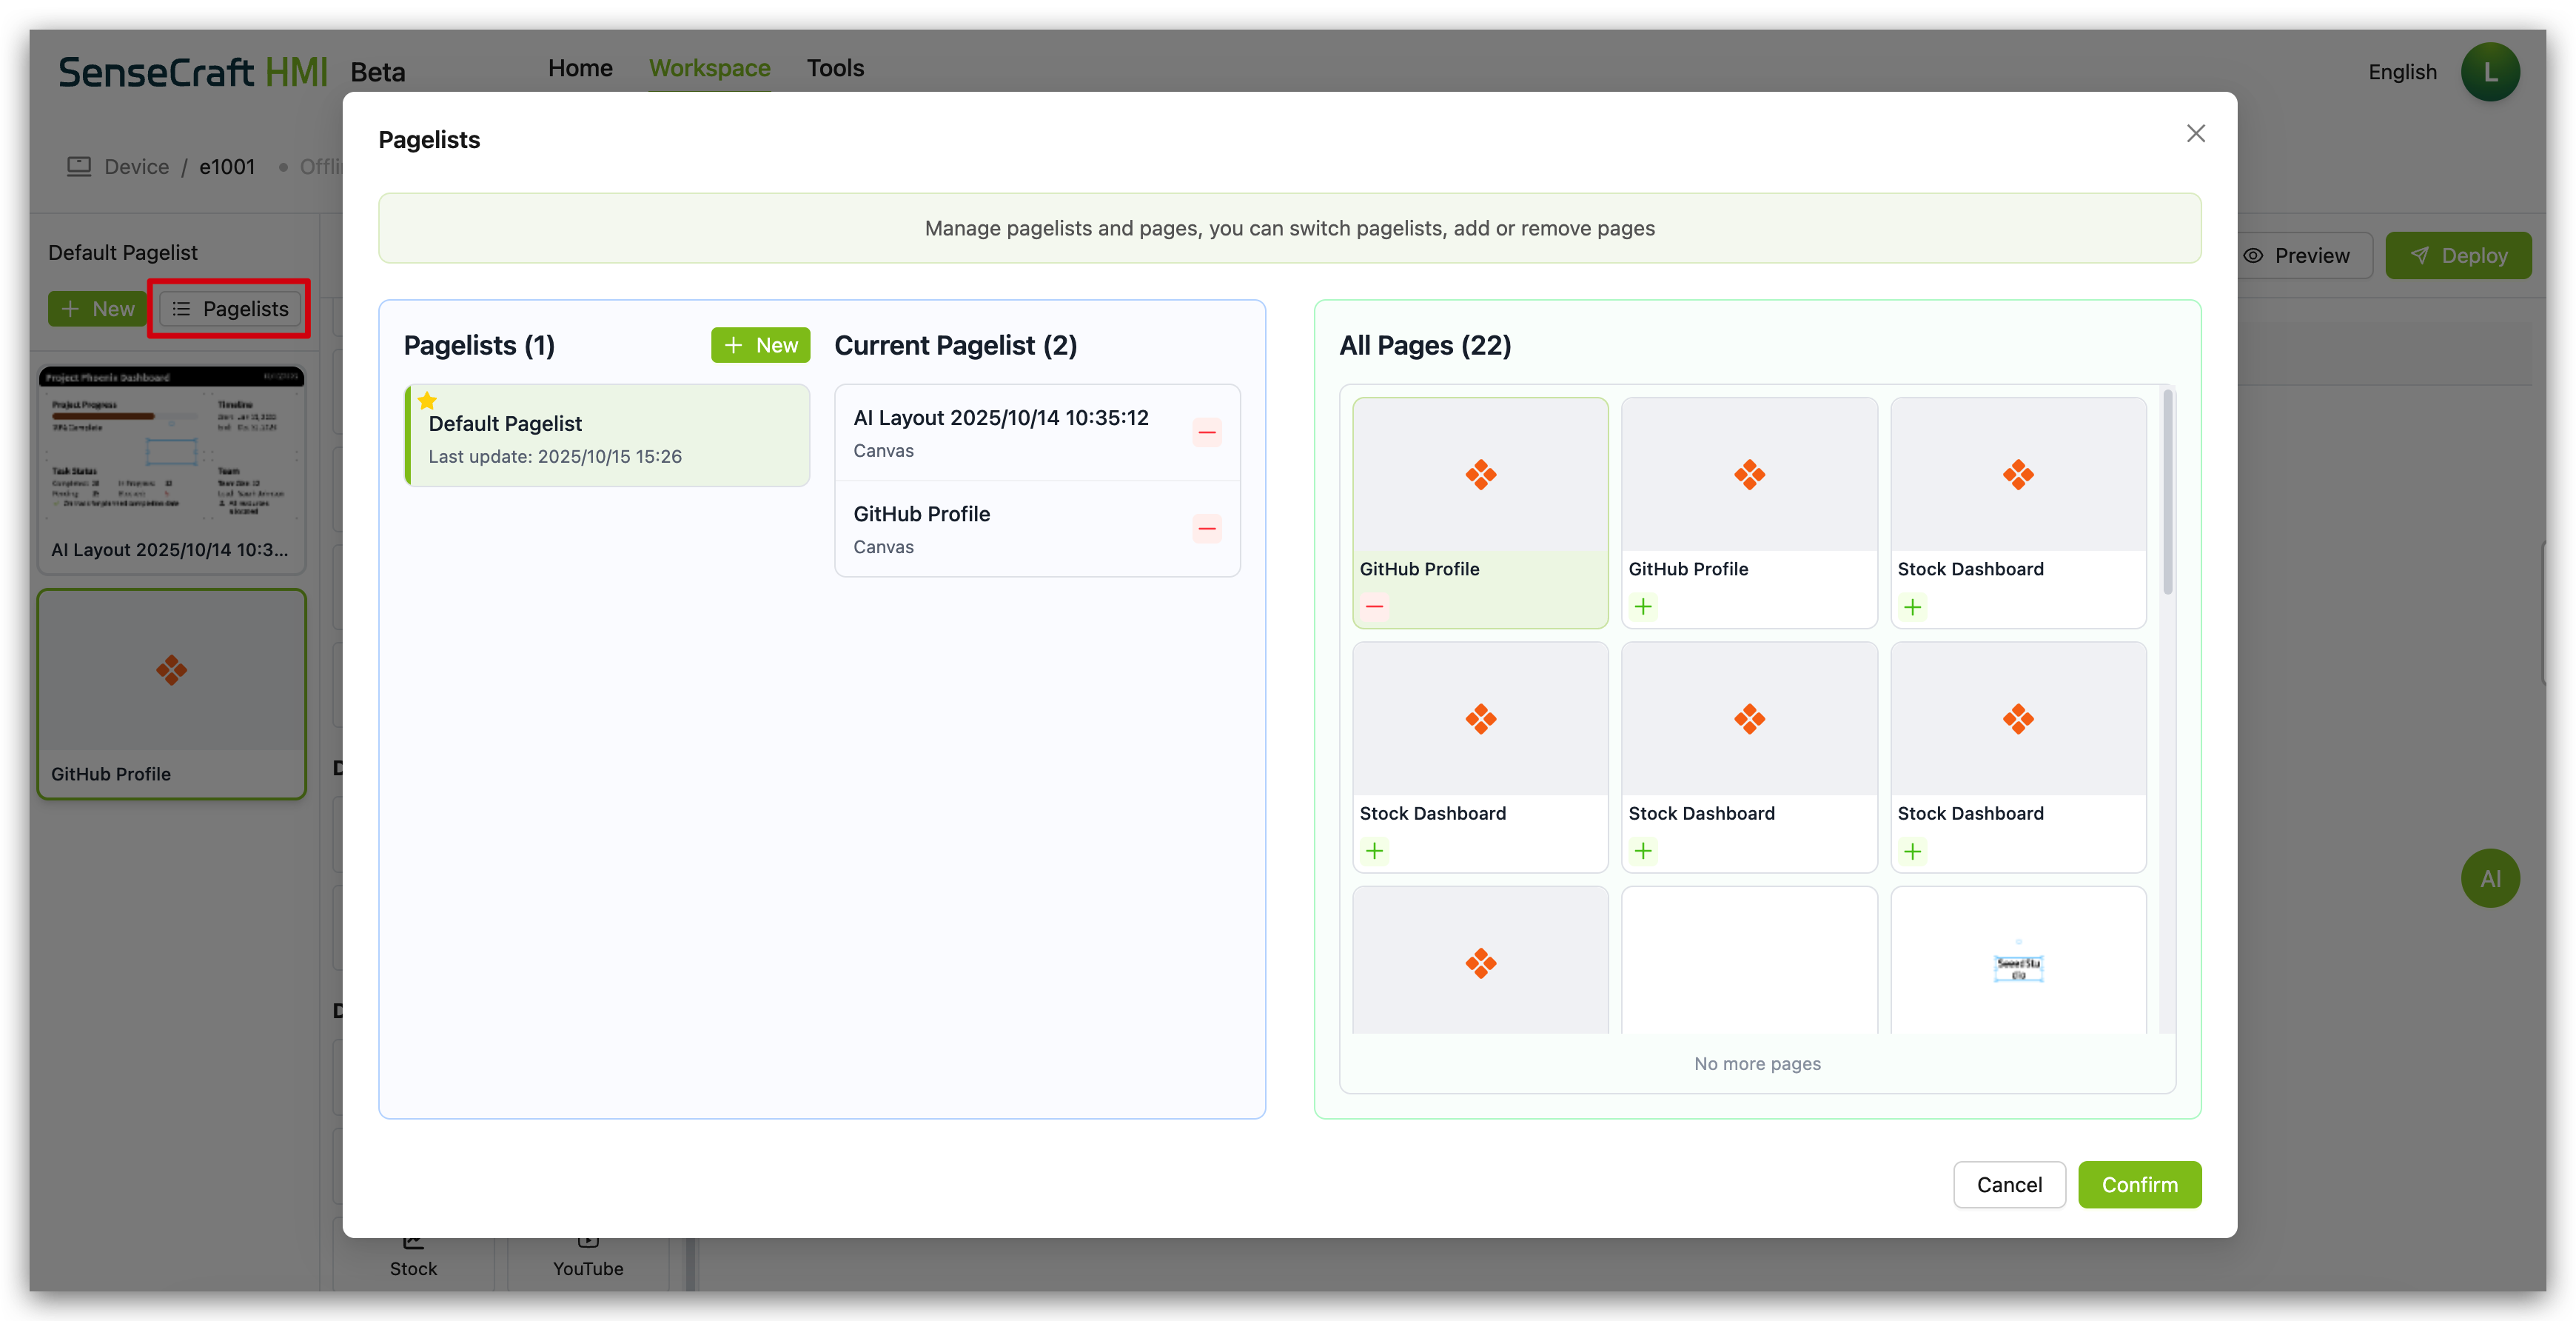
Step 1. Click the Pagelists button next to the + New button.
Step 2. The “Manage pagelists and pages” modal will appear, which is divided into three sections:
-
Pagelists (Left Panel): This area lists all the Pagelists you have created.
- The starred list (
Default Pagelistin the image) is the one currently active and will be displayed on the device. - You can click
+ Newhere to create a new, empty Pagelist.
- The starred list (
-
Current Pagelist (Middle Panel): This shows all the Pages currently inside the selected Pagelist.
- Click the red minus icon (
-) to remove a page from the Pagelist (this does not delete the page itself).
- Click the red minus icon (
-
All Pages (Right Panel): This is your library of all the Pages you have ever created. Only pages where you have clicked the Save button will appear here.
- To add a page to your currently selected Pagelist, simply click the plus icon (
+) on the desired page thumbnail. It will then appear in the “Current Pagelist” panel.
- To add a page to your currently selected Pagelist, simply click the plus icon (
Step 3. Once you have organized your Pagelist as desired, click Confirm to save the changes.
The Main Toolbar: Your Control Center
Section titled “The Main Toolbar: Your Control Center”This toolbar contains the essential action buttons for the design and deployment process.

-
Screen Orientation: These two icons allow you to switch your design canvas between landscape (horizontal) and portrait (vertical) modes.
-
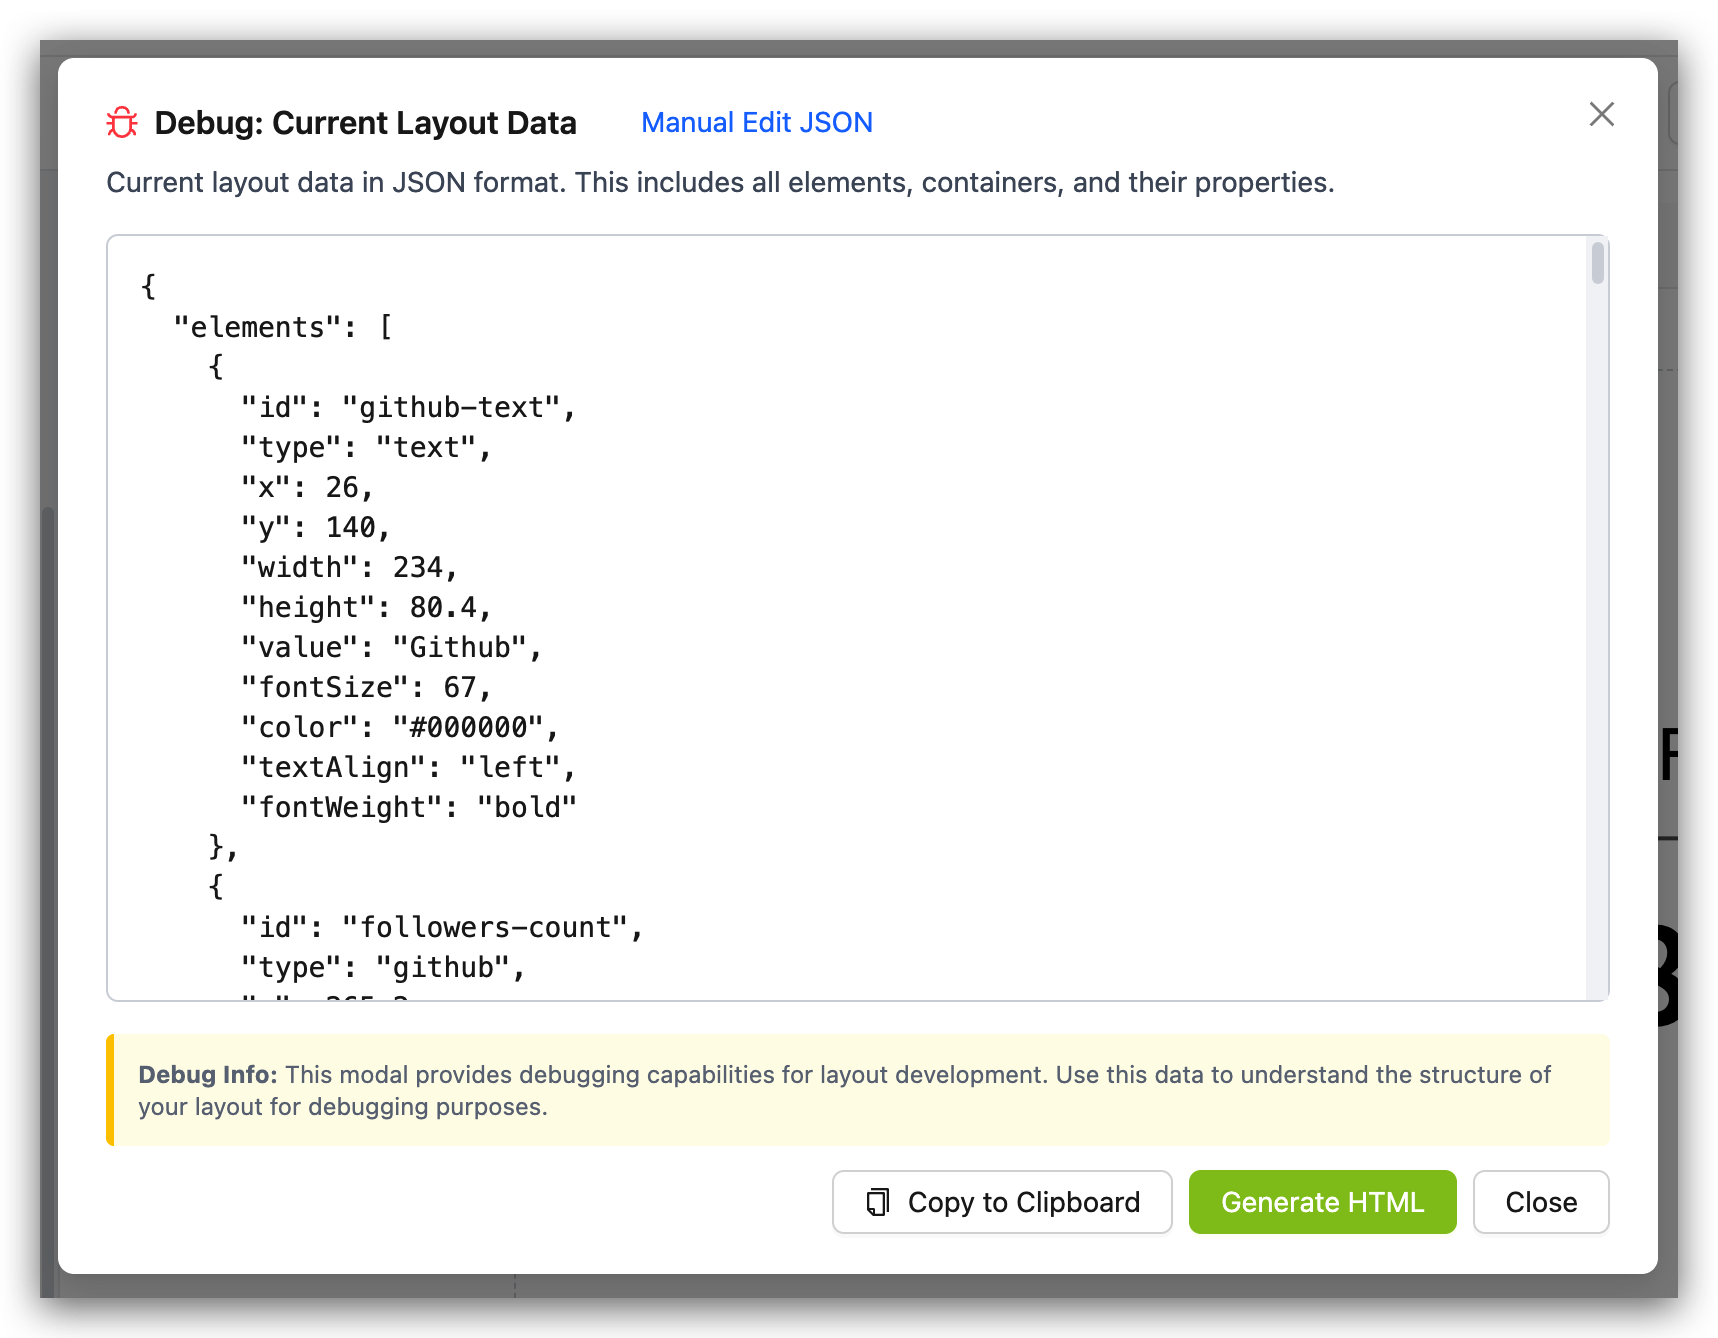
Debug (Bug Icon): This is a powerful feature for advanced users.
- Clicking it opens the “Debug: Current Layout Data” modal.
- This modal shows the entire layout’s configuration in JSON (JavaScript Object Notation) format, detailing every element, its position, size, color, and other properties.
- You can use this to understand the structure of your design for debugging purposes.
- Users comfortable with code can even click Manual Edit JSON to directly modify the layout’s properties, offering an incredible degree of control.
-
Import / Export: These buttons allow you to save your page designs to a local file (Export) or load a design from a local file (Import). This is useful for backing up your work or sharing designs.

The Export function allows you to save your current UI design as a file:
Step 1. After completing your interface design, click the Export button (outward arrow icon) in the top toolbar.
Step 2. In the file save dialog that appears, choose a save location and name your file.
Step 3. Click “Save” to complete the export process.
Your design will be saved as a JSON file containing all interface information, which can be used for backup or sharing.
The Import function enables you to load previously exported designs or templates:
Step 1. Click the Import button (inward arrow icon) in the top toolbar.
Step 2. In the file selection dialog, locate and select your previously exported design file.
Step 3. Click “Open” and the selected design will load into your current workspace.
These features are particularly useful for:
- Backing up designs before making major changes
- Sharing interface designs with team members
- Transferring projects between different devices
- Quickly starting new projects using pre-made templates
-
Save: This is one of the most important buttons. It saves your current page design to the SenseCraft HMI cloud. It does not save to your device.
-
Preview: This button shows you a virtual preview of how your current design will look on the device’s screen. It’s a quick and easy way to check your layout, fonts, and colors without having to deploy to the actual hardware.
-
Deploy: This is the final step. The Deploy button sends your saved and active Pagelist to your connected device. The device will then download and display the new content.
Conclusion
Section titled “Conclusion”You now have a solid understanding of the fundamental controls within SenseCraft HMI. By effectively using the Device Status Bar, managing your Pages and Pagelists, and following the Save -> Preview -> Deploy workflow, you are well-equipped to create, manage, and display any content you can imagine on your screen-based device.