Getting Started
This guide walks you through the core first-use workflow in SenseCraft HMI, including connecting a compatible device, pairing it with your account, checking device status, and updating firmware when needed.
If you are new to the platform, we recommend reading the Overview first for platform introduction, account registration, and feature details.
The following walkthrough uses reTerminal E1002 as an example to demonstrate the basic SenseCraft HMI workflow.
If you are using a different device, you can still follow the same general process. Visit Supported Hardware to find the matching device page, or use the links below to jump directly to the corresponding wiki guide.
- reTerminal E1001
- reTerminal E1002
- reTerminal E1003
- reTerminal E1004
- TRMNL 7.5” (OG) DIY Kit
- XIAO ePaper DIY Kit EE02
- XIAO ePaper DIY Kit EE03
- XIAO ePaper DIY Kit EE04
- XIAO ePaper DIY Kit EE05
Update Your Device Firmware
Section titled “Update Your Device Firmware”Before you begin, make sure you have:
- A USB cable to connect the device to your computer
- A stable internet connection to download firmware files
- A supported browser such as Chrome, Firefox, Safari, or Edge
- Enough device power to complete the flashing process safely
- A registered SenseCraft HMI account with access to the platform
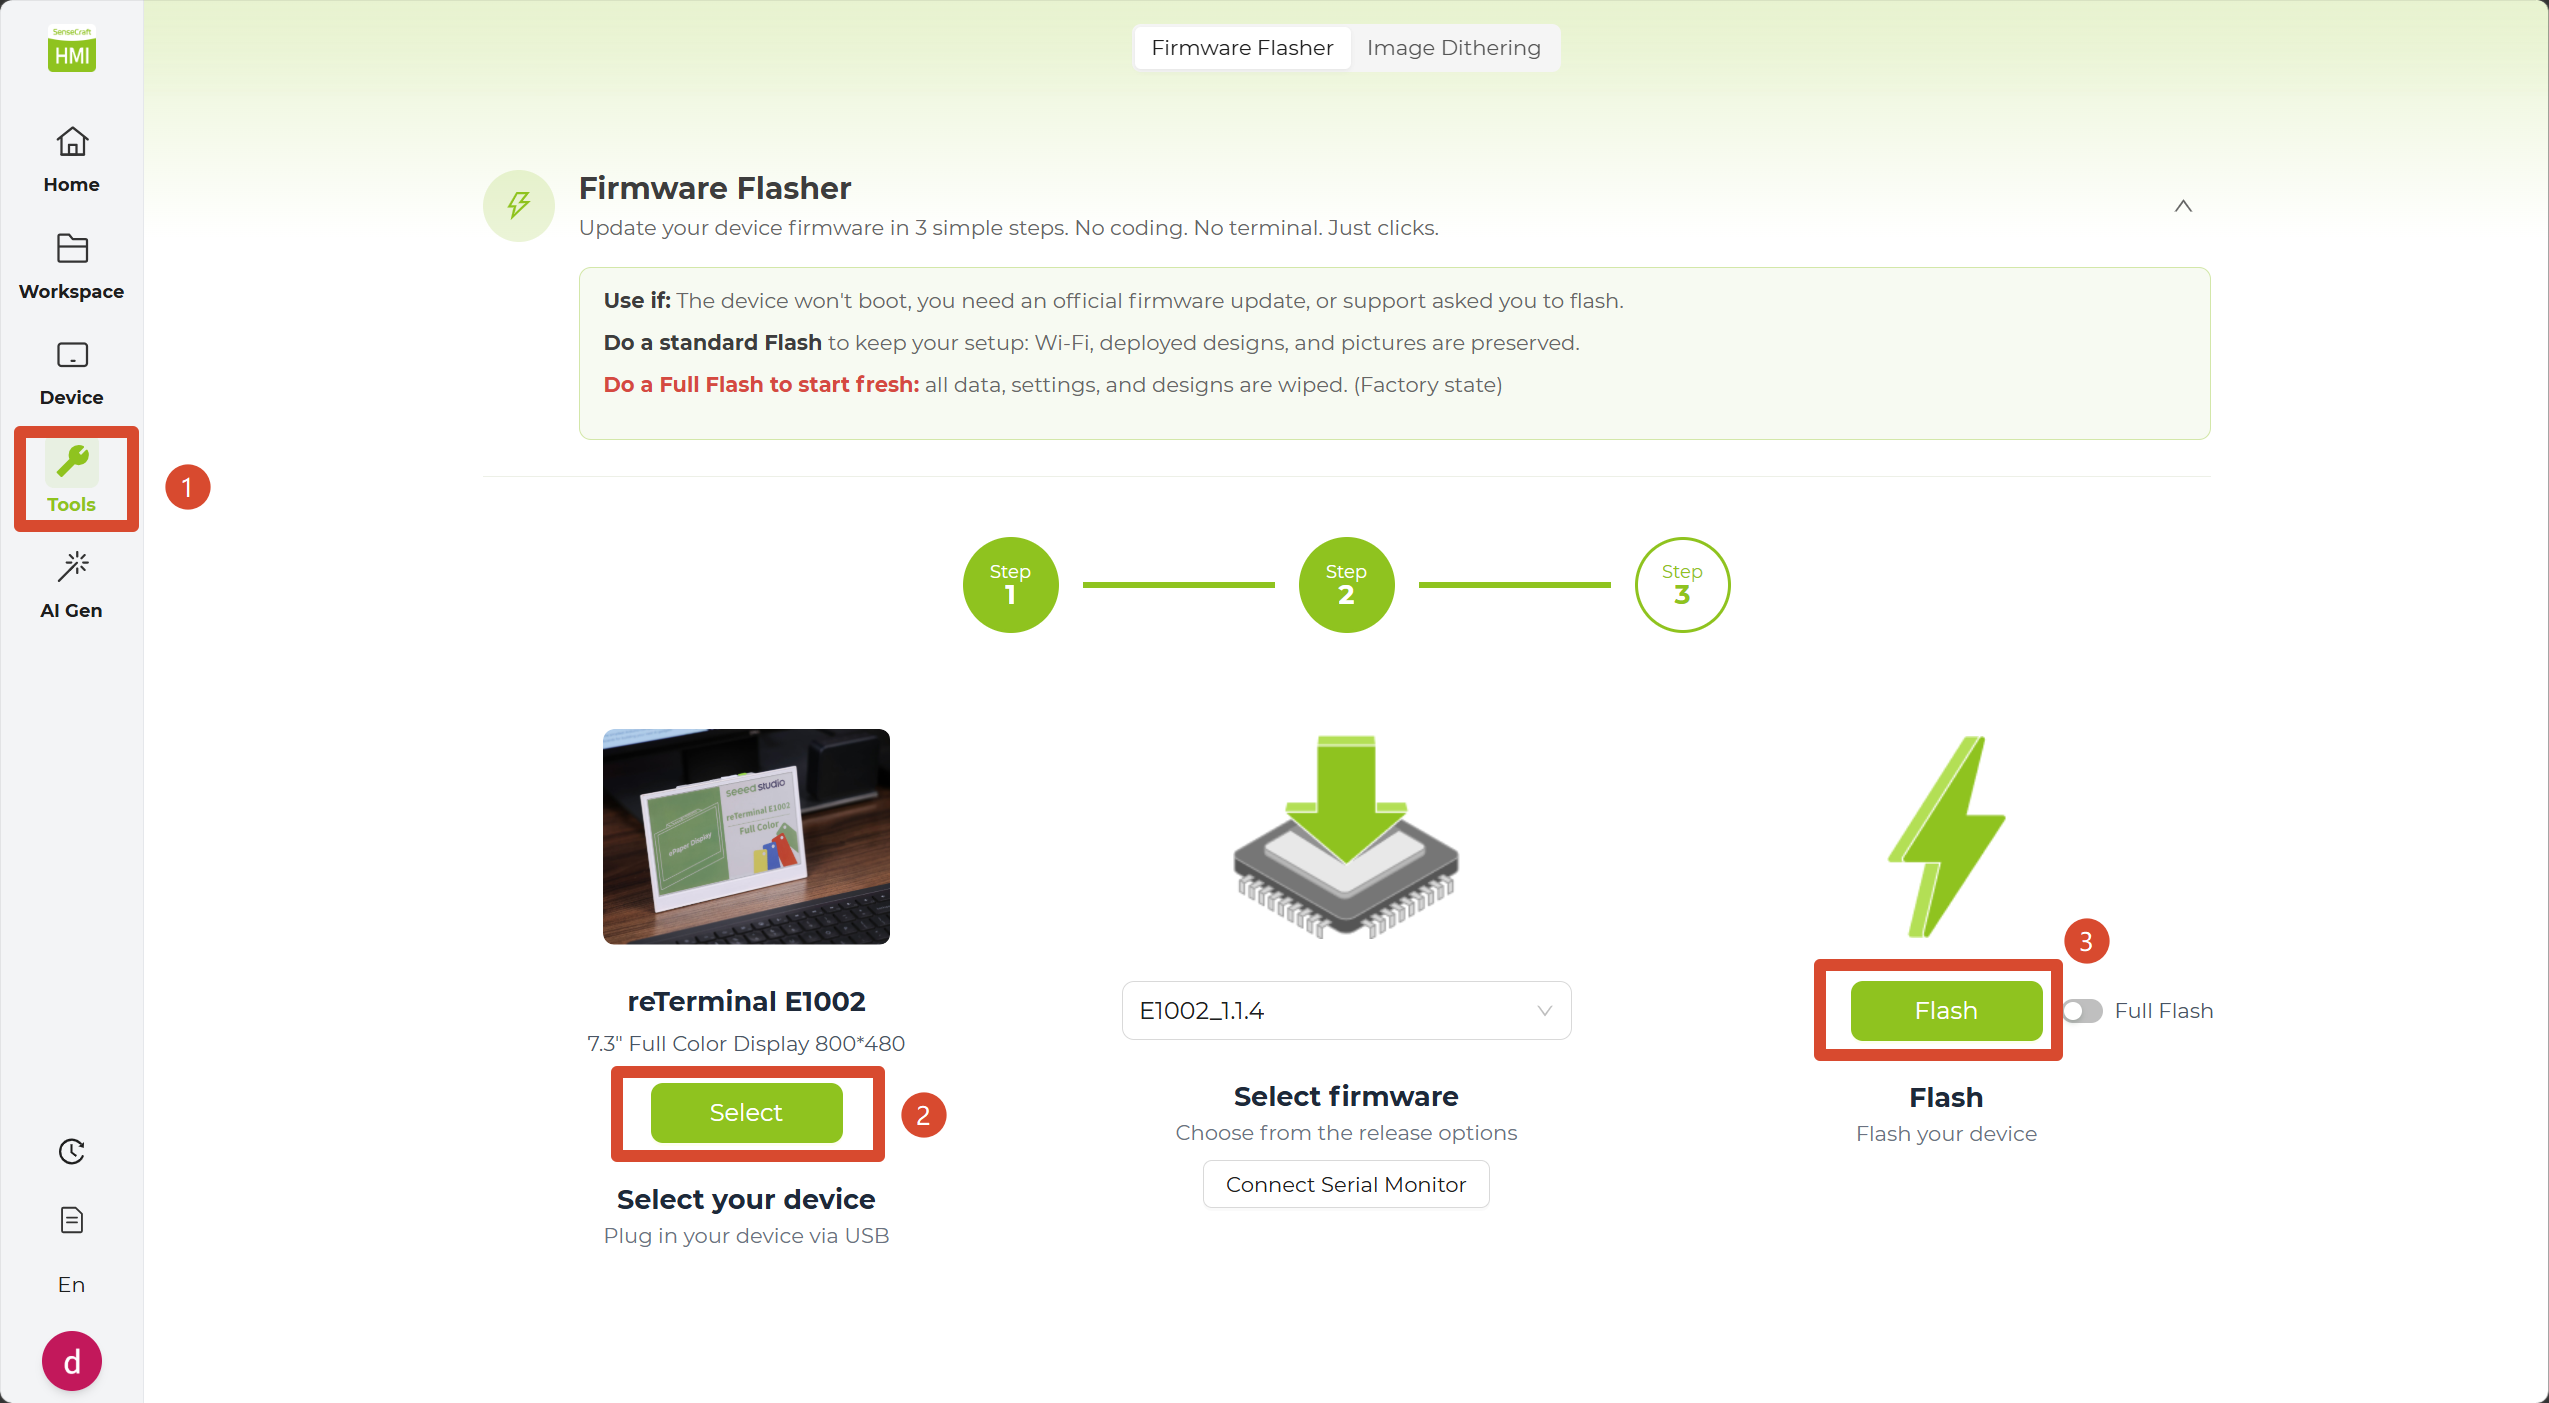
Step 1: Connect the Device via USB
Section titled “Step 1: Connect the Device via USB”Connect your device to your computer with a USB cable.
Step 2: Select Device
Section titled “Step 2: Select Device”Click Select. In the pop-up window, choose your device from the supported hardware list.
If you select ePaper DIY Kit - EE04, you must also choose the correct screen type and size so the proper display driver can be included.
Step 3: Update Device
Section titled “Step 3: Update Device”Click Flash to start the update process. Do not disconnect the device or close the browser tab until the progress reaches 100%.
After Flashing
Section titled “After Flashing”Wait for the device to restart automatically. This may take a short moment.
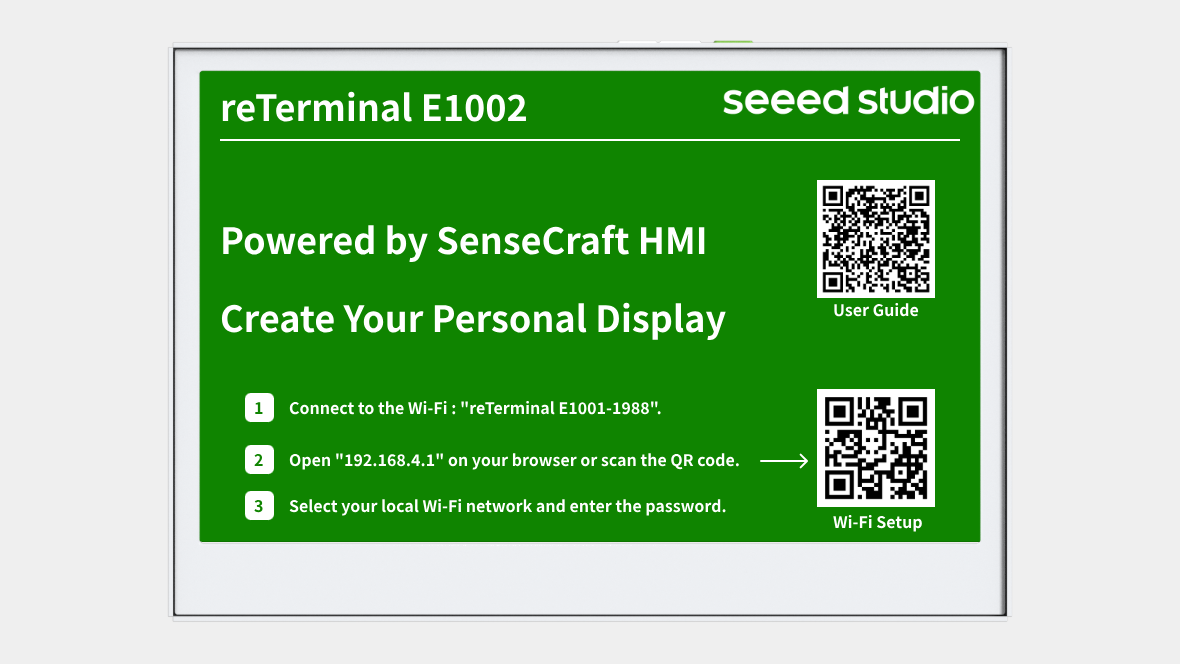
If you performed a Full Flash, the device will need to be set up again after the restart because its saved settings were erased during flashing. It will return to configuration mode after restarting. Reconnect it to Wi-Fi, then pair it with SenseCraft HMI again by following the steps in the next section.
For example, if you are using a reTerminal E1002, the screen will look like this after a Full Flash:
Connect Your Device
Section titled “Connect Your Device”Step 1: Enter Config Mode and Connect to Device Wi-Fi
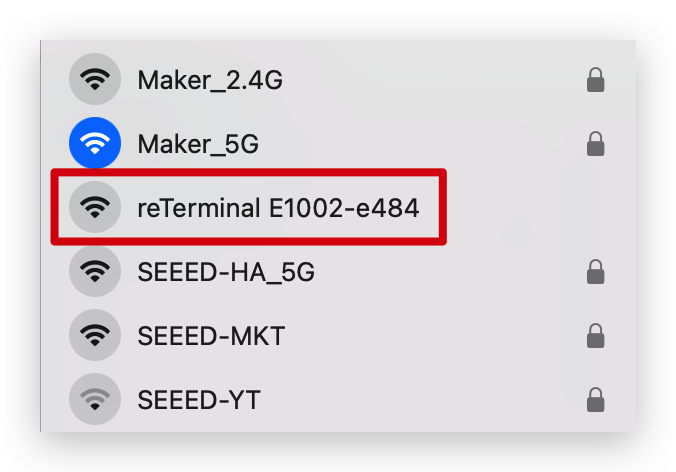
Section titled “Step 1: Enter Config Mode and Connect to Device Wi-Fi”By default, new devices, or devices after a Full Flash, enter configuration mode automatically after startup. In this mode, use your phone or computer to connect to the Wi-Fi hotspot shown on the ePaper screen.
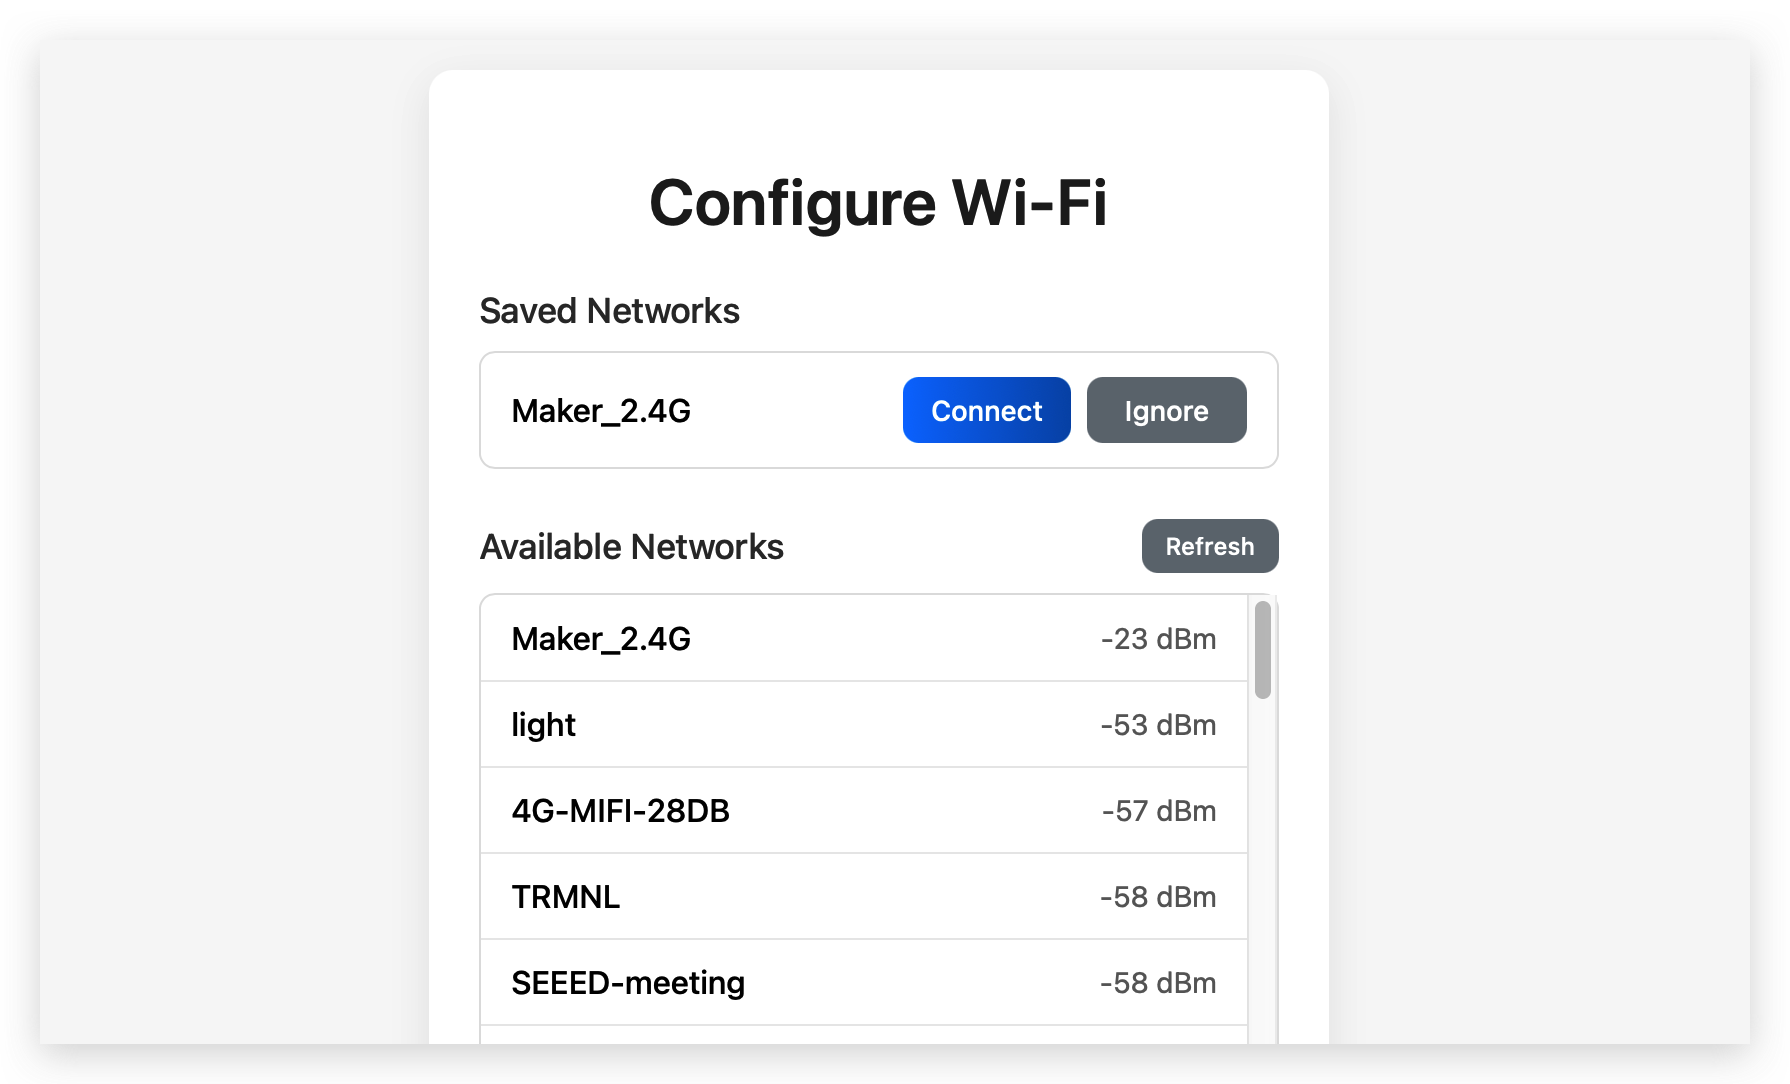
Step 2: Open the Config Page and Set Up Wi-Fi
Section titled “Step 2: Open the Config Page and Set Up Wi-Fi”In your browser, go to http://192.168.4.1/. Then select your local Wi-Fi network, enter the password, and click Connect.
Step 3: Get the Pairing Code
Section titled “Step 3: Get the Pairing Code”After the device connects successfully, a 6-digit pairing code will appear automatically on the screen.

Step 4: Add the Device in SenseCraft HMI
Section titled “Step 4: Add the Device in SenseCraft HMI”On the Device page, click + Add NEW Device.

Step 5: Complete Pairing
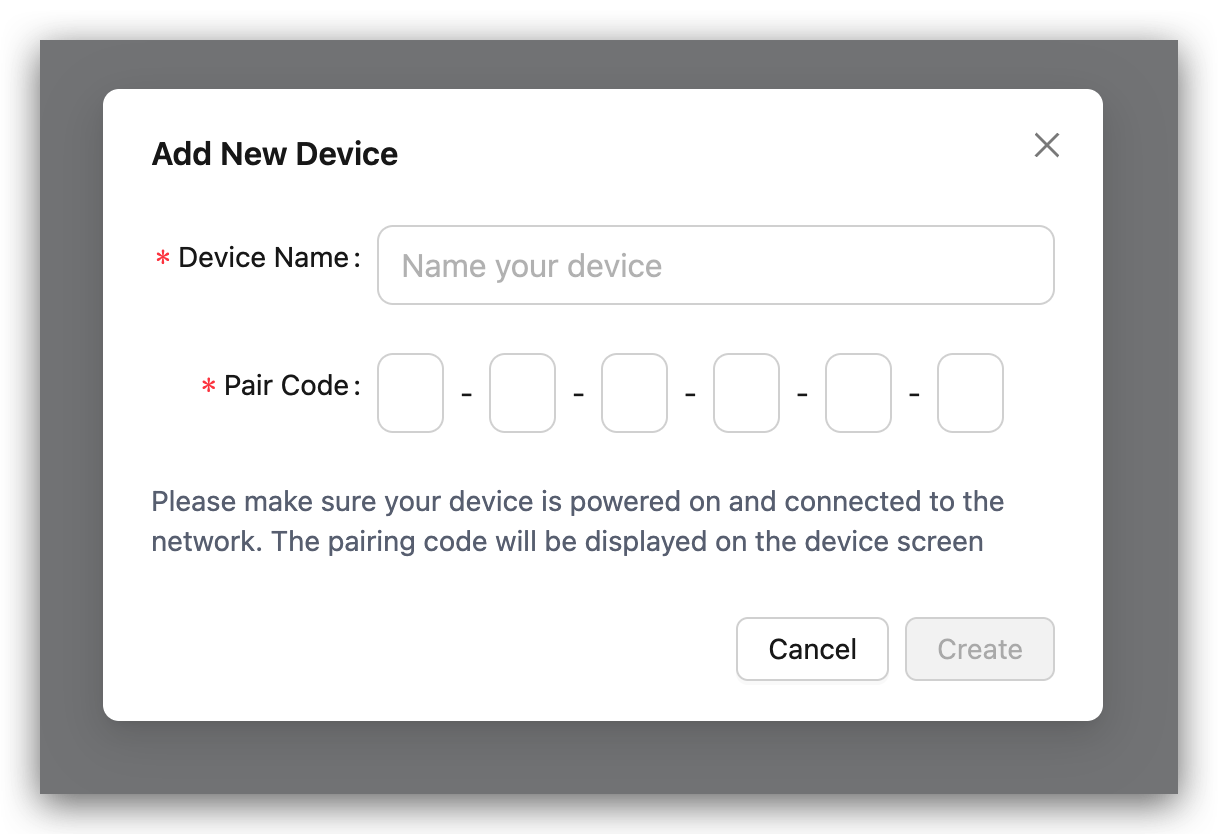
Section titled “Step 5: Complete Pairing”Enter a custom device name and the 6-digit pairing code, then click Create.
Manage Your Device
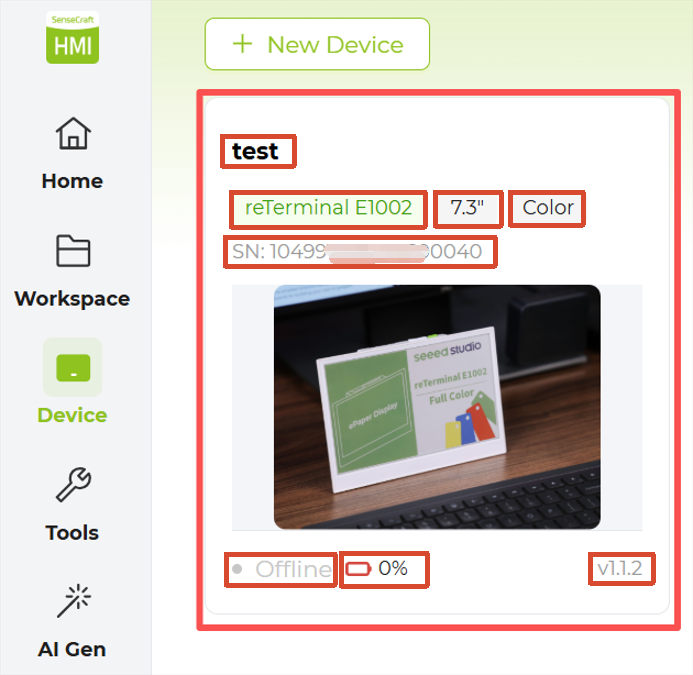
Section titled “Manage Your Device”After pairing, you can view your device on the Device page. The top section shows the device name you assigned, followed by details such as the device model, supported screen size, color mode, MAC address or SN number, online status, battery level, and firmware version.
For example, an E1002 device may display a custom name such as test, along with the model reTerminal E1002, a supported screen size of 7.3", a color mode of Full color, an SN number such as 1049****0040, Offline status, 0% battery, and firmware version 1.1.2.
Click the device card to open the detailed view. From there, you can check and manage:
- Low Power Mode: Enable or disable power-saving behavior.
- Refresh Interval: Control how often the display refreshes.
- Online Status: Check whether the device is currently connected.
- Battery Status: Monitor the current battery percentage.
- Active Page: View and manage the page currently shown on the device.

Quickly Deploy Community Templates
Section titled “Quickly Deploy Community Templates”Next, let’s quickly deploy a community template to your device.
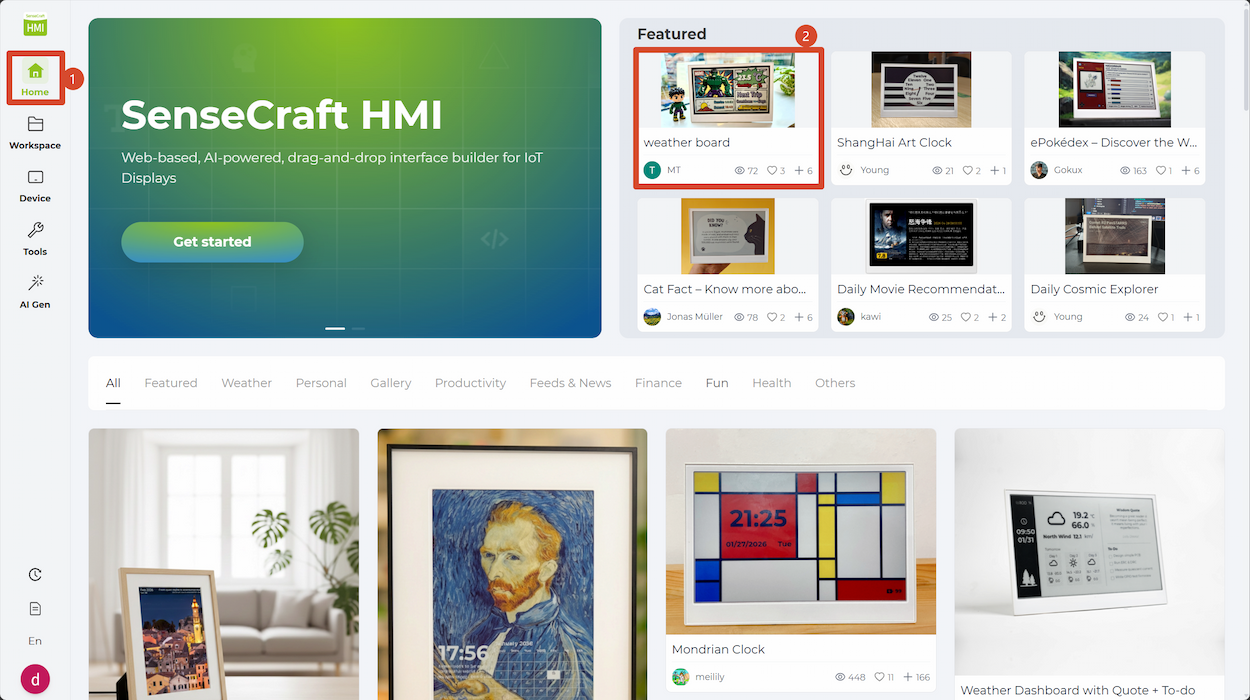
Step 1. Click Home to return to the main page.
Step 2. Open any template shared by another user to view its details.
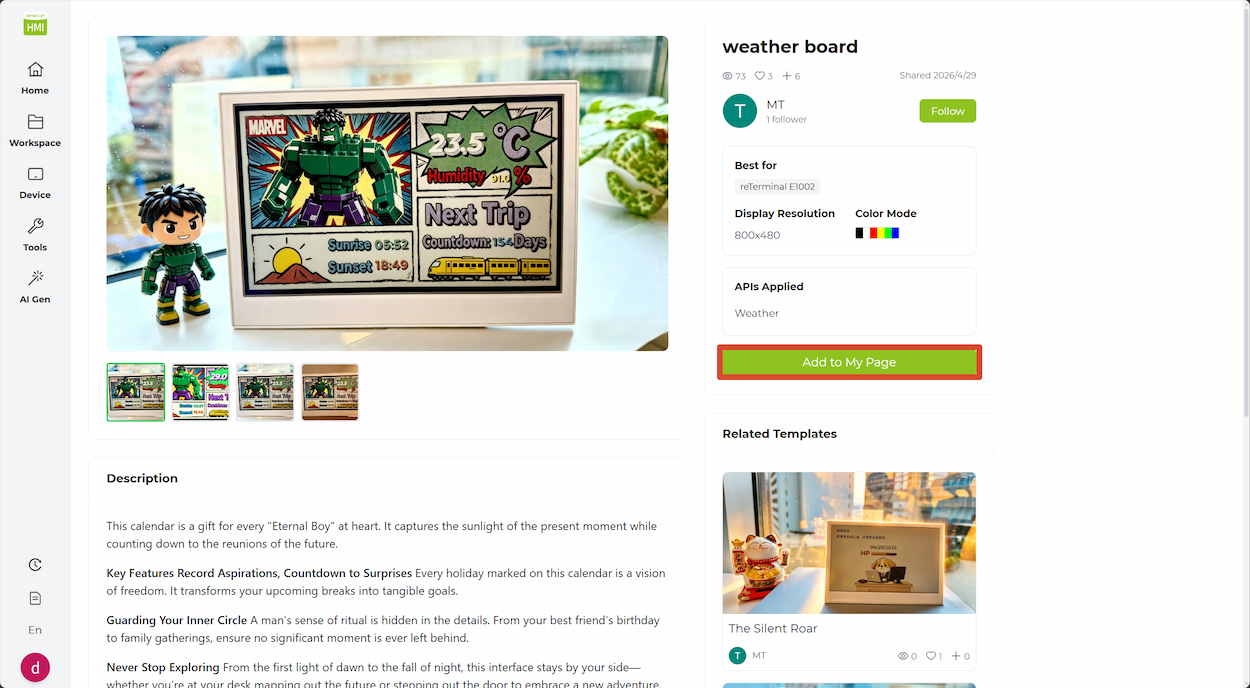
Step 3. On the right side of the details page, click Add to My Page to add the template to your page library.
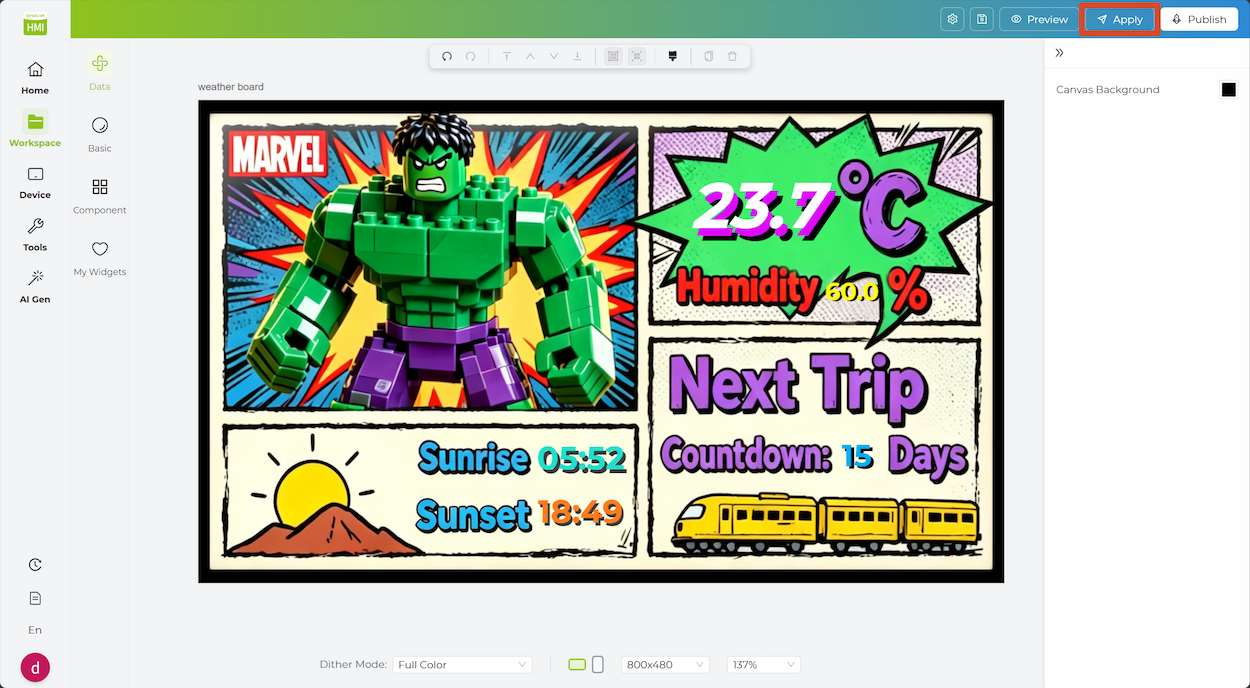
Step 4. On the page that opens next, click Apply in the top-right corner to send the template to your device.
Step 5. Wait a moment while the content is delivered to the device.
What’s Next
Section titled “What’s Next”Once your device is online, you can continue with the rest of the platform workflow:
- Explore the Workspace to design and deploy your own pages.
- Visit AI Gen to create content with AI assistance.
- Check Supported Hardware for more compatible devices.